Homemade Paneer

Making your own Homemade Paneer is one of the easiest cheeses you can make from scratch! All you need is 2 ingredients and just a little bit of time and you have a beautiful cheese for all of your favorite Indian dishes!
Lemme say it again in case you missed it: 2 Ingredients! It is truly one of the easiest cheeses you can make and is sooo delicious! This is one of the first cheeses we ever made and still, years later, one of my favorite because it’s so easy and the perfect excuse to then make some of our favorite Indian dishes!
Ingredients and Equipment Needed
Should I say it again? TWO ingredients! 😉
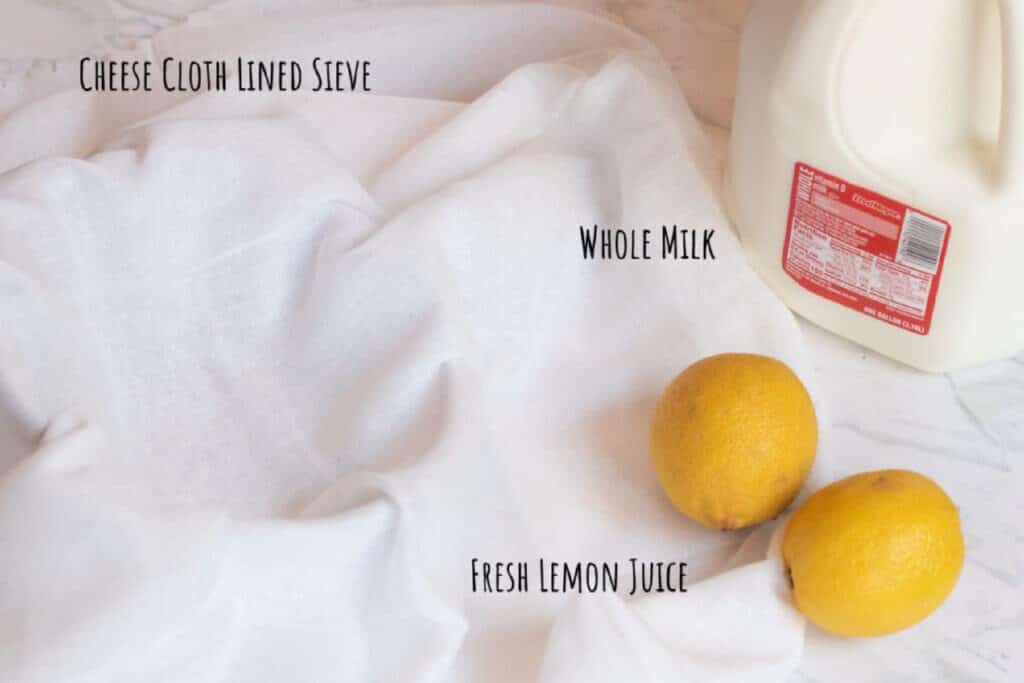
- Whole Milk
- Fresh Lemon Juice – bottled works totally fine too, whatever you have!
Now for equipment, there are some things that you will need that you may not already have in your kitchen, but if you’re planning on making any other cheeses, then a good cheesecloth and sieve/colander is definitely worth every penny.
We love this cheesecloth – it’s big, but that’s why I love it. When you’re pouring cheese into it, you want plenty of room to tie up the ends. Trust me, it is a sad, sad day if your ends fall out and you lose your cheese, there will be tears…
You’ll also need a sieve or colander. This is the sieve that we use.
Step-by-Step Instructions
As easy as the ingredients list are the instructions!
Step 1: Add milk to a pot and heat over medium until it comes to a low boil.
Tip: Be sure to stir frequently to make sure that the pot doesn’t but. Using a non-reactive pot like stainless steel is best if you have it, but if you don’t, no problem. If you’re in the market for some new stainless steel pots, though, we just got some Made In pots and they are amazzinng.
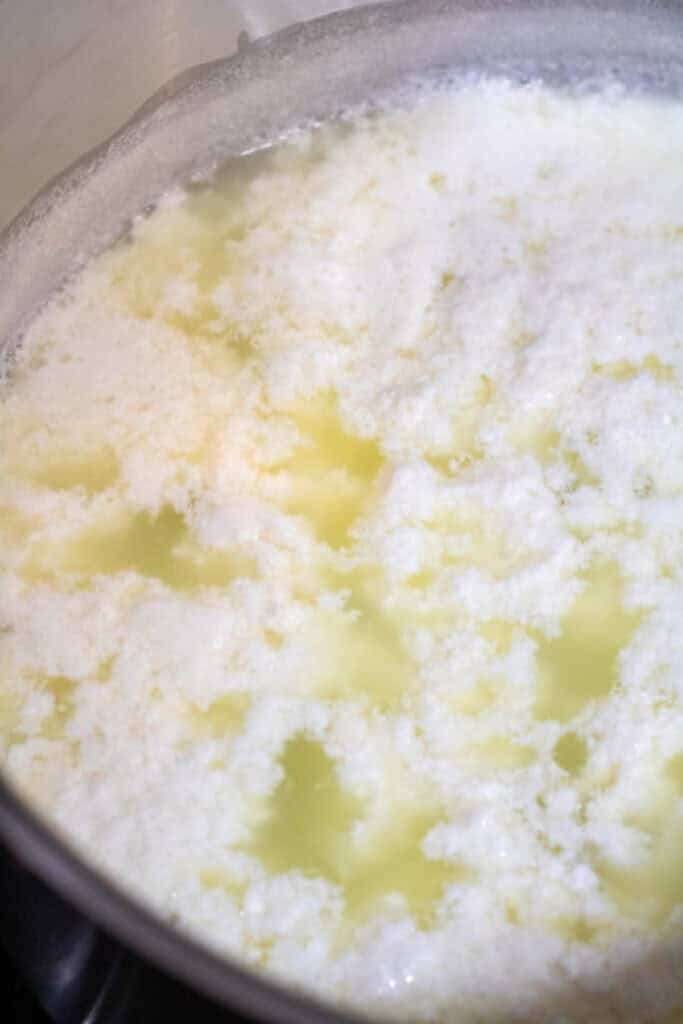
Step 2 : Add the lemon juice and watch the curds begin to form!
Tip: You should start to see the curds form and separate from the whey pretty quickly. If you don’t though, you can always add just a little (a tablespoon or two) more lemon juice to activate the curdling process.
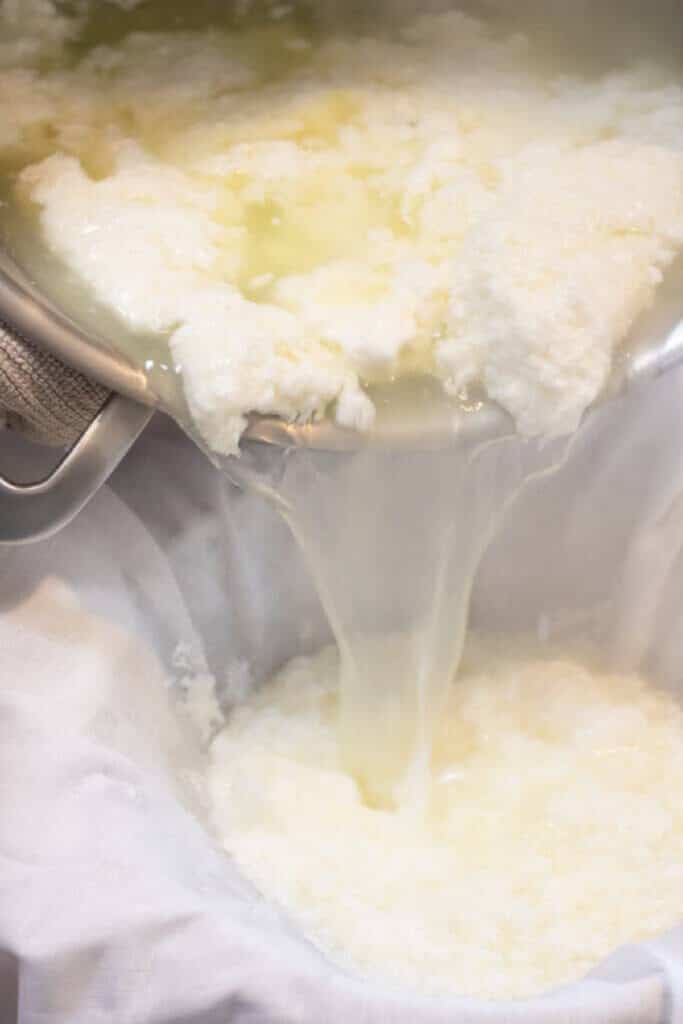
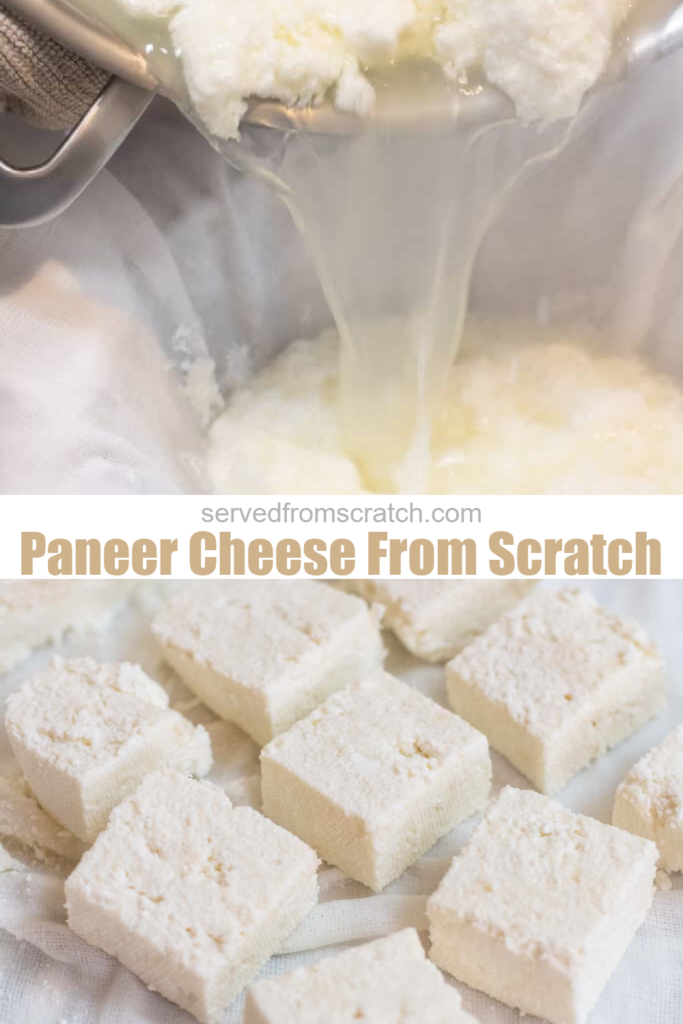
Step 3 : Pour the curds and whey into the cheese cloth-lined sieve.
Tip: Put the sieve over another large pot, but be sure that it will hold all of the whey.
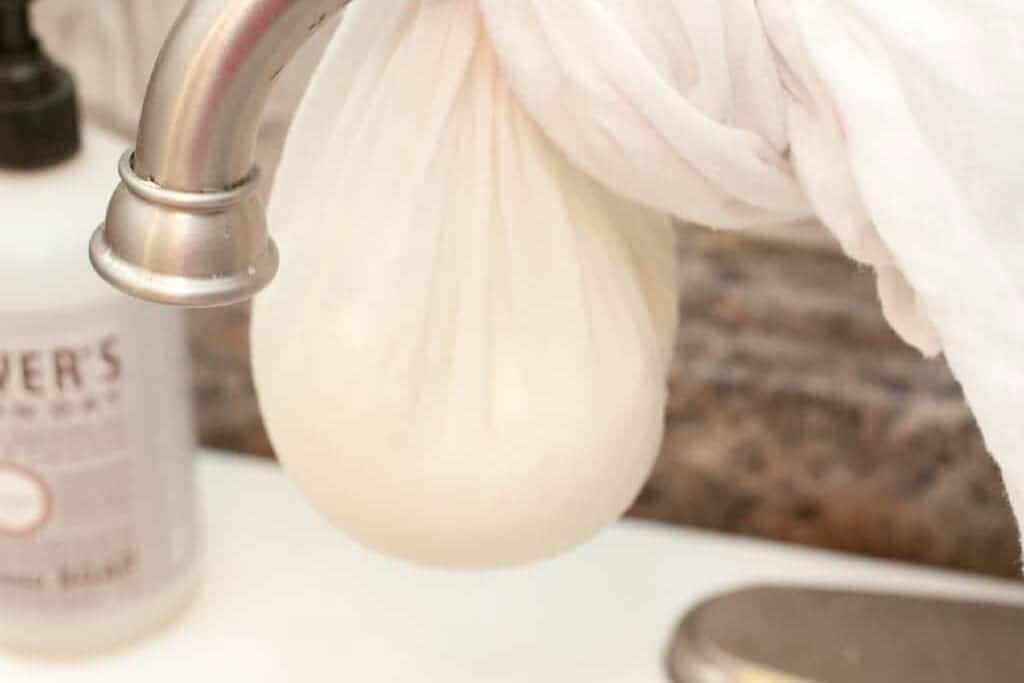
Step 4: Gather the edges of the cheesecloth and give it a gentle squeeze to release some of the whey and then let it drain. This is another reason why I like the larger cheese clothes to be able to not only gather the edges easily but also be able to tie it up on a sink faucet.
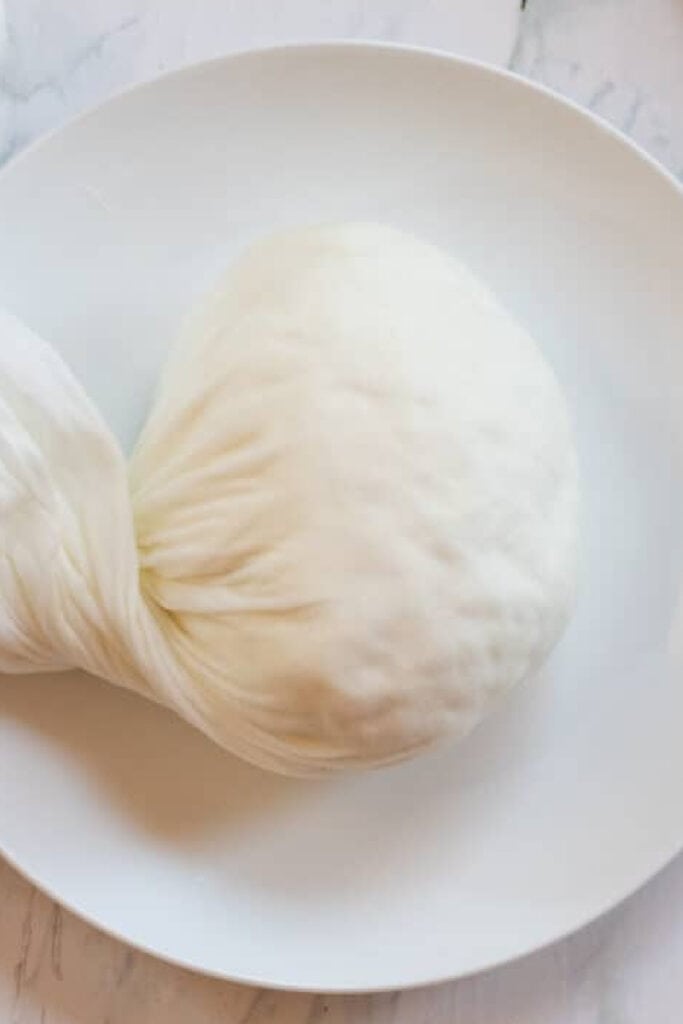
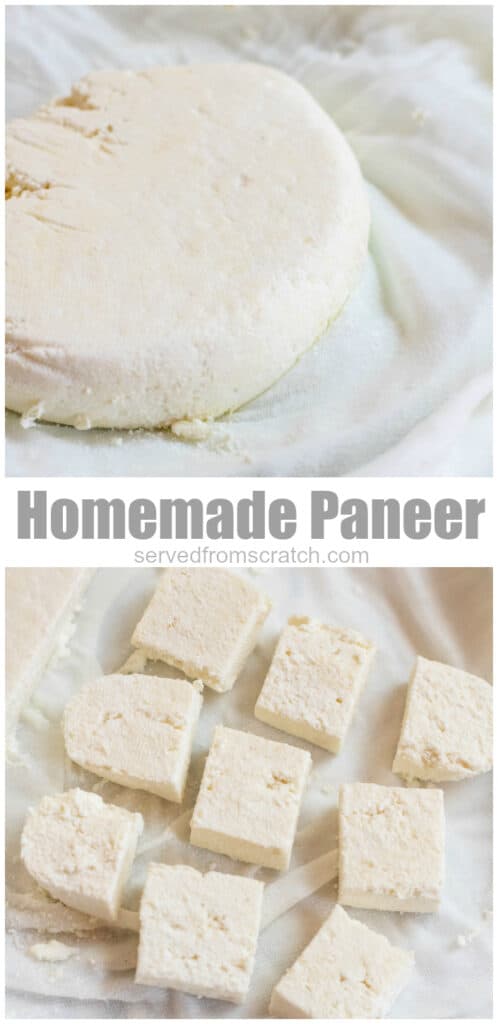
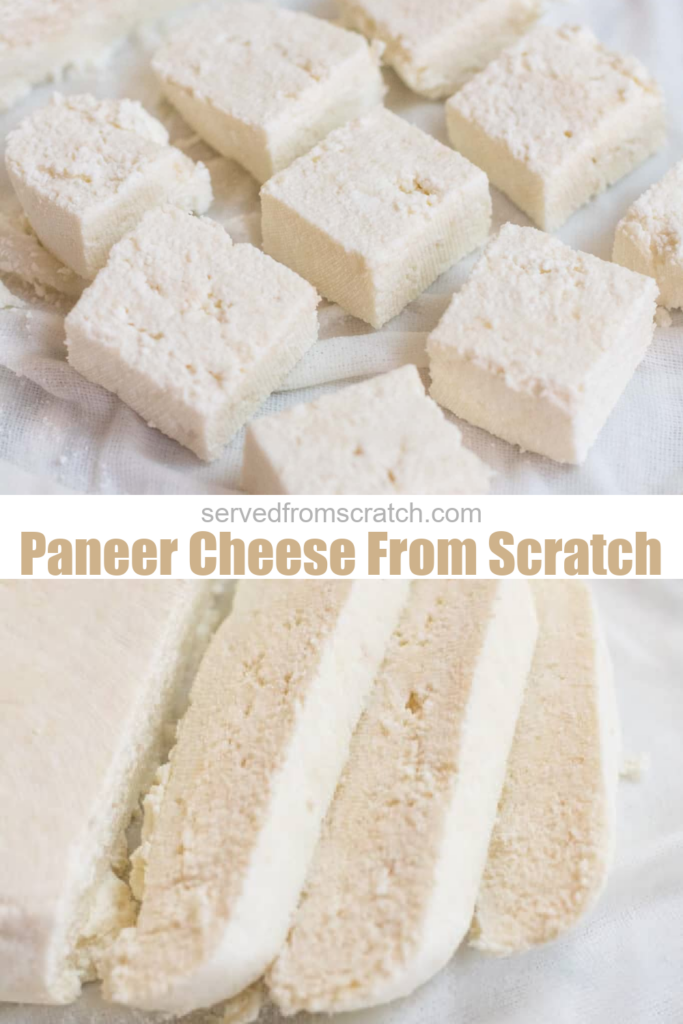
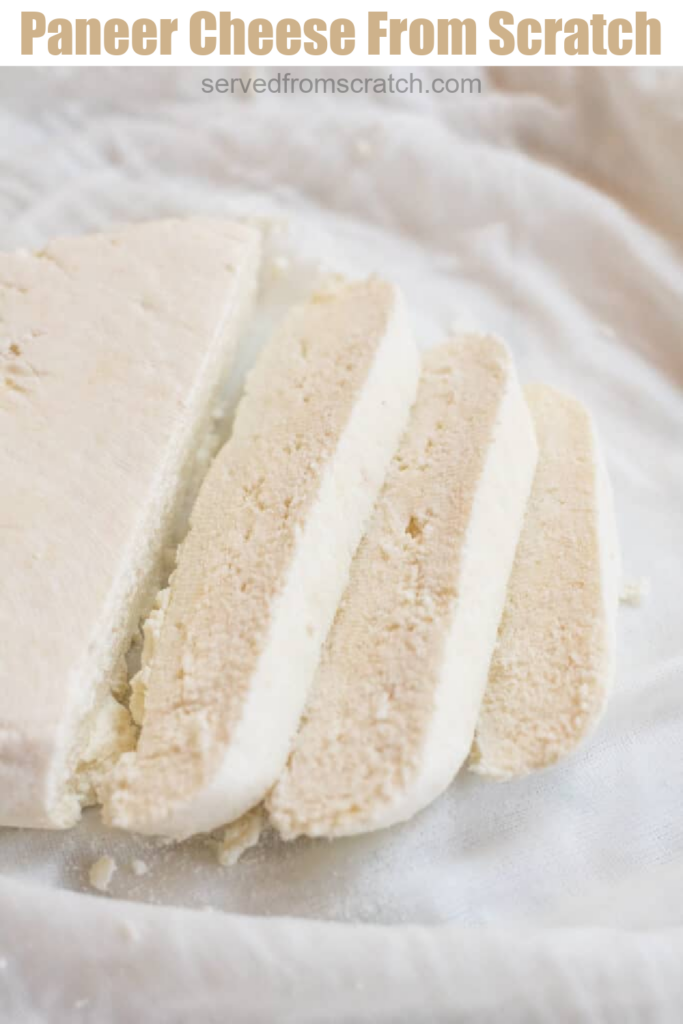
Step 5: Once you’ve let the whey drain for a bit, then it’s just pressing the cheese so that it’s firm.
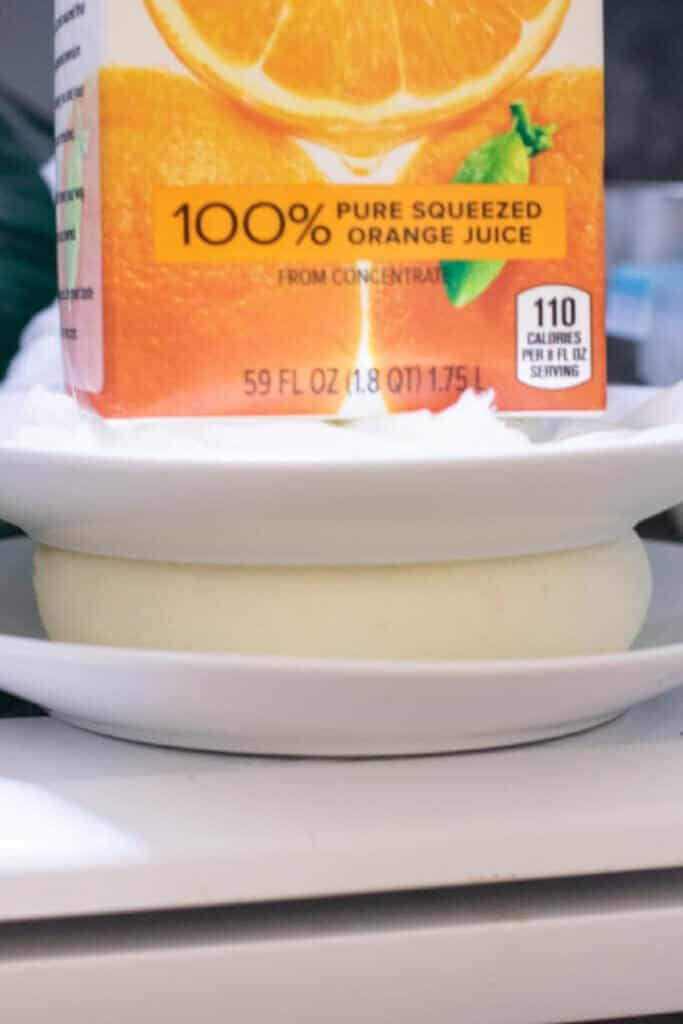
Our solution, two plates and then something heavy (like OJ) on top in the fridge.
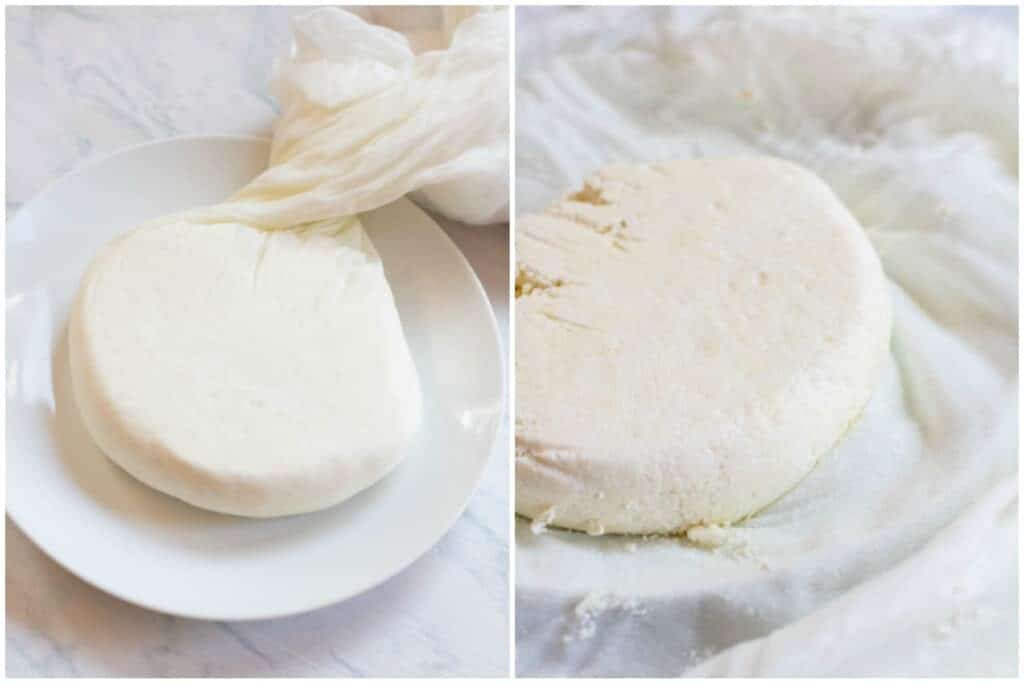
Until it’s nice a flat!
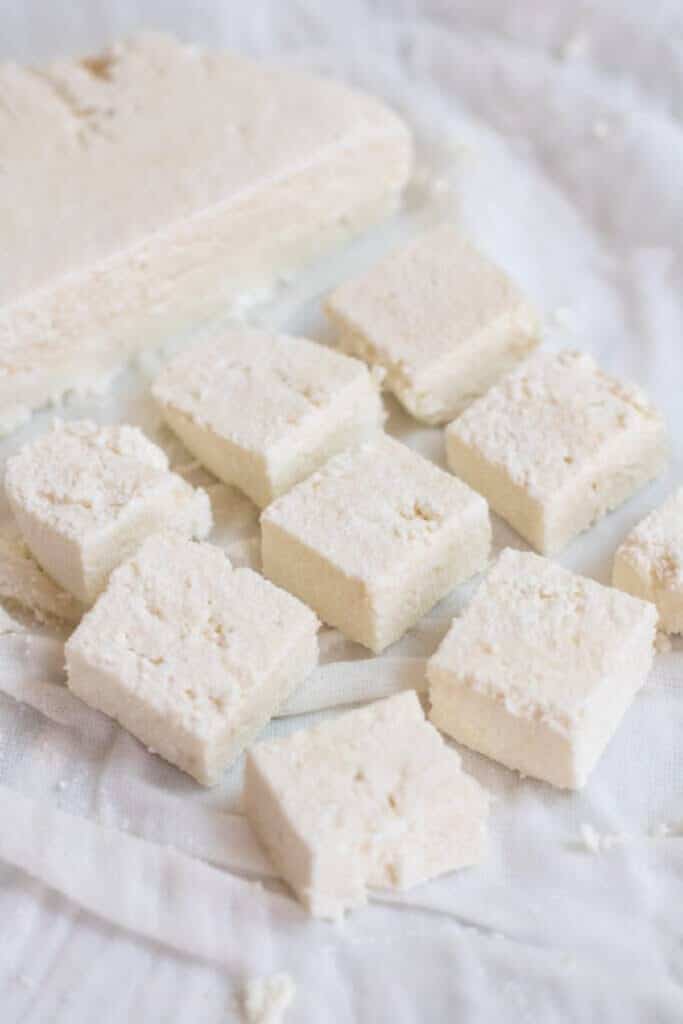
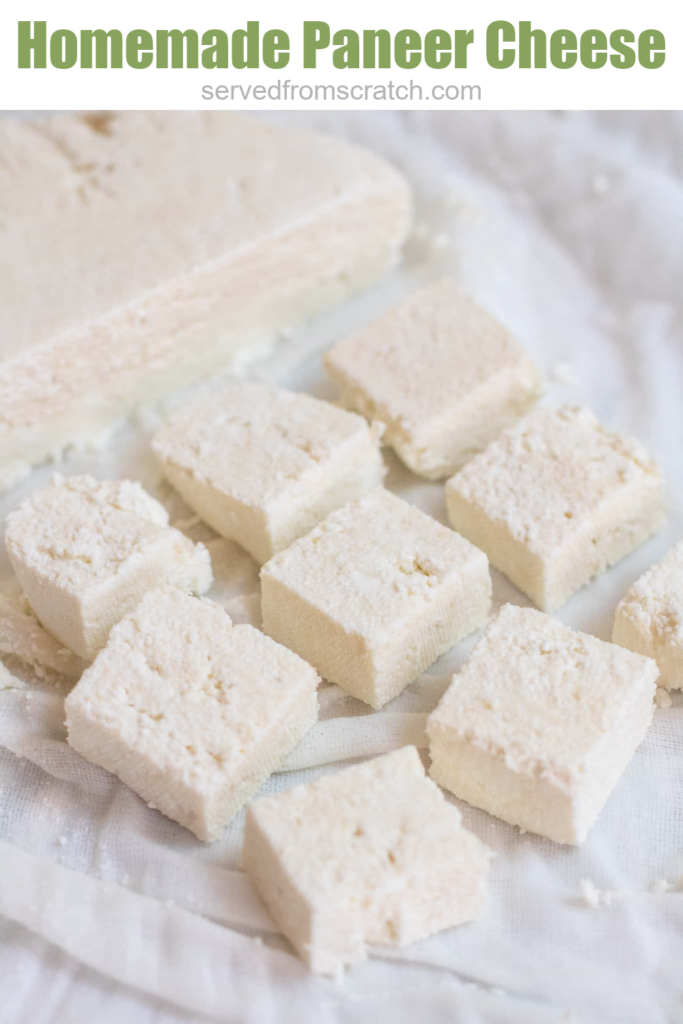
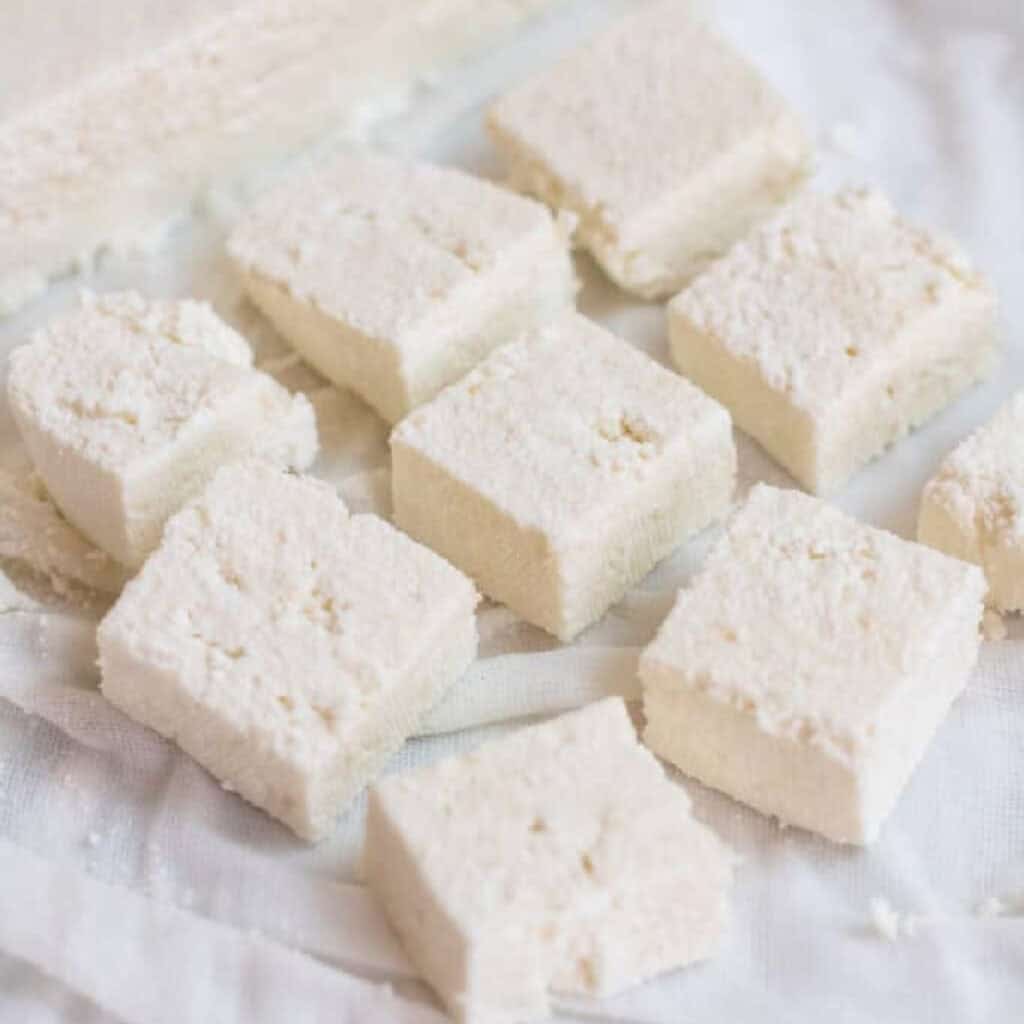
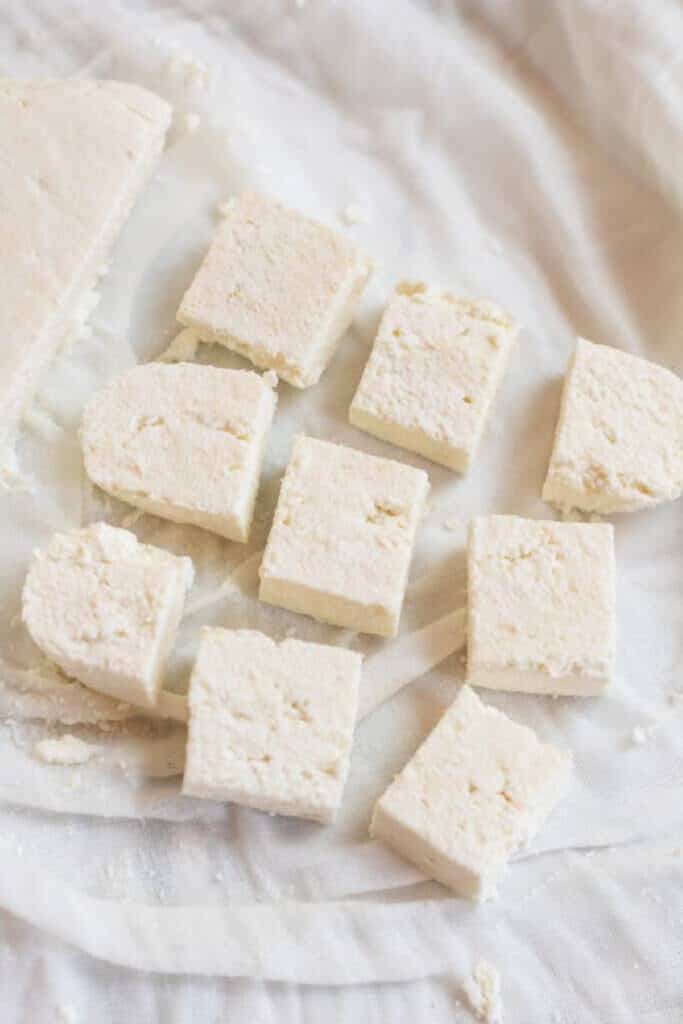
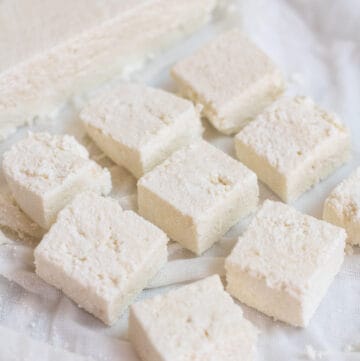
And done! Sliced and then cut into cube and you have some beautiful Homemade Paneer!
Our Other Favorite Homemade Cheeses
FAQs
Whole milk that is not ultra-pasteurized. It doesn’t have to be organic or raw or anything like that. Any whole milk from your grocery store will work great.
You should see the curds and whey form pretty soon after adding the lemon juice, so if you don’t add just a little more (a tablespoon at a time) until you see them form.
You can pour it out, no problem. It just means you had a little left when you did your first drain.
It’s best to use the cheese fresh within 2 – 3 days. But you can also freeze it up to 3 months.
Enjoy! As always, if you make this recipe or any of my others, I love to hear what you think! Leave a comment below, email me, or you can find me on Facebook, Instagram, and Pinterest!
If you want to see more, be sure to sign up for my 5 Easy Ways to Start Cooking From Scratch!
Ingredients
- 8 cups whole milk
- 1/4 cup fresh lemon juice
Instructions
- Line colander with 2 layers of cheese cloth and place in sink or over a large pot.
- Heat milk over medium to high heat on stove and stir frequently to prevent from milk from burning to bottom of the pot. Once it just begins to boil, add in lemon juice and lower heat to low-medium. Stir slowly as curds begin to form. If they do not start to form after about 30-60 seconds, add another tablespoon or two of lemon juice.
- Once curds form and you can see whey separate, pour curds and whey into cheese cloth lined colander.
- Gather sides of cheese cloth to form a ball and gently squeeze our whey (be careful, it may still be hot!). Then hang the cloth with the cheese for at least 90 minutes to let whey drain out.
- After about 5 minutes, twist cheese cloth around cheese and put to the side. Add cheese cloth to a plate and plate another plate on top. Add a weight (like OJ) and then put in fridge to press.
- After 20-30 minutes, remove weight and cheese from cheese cloth and slice cheese and cube.
- Store in fridge for up to 2-3 days or freeze up to 3 months.
Ooh, I will definitely be making this!! I love Paneer!!
xx Bry | https://cookingwithbry.com
Great step by step for fresh cheese. We enjoy cheese making and will have to try this.
This is the first I’ve heard of paneer. Looks like I’m missing out and need to give it a try!
Oh yes, you should! And what’s better than adding another delicious cheese in your wheelhouse? 😀
It’s been maybe 20 years since I’ve made paneer. I think I started using tofu – this was back when I was not only cooking for my family but another family full time. With an empty next, I need to make some again. I make curry quite often, and absolutely love saag paneer!