Homemade Sweet Potato Rolls
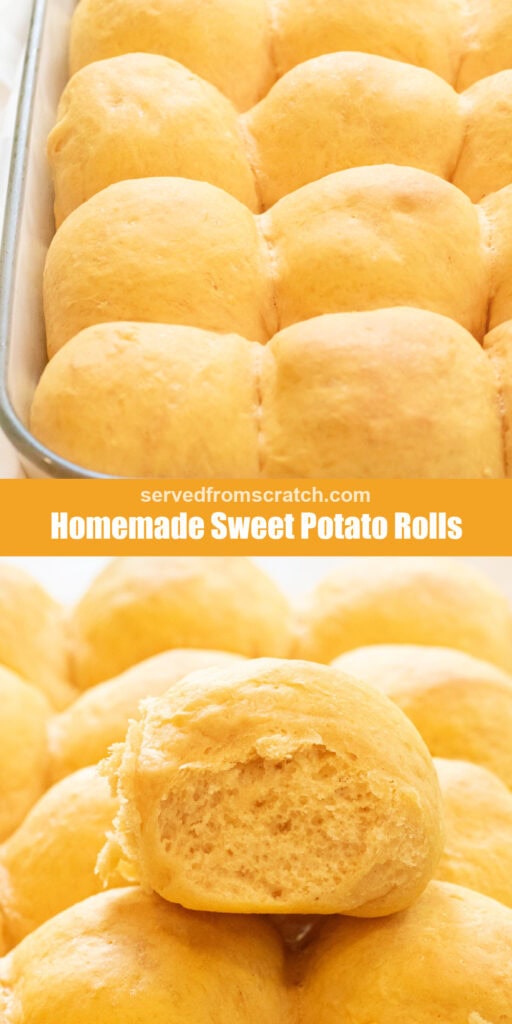
Super soft, fluffy, and perfect for a holiday meal or any time. Our Homemade Sweet Potato Rolls are sure to be your new favorite dinner roll, made even better with some added nutrition!
Be sure to also try our Homemade Hawaiian Rolls!

Bring on all of the fall baking and holiday table recipes! We absolutely love homemade bread around here especially when they’re this easy to make and this incredibly delicious to eat! Our Homemade Sweet Potato Rolls have quickly become a household favorite. Not only are they so soft and fluffy, but there’s also some added sneaky nutrition! They are everything you love about the classic fluffy sopping-up side, but with a load of extra vitamins and antioxidants for a roll that’s delicious and nutritious!
Ingredients Needed
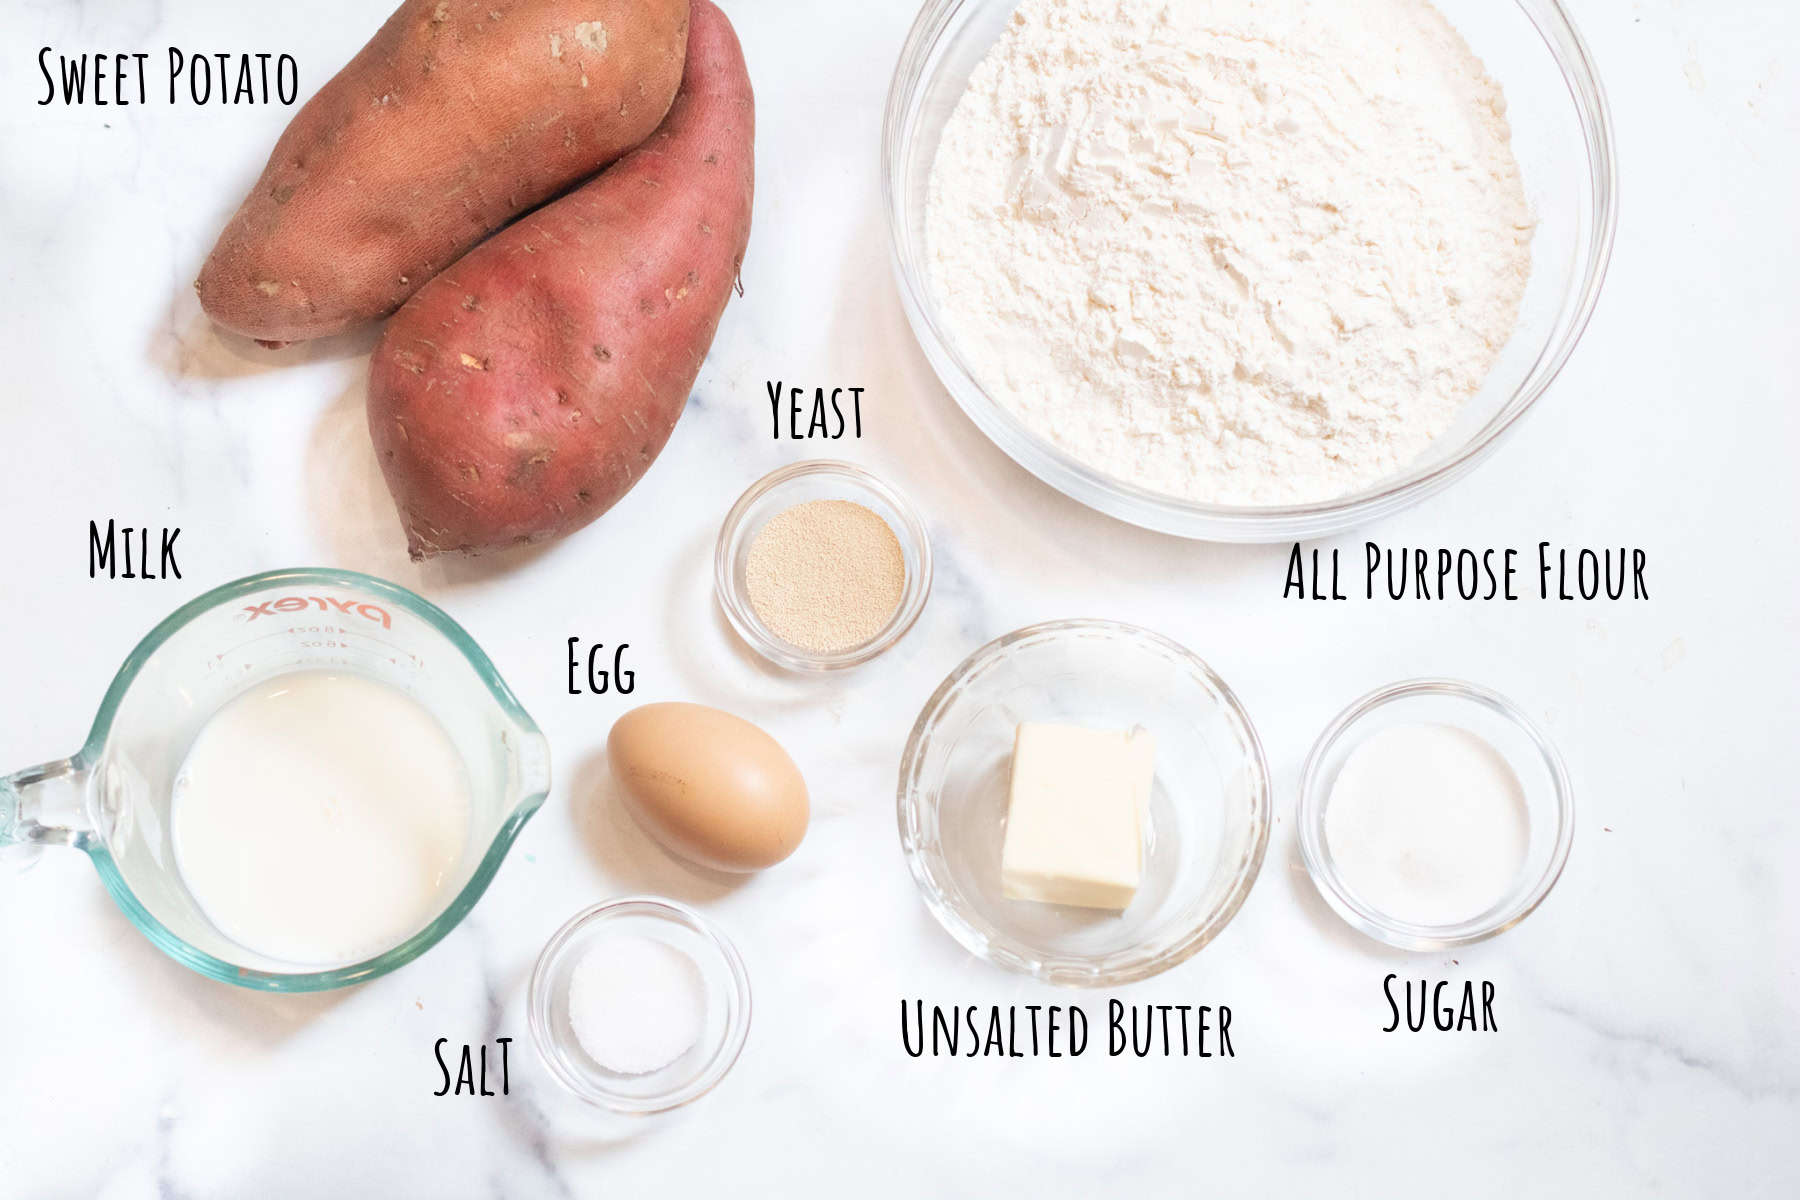
- Sweet Potatoes – Be sure to get sweet potatoes and not yams, since they are not the same! Sweet potatoes are much softer when cooked, and this is the texture that you want for these potato rolls.
- Flour – All purpose or bread flour works great!
- Yeast – Active or Instant works great for this recipe. See recipe notes for instructions to use each.
- Unsalted Butter – If you only have salted butter, that’s ok too! You can just reduce the salt a bit – see recipe notes.
- Egg –
- Sugar and Milk – Just a touch of each to help activate the yeast, but not too much to make these rolls taste sweet.
Helpful Tools
(Amazon affiliate links)- You can find all of my kitchen essentials here!
Stand Mixer – You can make this dough without a stand mixer and just by using a large spoon or spatula to mix by hand, but a stand mixer will make it much easier and faster!
Kitchen Scale – This is probably the most important tool for your kitchen when baking. They’re fairly inexpensive and will be worth every penny because weighing your ingredients is truly the best way to ensure the most accurate and consistent results when baking.
Sieve – Or colander of choice to strain the cooked sweet potatoes.
Potato Masher– Not required, but helpful to get a good mash! You can also run the potatoes through a ricer!
9×13 Baking Dish – We love this baking dish and it’s the perfect size to fit these rolls!
Small Pot– To boil the sweet potato in.
Mixing Bowls – We love these glass mixing bowls and use them for everything!
Nutritional Benefits of Sweet Potatoes
This root vegetable adds color, texture, and nutrition to these dinner rolls! The potatoes help to retain moisture in the dough which adds to the great soft texture of the dough. Also, sweet potatoes are jam-packed with Vitamin A, and C, calcium, iron, magnesium, potassium, the list goes on and on! In addition, carotenoids give the sweet potatoes their color, which also adds antioxidants. So now when we’re choosing which rolls to make to go with a Sunday or holiday meal, these Homemade Sweet Potato Rolls are the winner because they have all the soft fluffiness you want in a roll, but with unmatched added nutrition you just won’t find in those store-bought white rolls.
Easy to Make
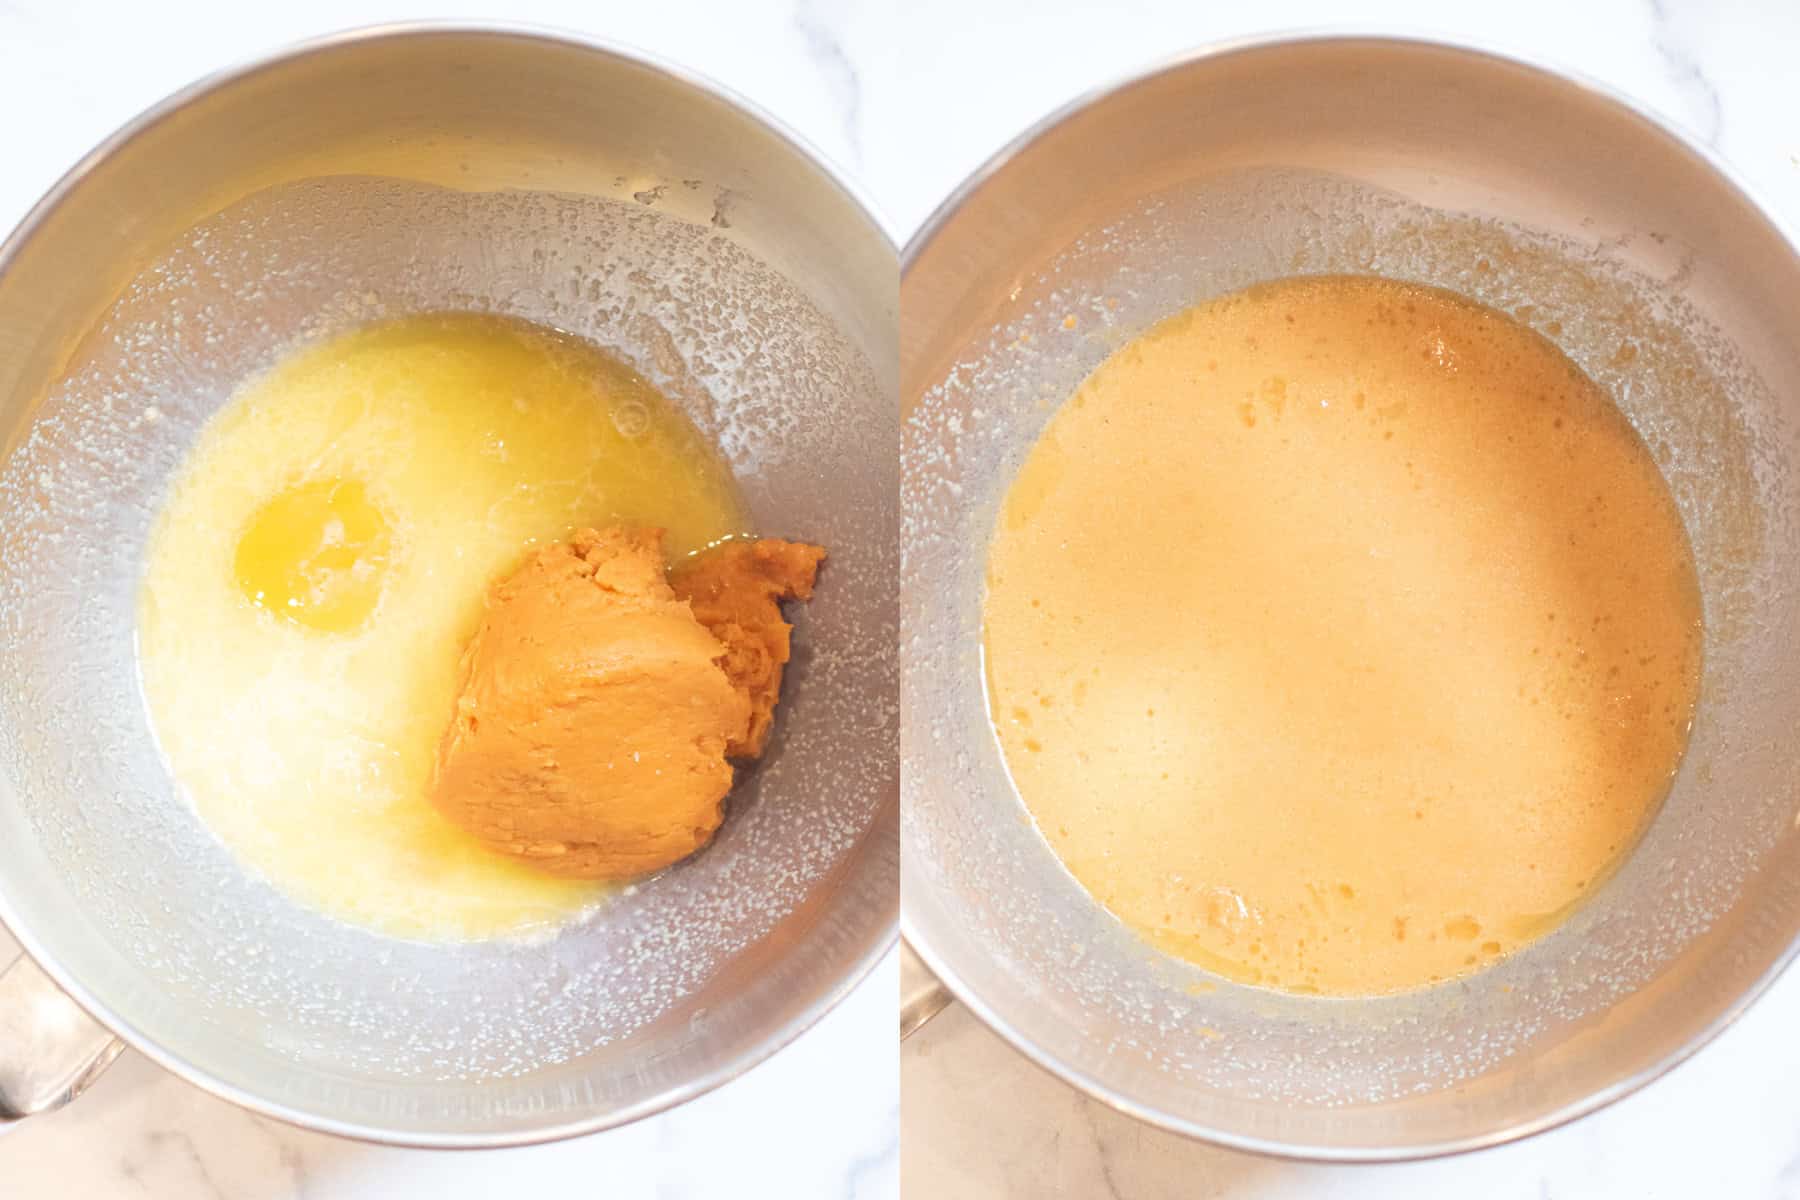
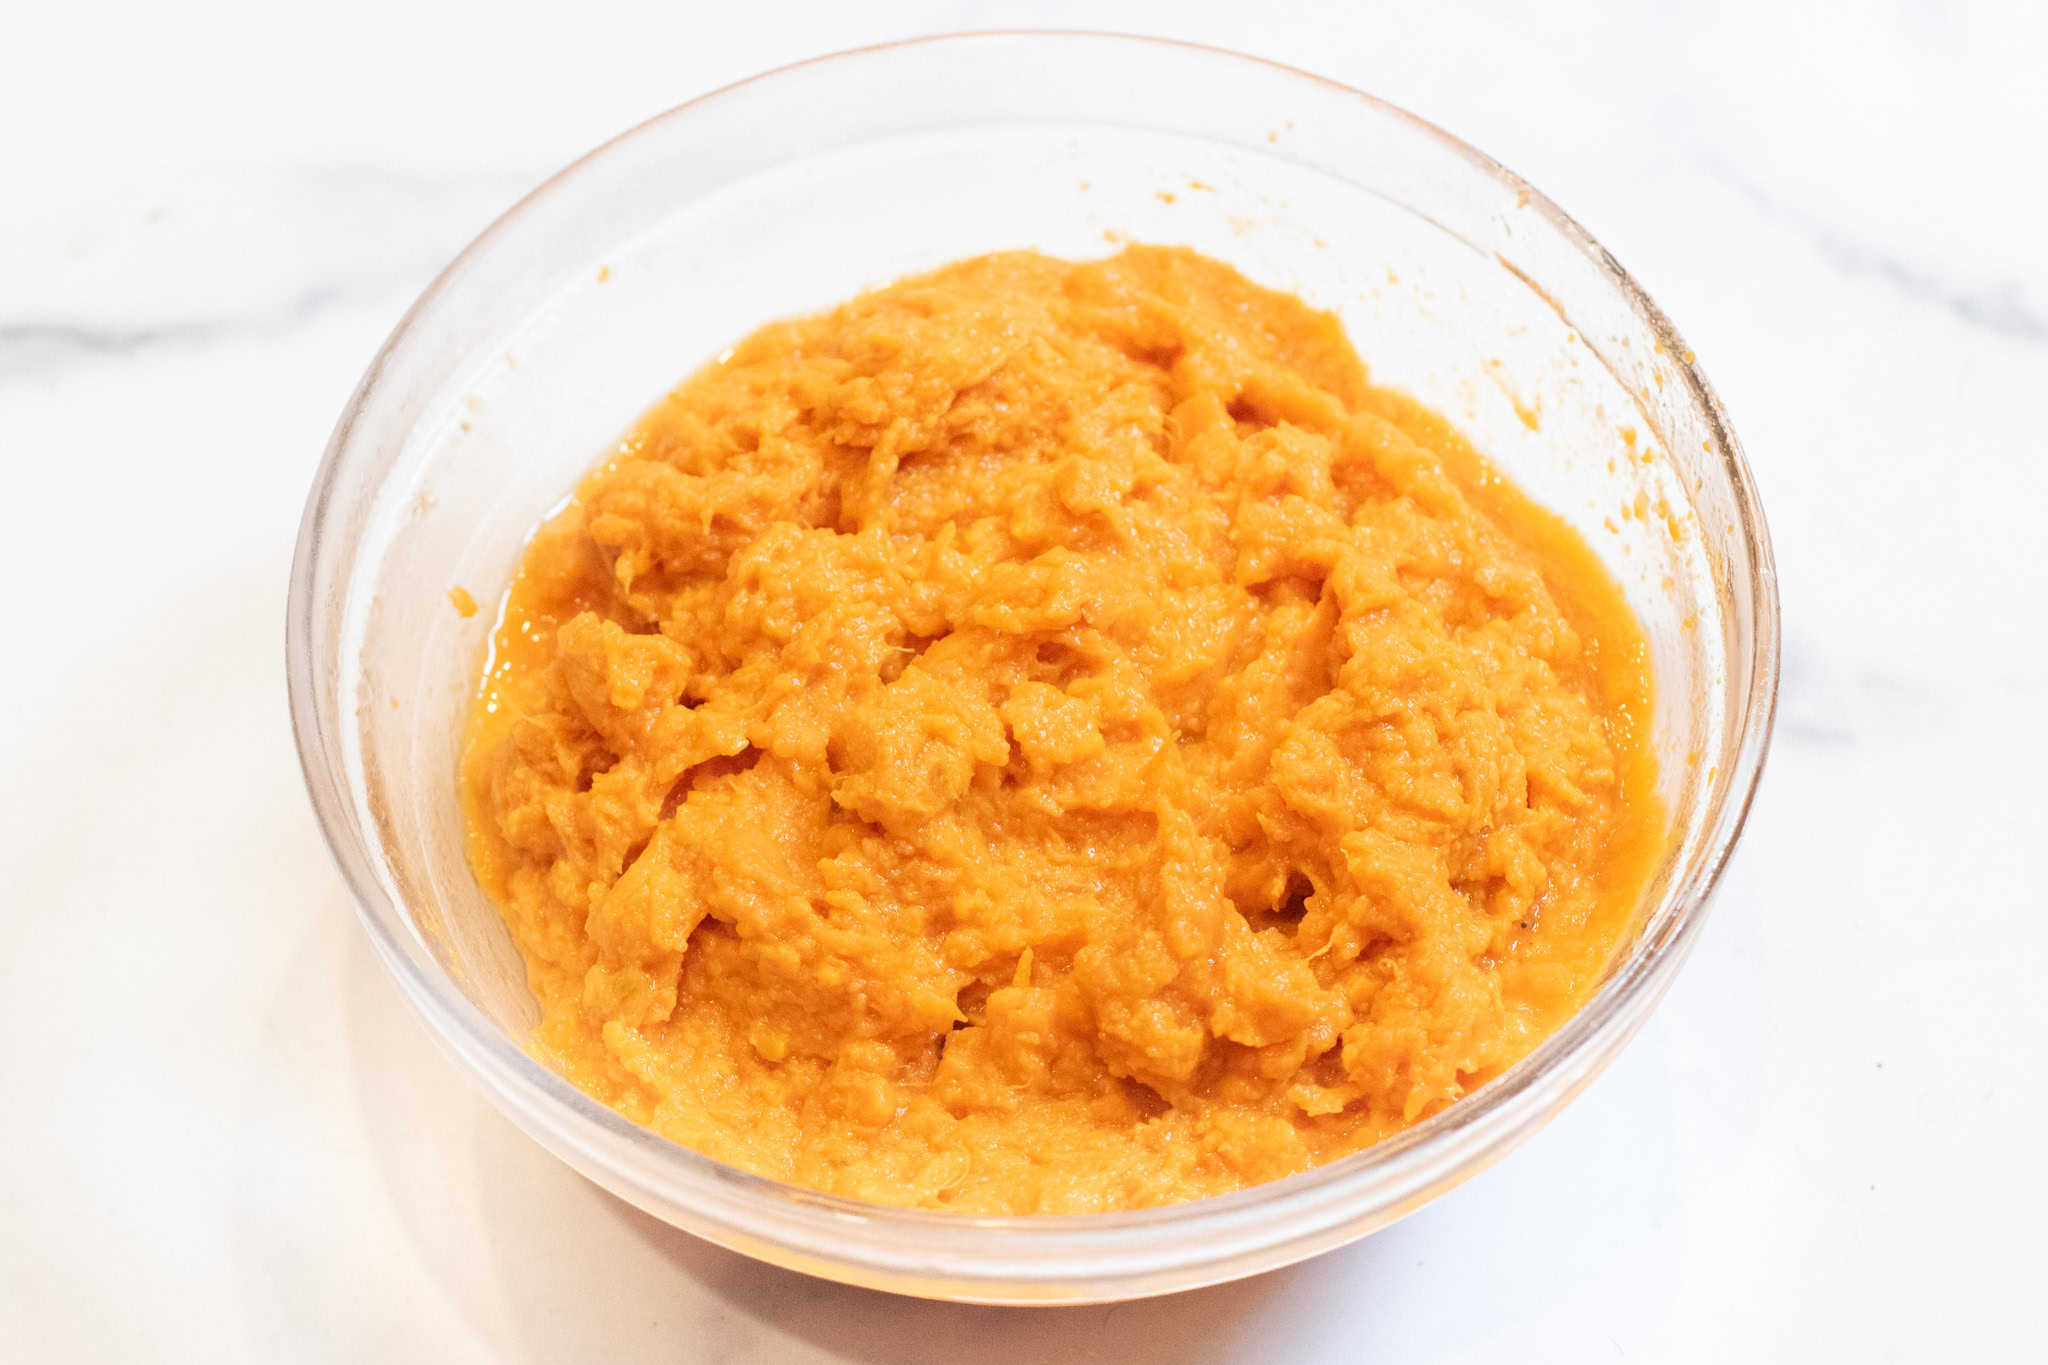
Once the sweet potato is ready, then it’s just a matter of activating the yeast before adding the butter, egg, and potato and mixing.

Slowly add the flour with the salt to your trusty stand mixer to create your dough. It should come out of the mixing bowl fairly easily as it’s not a super sticky dough. It will be soft and pliable and easily formed into a ball.
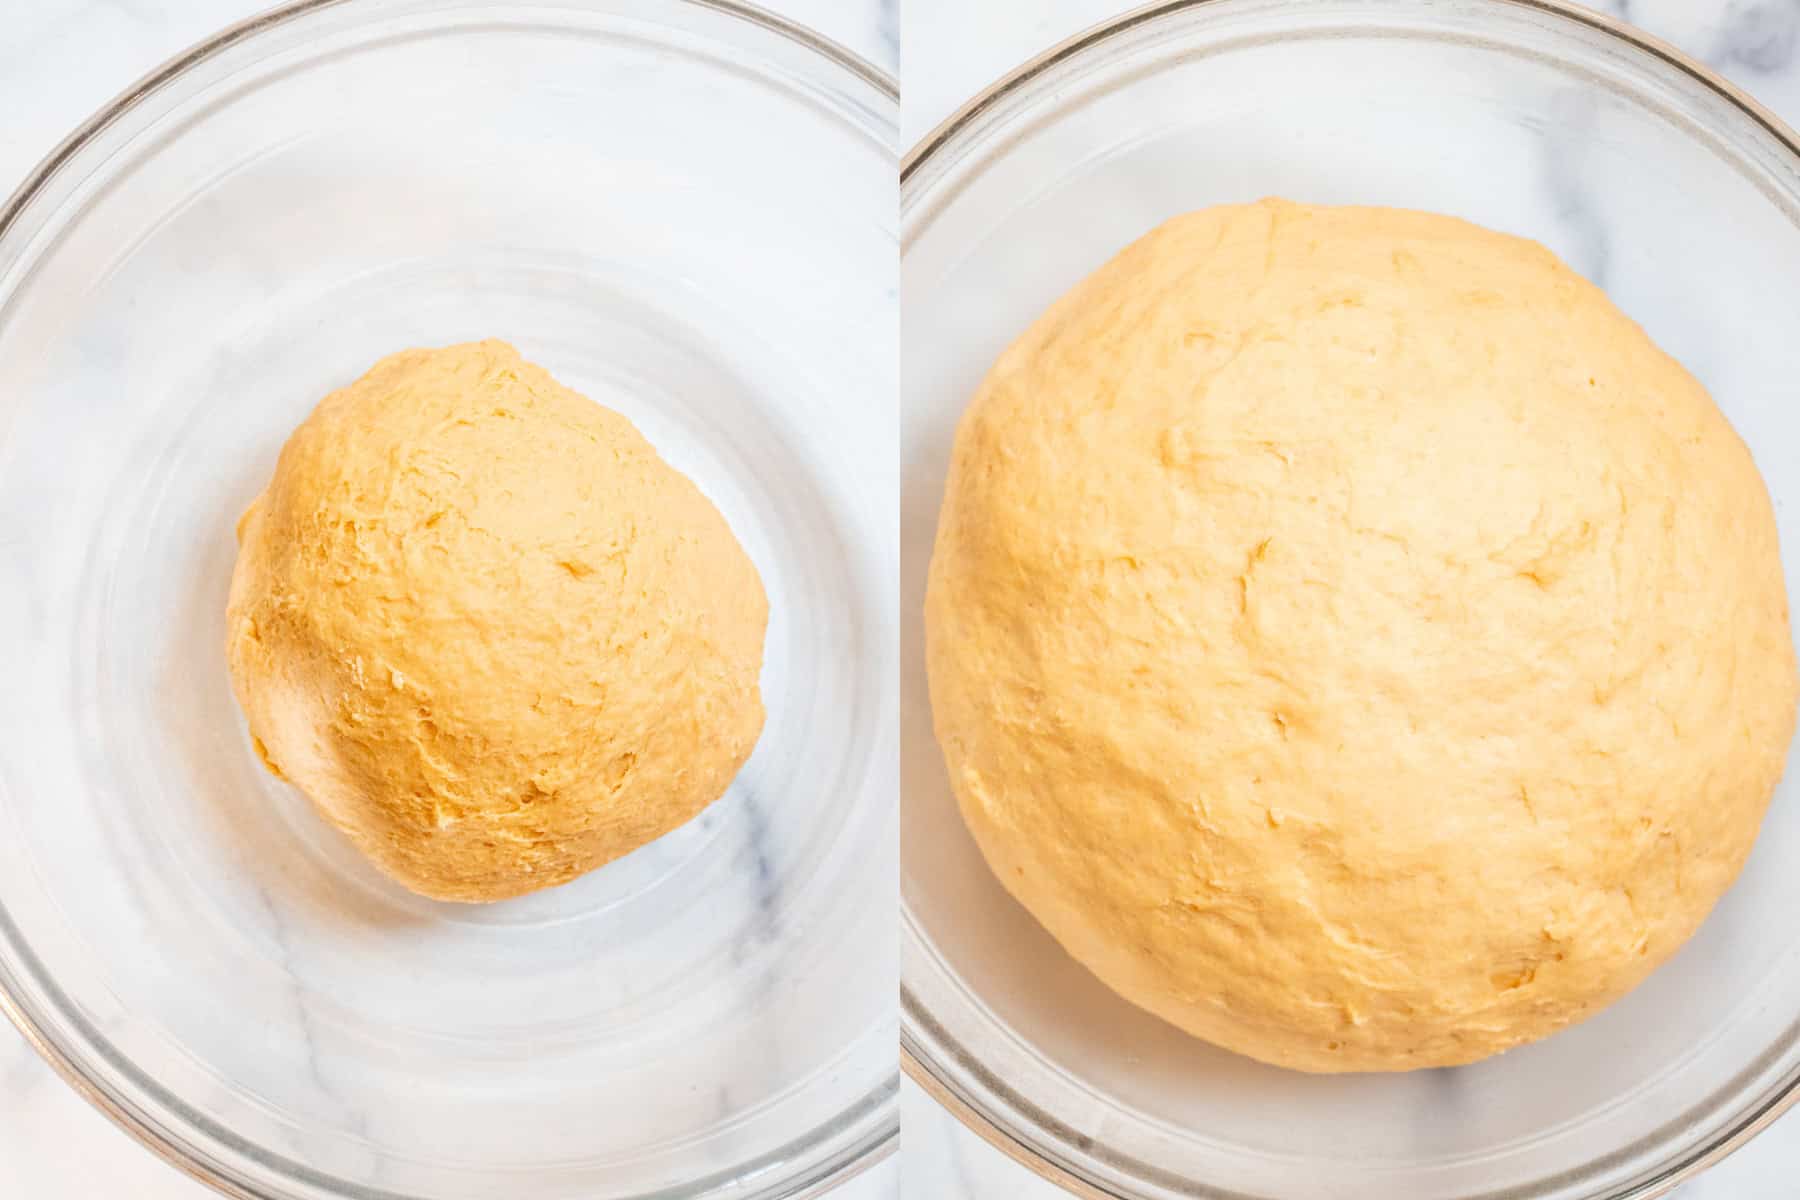
Then let it rise for 1 hour until it has doubled in size.
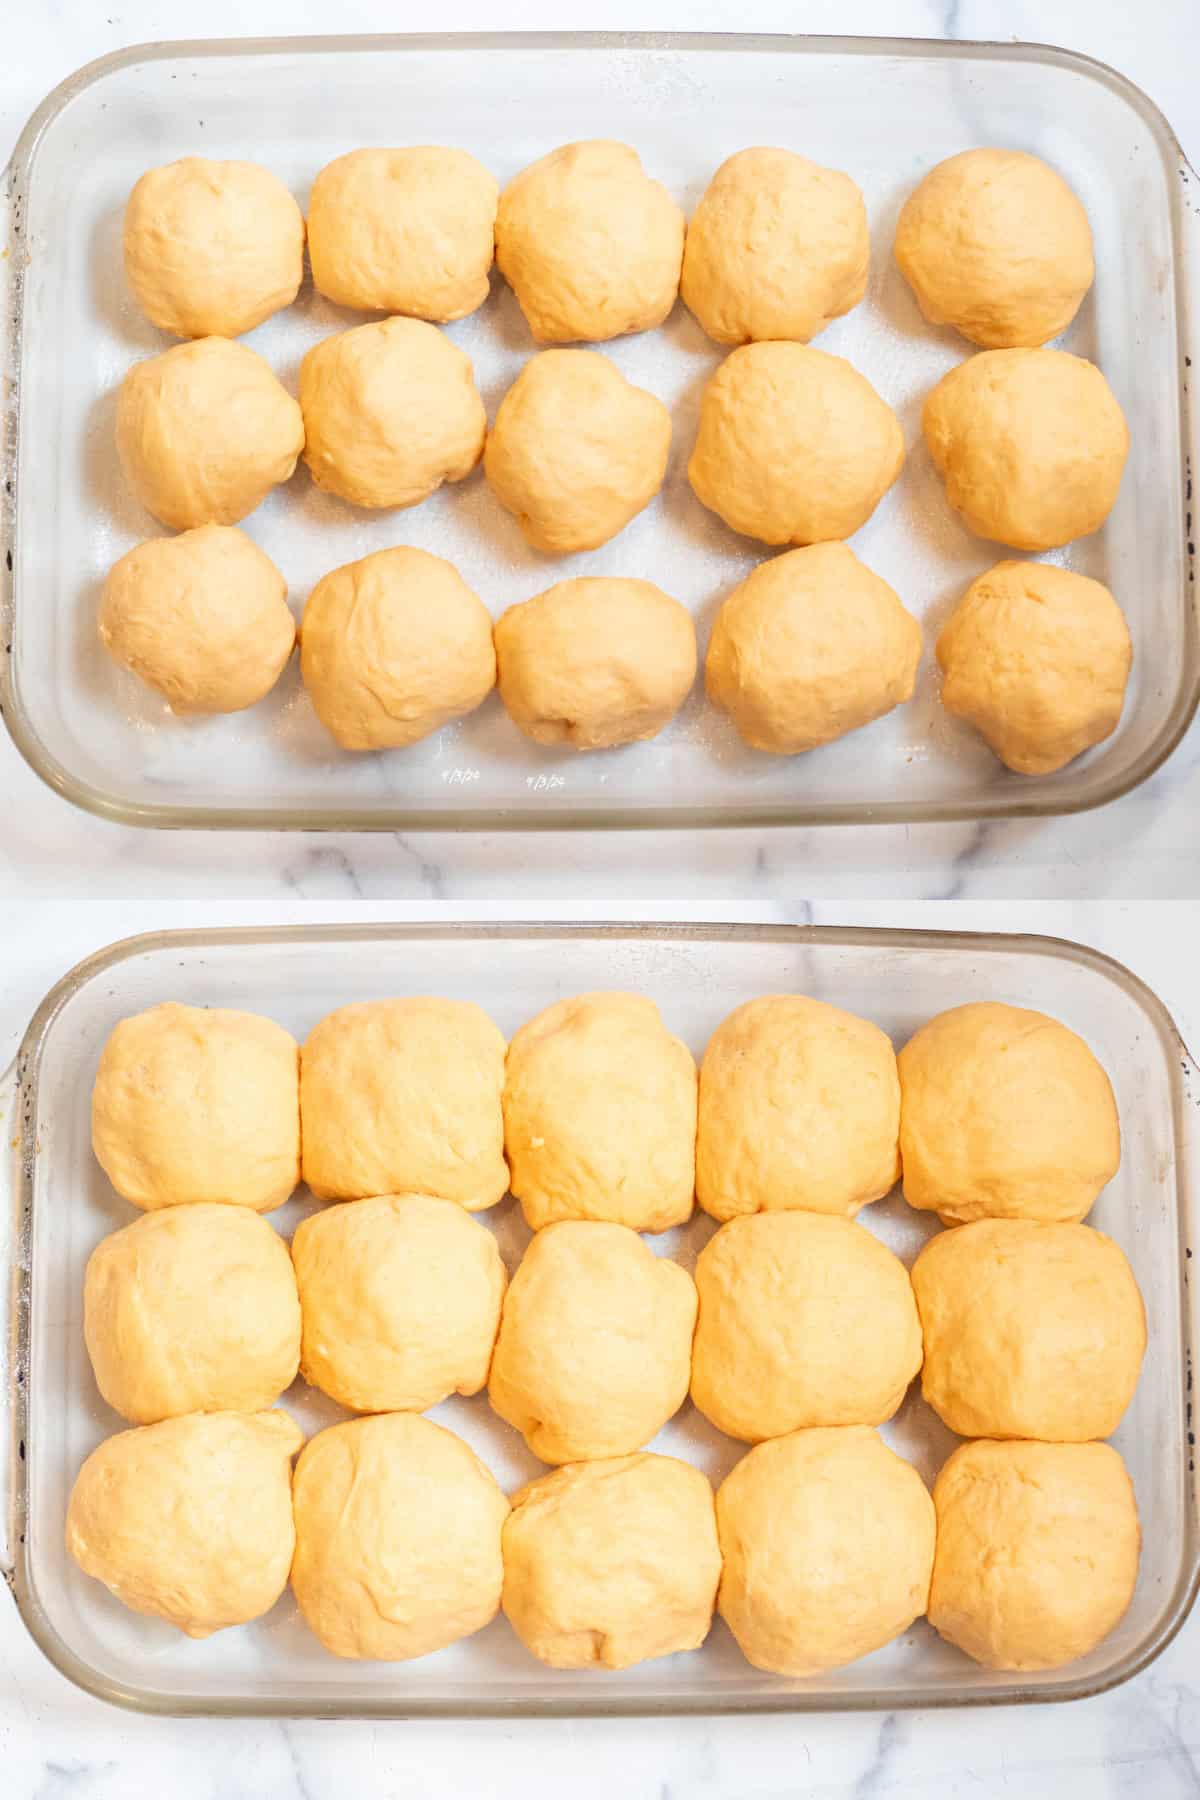
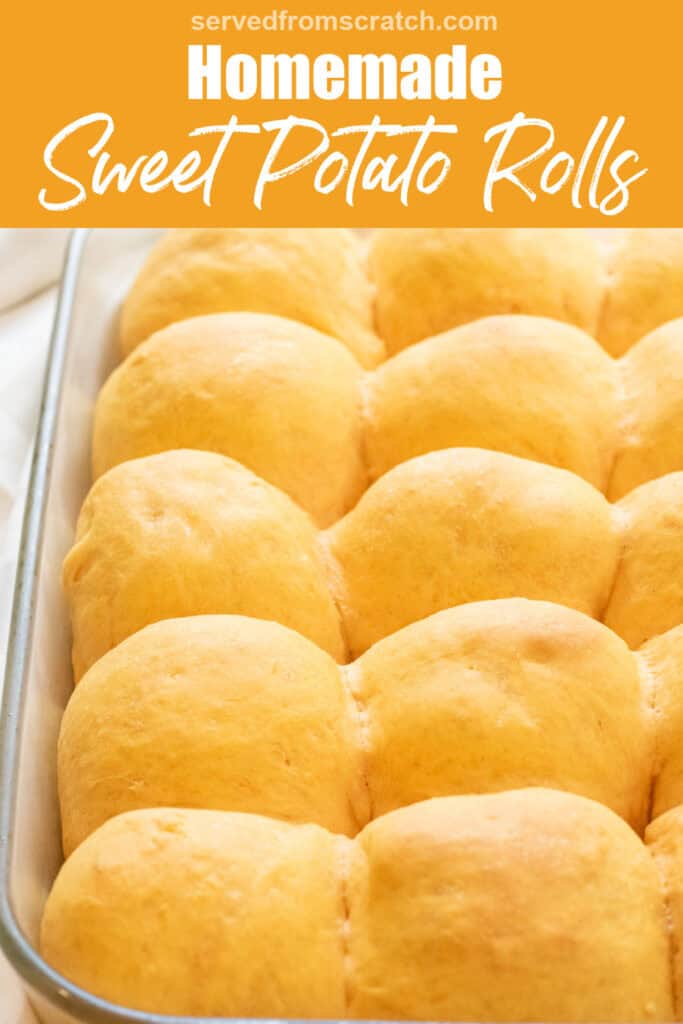
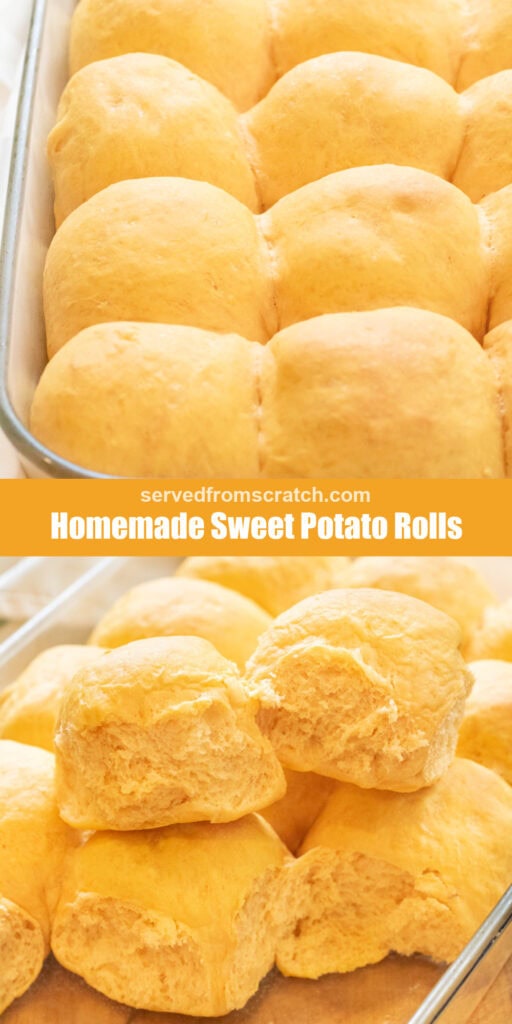
Once proofed, separate the dough into 15 equally sized balls, line them in a baking dish, and let them proof again.
Pro Tip: To get the most evenly sized rolls, the best method is to use a kitchen scale and measure out dough balls that are about 2.5-2.75 oz each, but you can also use a dough cutter or a butter knife to separate the dough, too.
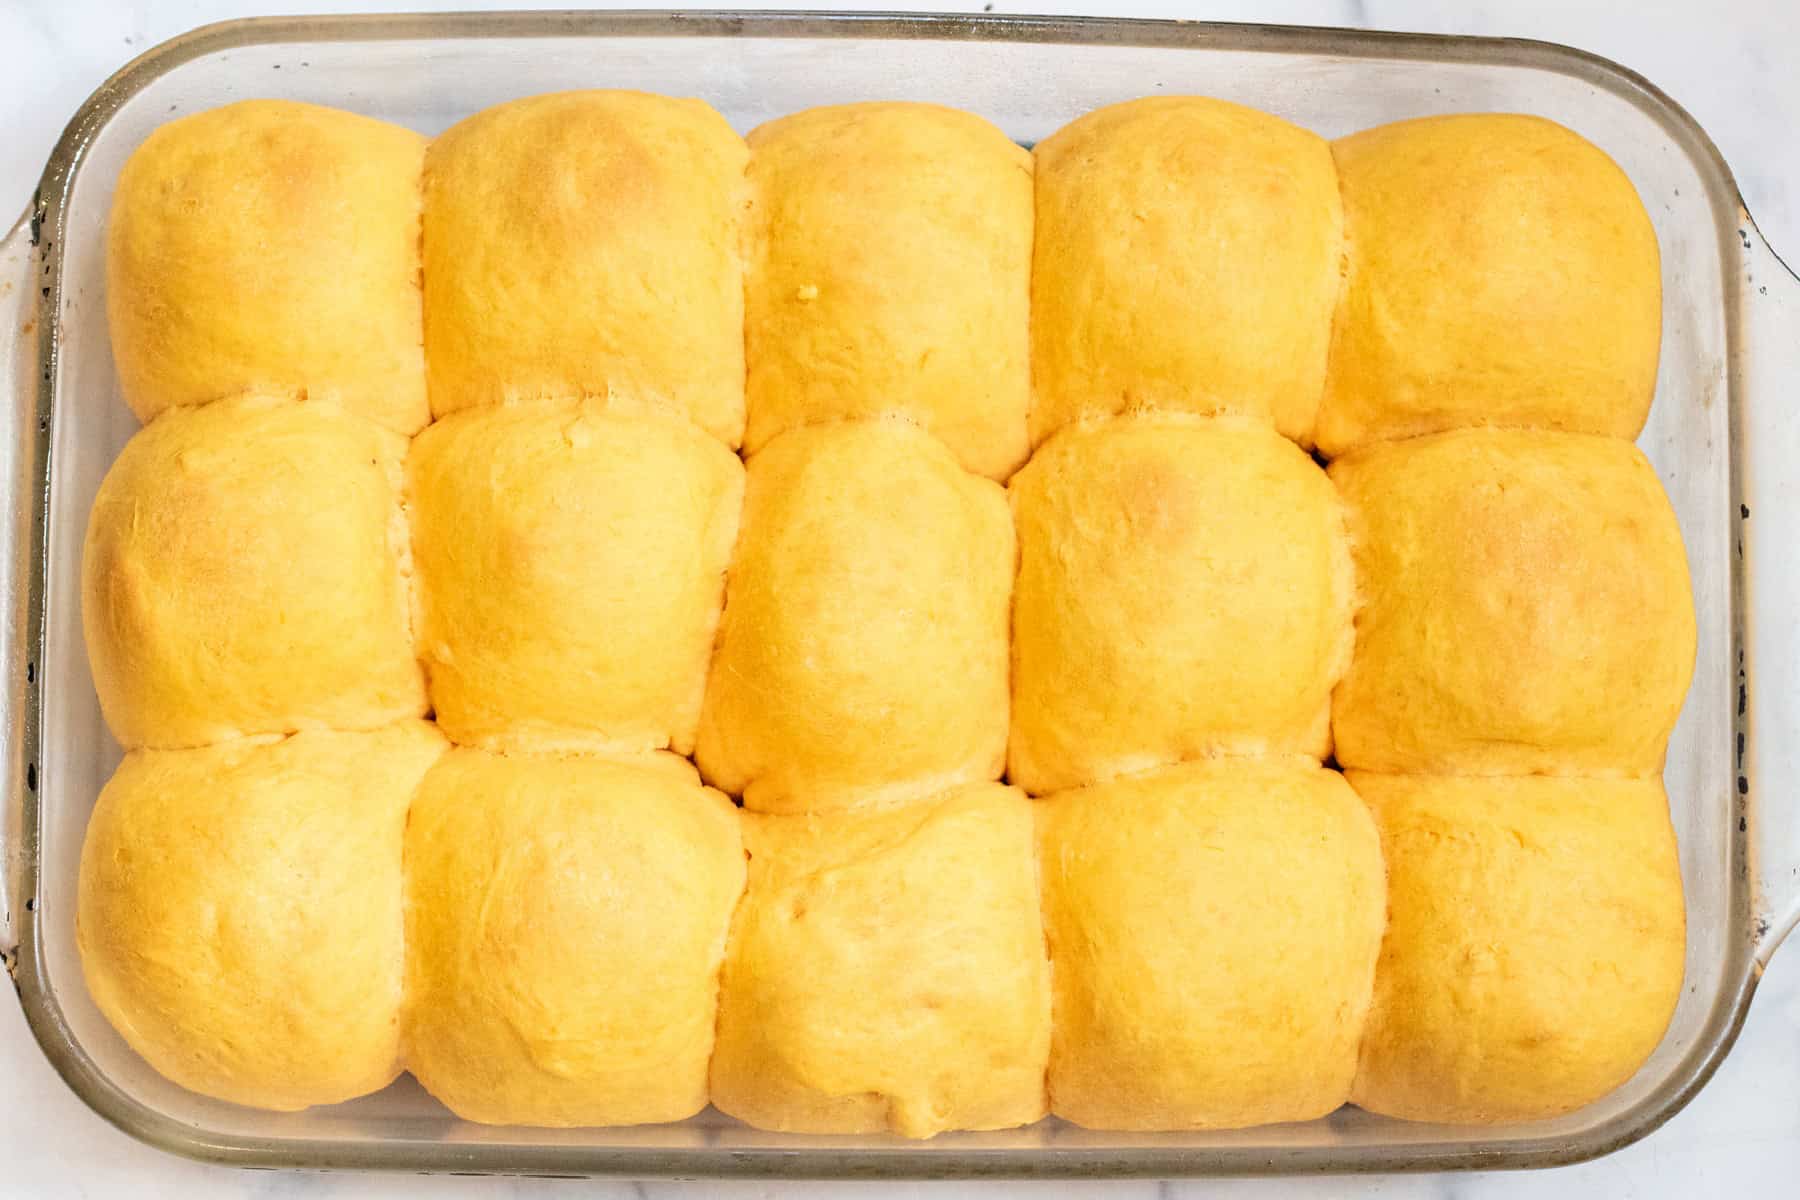
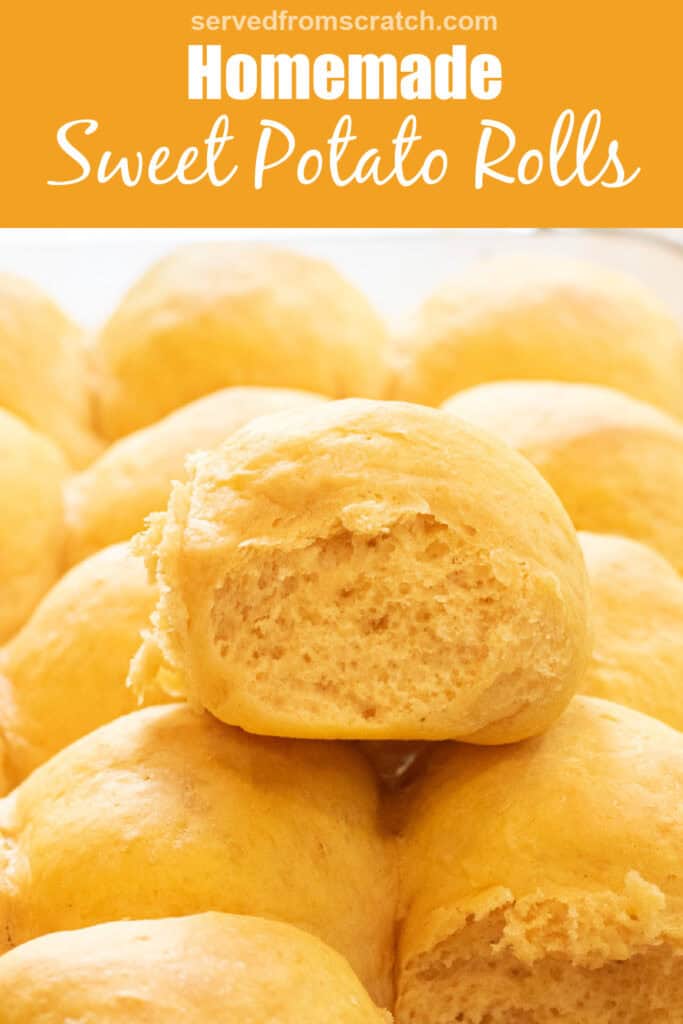
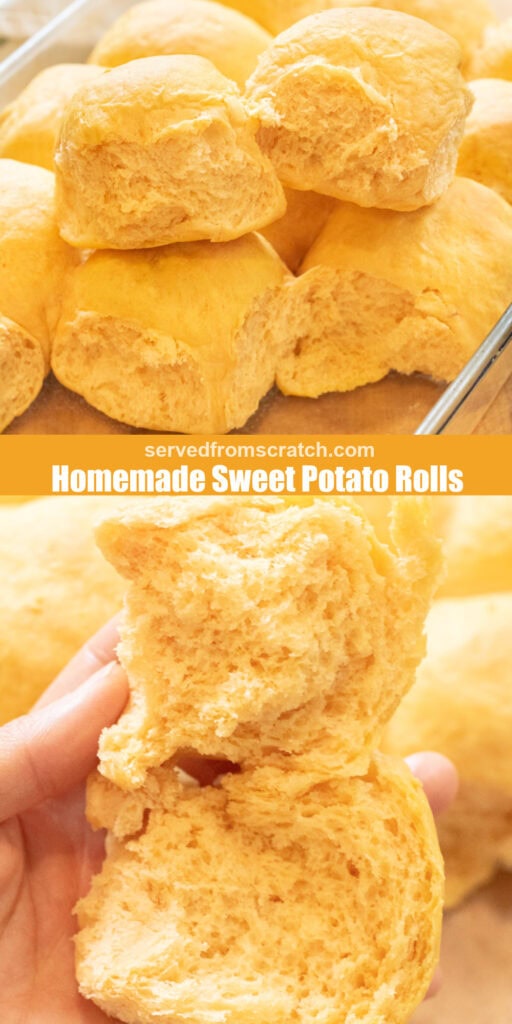
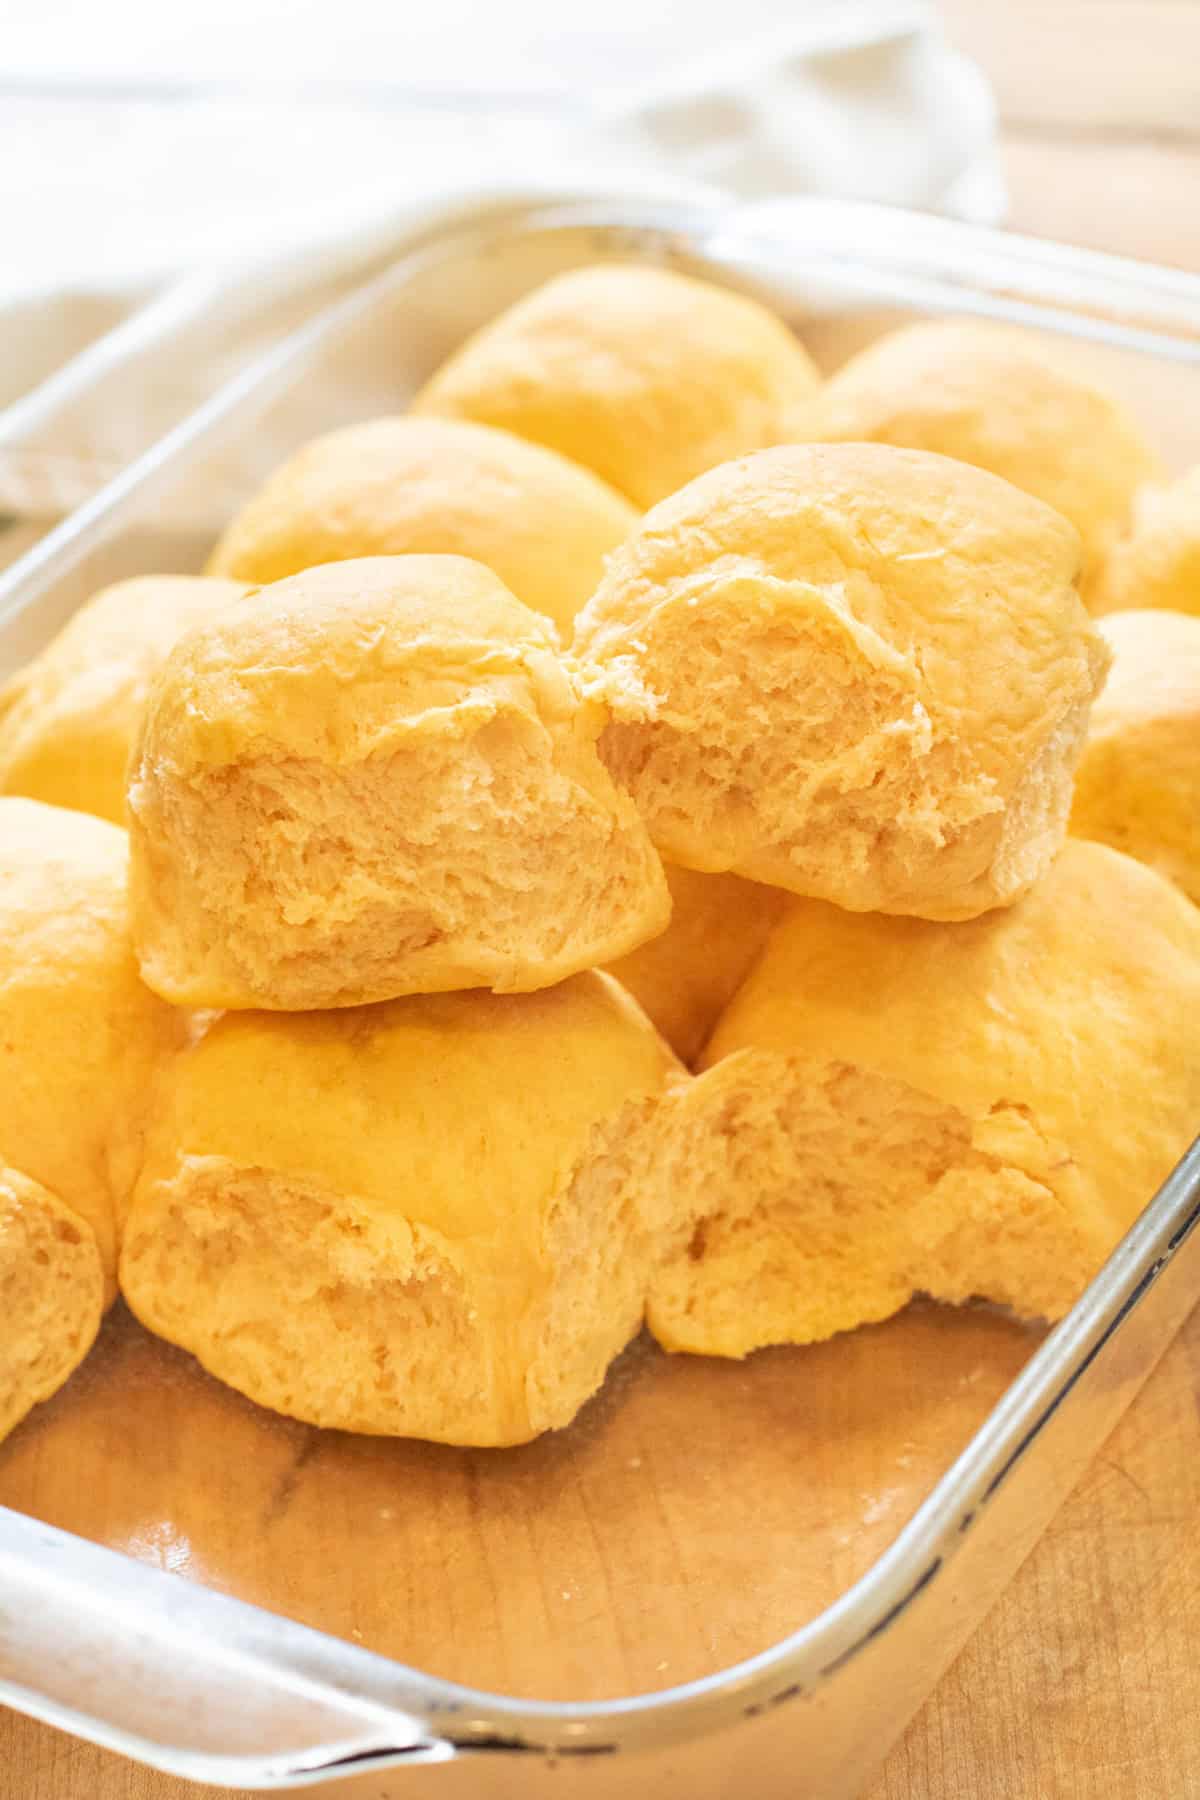
Baked to fluffy delightfulness, Homemade Sweet Potato Rolls!
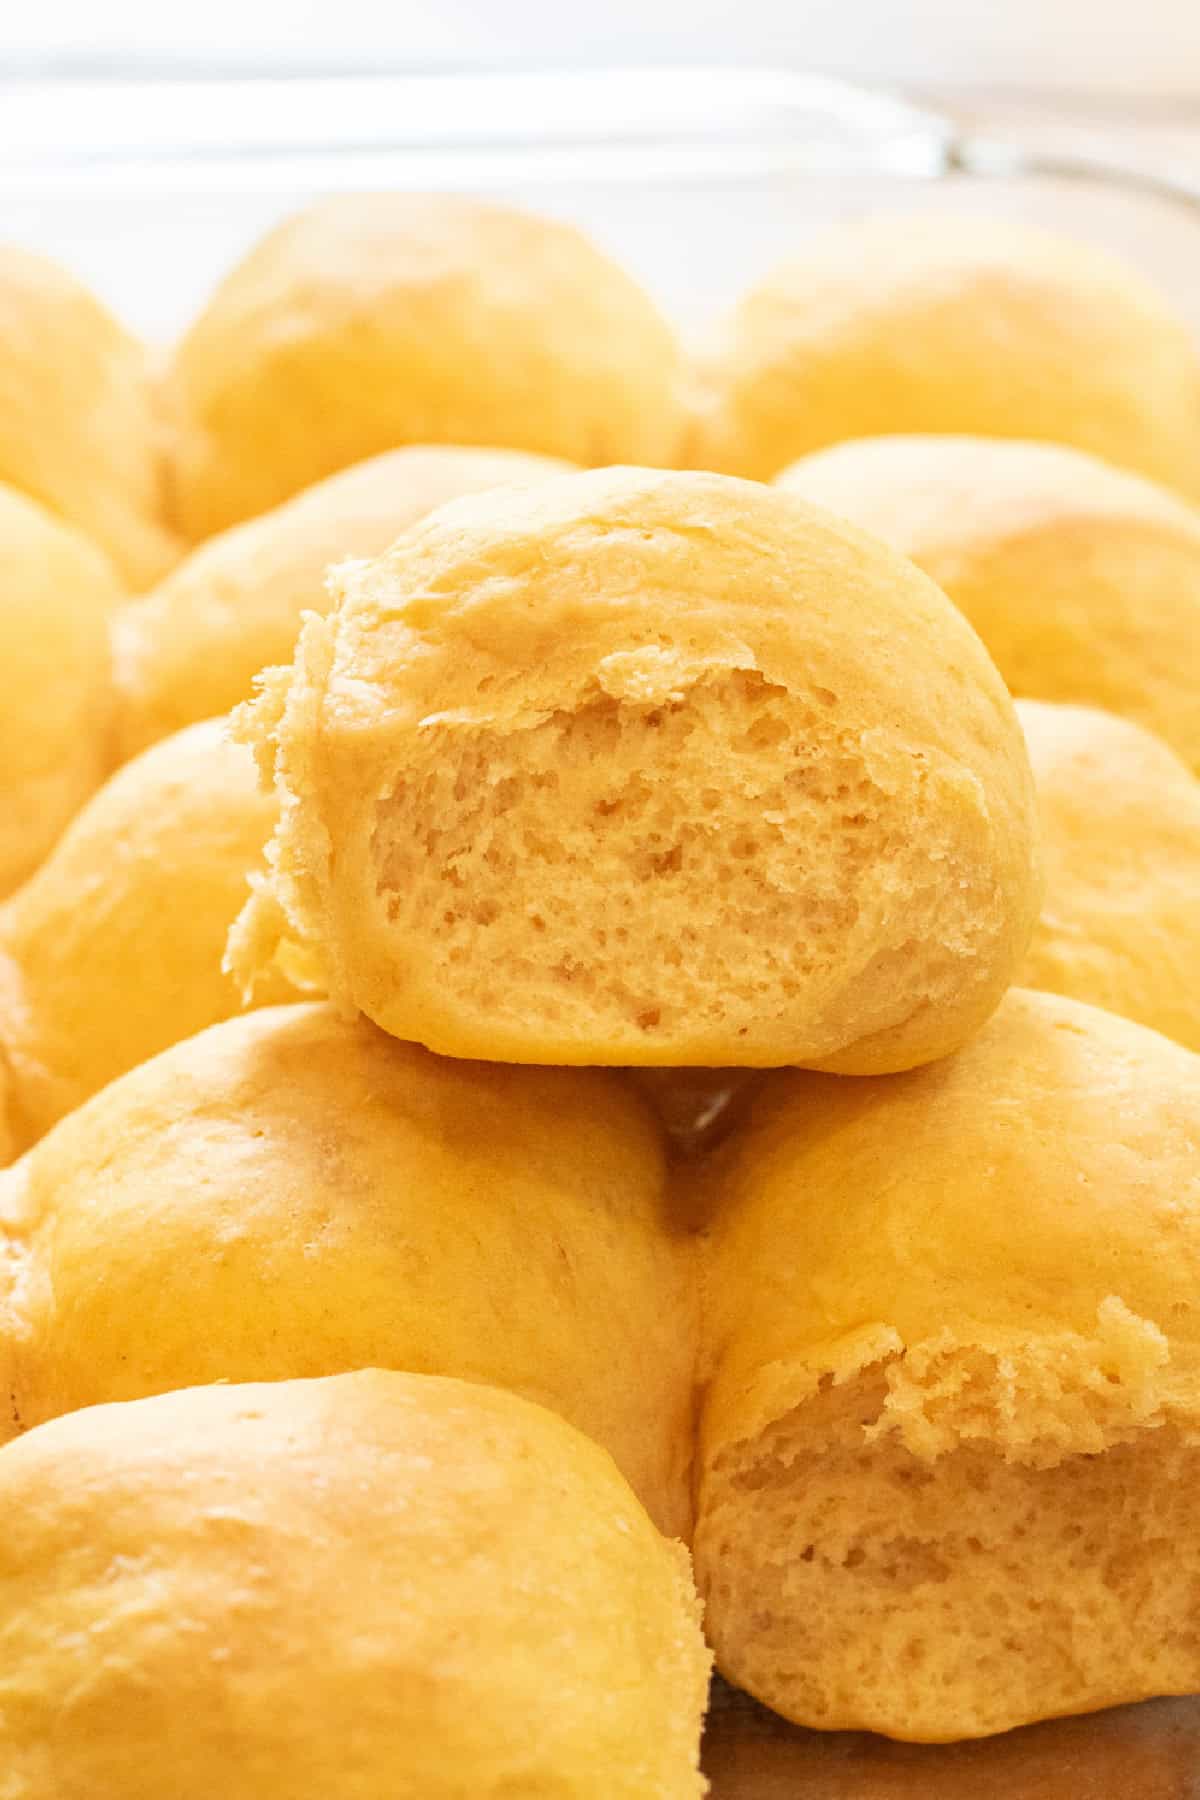
So soft and perfect for sliders (like these!), sopping up soups, gravies, sauces, or anything else on a holiday plate or any other plate!
Recipe Tips
It’s always best to weigh your ingredients when baking (especially breads) for the most accurate and consistent results, each time. There are so many factors that can play into what 1 cup of all-purpose flour will be from one measurement to the next so a kitchen scale is an affordable tool that’s worth every penny.
You do not need a stand mixer for this recipe, you can absolutely do this all by hand, it’ll just take a little extra elbow grease.
There are a couple of ways you can prep this dough in advance!
Overnight 1st Rise: You can prepare the dough and then cover the bowl and pop it in the fridge overnight. The next day, take the bowl out and let the dough rise, although it’ll likely take closer to 2 hours, maybe more to fully double.
Overnight 2nd Rise: Prepare the dough balls and then cover them and pop them in the fridge. Give yourself at least 3 hours before you need them, and then take them out of the fridge for the 2nd rise, about 1-2 hours, before baking.
Freeze: Shape the dough balls and then flash freeze them on a parchment-lined baking sheet. Once frozen, store in an airtight freezer bag/container. When you’re ready for them, take out the frozen dough balls then line them in your greased baking pan and let them thaw and rise for about 4-5 hours before baking.
To ensure evenly sized rolls, again, it’s best to use a kitchen scale and create dough balls that are 2.5 – 2.75 oz each.
If you’re using good yeast, your dough should rise within the time frame in the recipe, however, yeast does expire and that means that it may not be as effective as it once was. If you used instant yeast, it seems to be taking a while for your dough to rise; it may be because you have older yeast that may need more time. You will know whether or not active yeast is activated – if it doesn’t activate, then your yeast may be dead.
Serve Them With
- Dutch Oven Chicken and Dumplings Soup
- Croque Monsieur Sliders
- Chickpea Kale Curry Soup
- Creamy Shrimp Corn Chowder
- Fresh Ricotta and Spinach Stuffed Chicken
- Pumpkin Mac n Cheese
- Crock Pot Honey Mustard Chicken
- Or anything else you would use our our Easy Dinner Rolls From Scratch or Homemade Hawaiian Rolls, too!
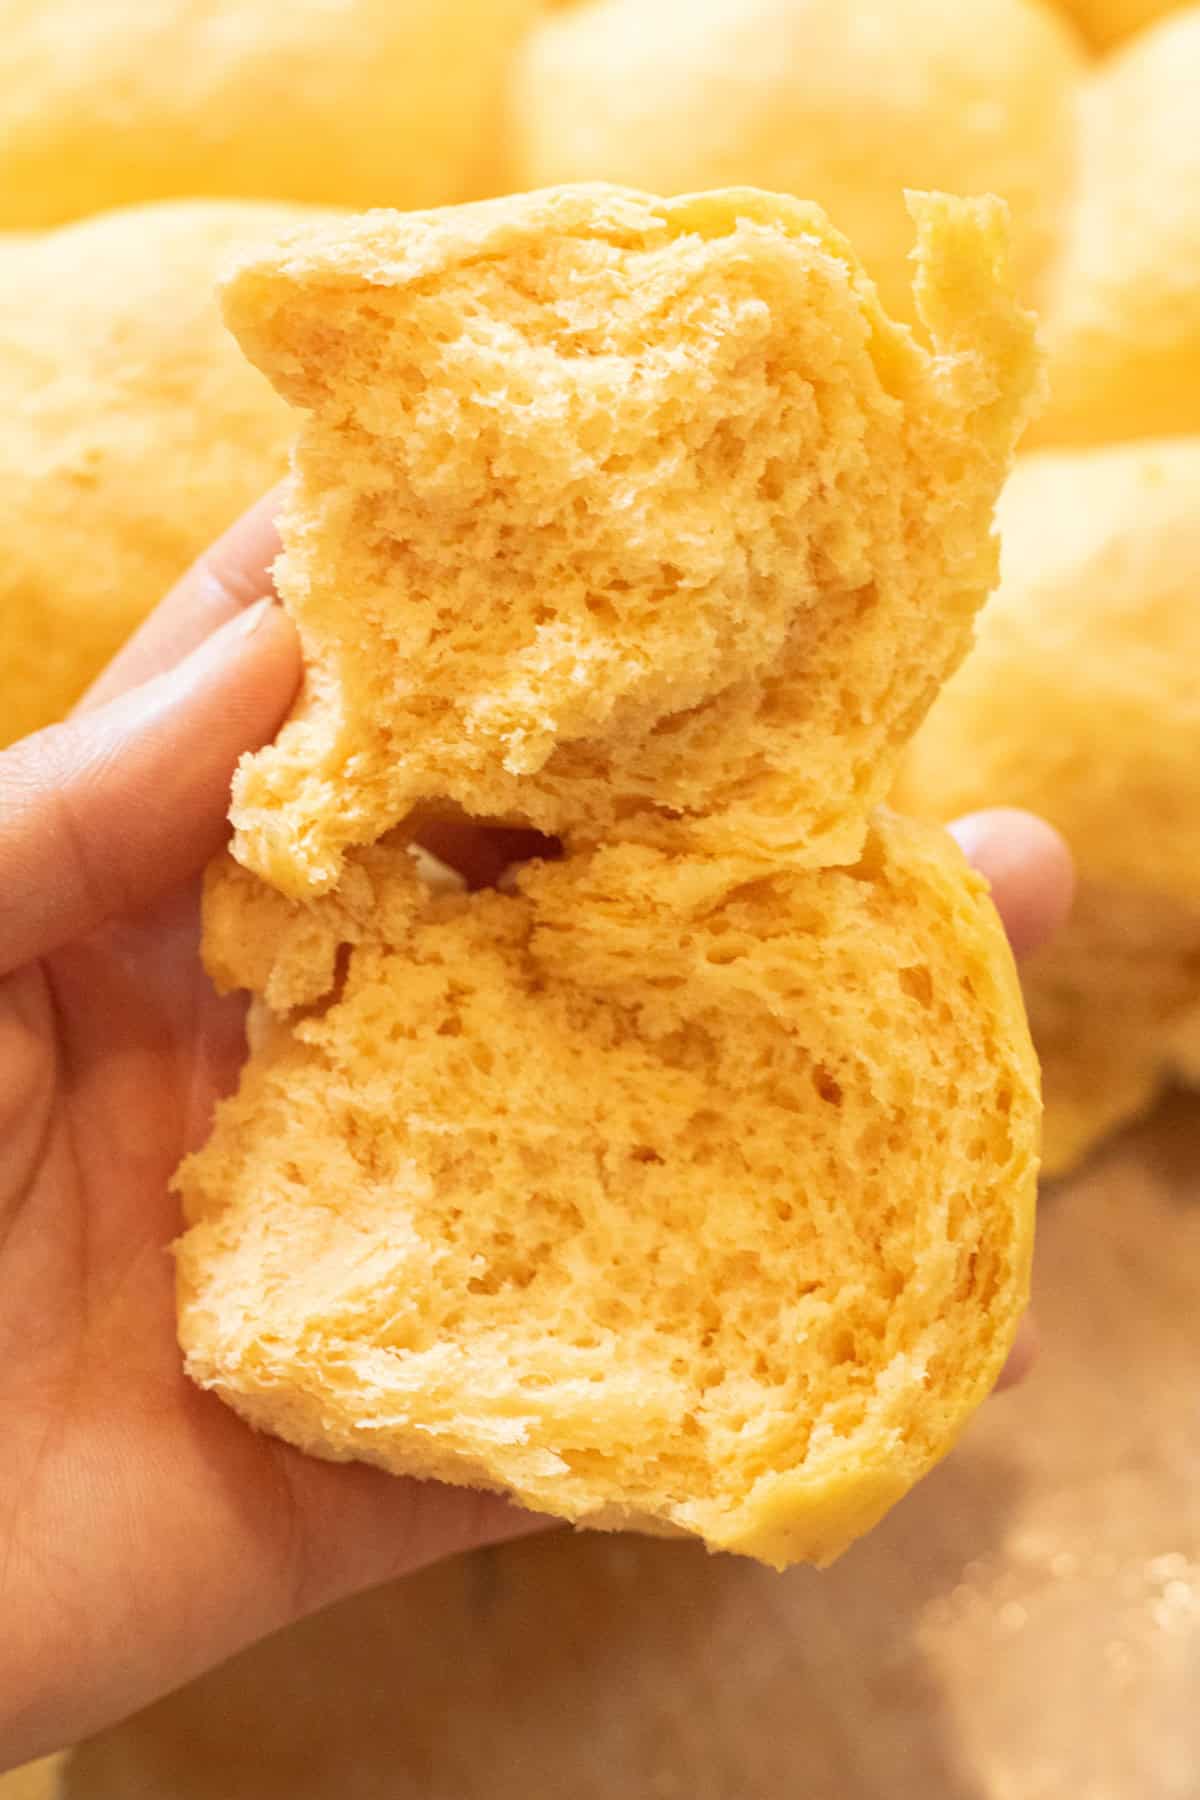
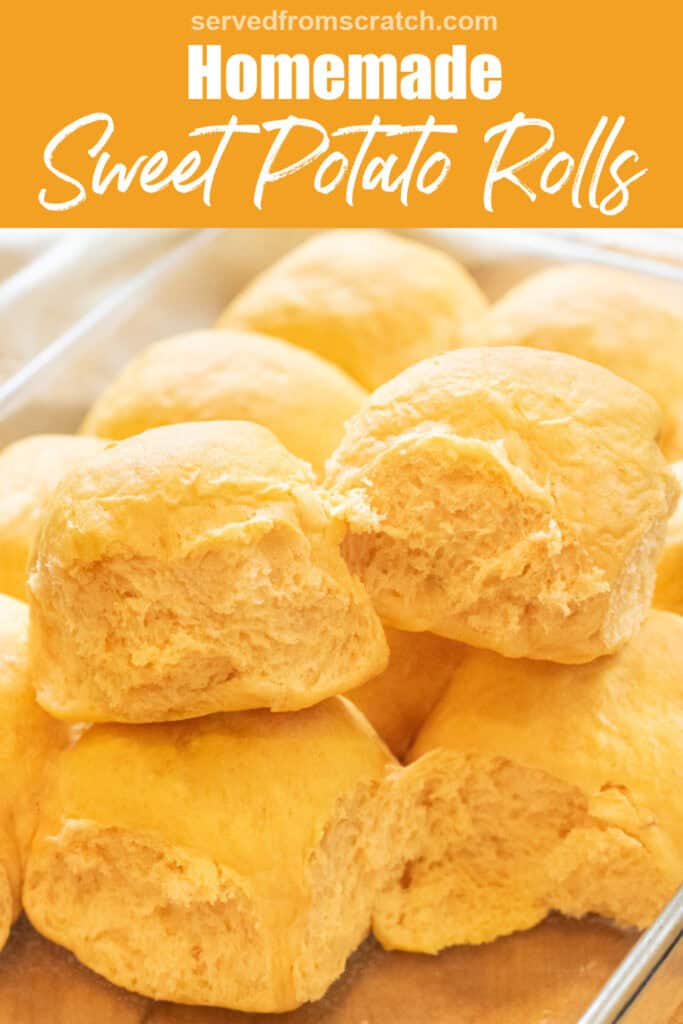
So incredibly fluffy, right? These Homemade Sweet Potato Rolls are just begging for a big ol’ tab of butter!
Enjoy! As always, if you make this recipe or any of my others, I love to hear what you think! Leave a comment below, email me, or you can find me on Facebook, Instagram, and Pinterest!
If you want to see more, be sure to sign up for my 5 Easy Ways to Start Cooking From Scratch!

Homemade Sweet Potato Rolls
Equipment
- small pot
- potato masher optional
- or ricer optional
Ingredients
- 1-2 sweet potatoes mashed, about 1 1/4 cup, 279 g
- 4 cups all purpose flour 525 g or 538 g of bread flour
- 2 tablespoons sugar 25 g
- 1/2 cup milk warmed to 90 degrees F
- 2 1/4 teaspoons active yeast
- 1 1/2 teaspoon fine ground salt
- 4 tablespoons unsalted butter melted
- 1 large egg
Instructions
- Mash Sweet Potatoes: Peel and dice sweet potato(es) and add to a small pot with water. Bring to a boil and boil for 10-15 minutes until potatoes are super soft. Drain and mash well and set aside to cool.
- Activate Yeast: Add sugar and warmed milk (you can heat milk in the microwave for about 10 seconds to warm) to the bowl of a stand mixer and whisk. Sprinkle yeast on top and then let sit for 10 minutes to activate.
- Create Dough: Add egg, melted butter, and mashed sweet potato to the stand mixer with the dough hook attachment and mix until egg is broken and mashed potato mixed well with the milk and butter. With the mixer running, slowly add the flour, about 1 cup at a time until all of the flour is added and well incorporated.
- Proof: Remove dough from the mixer and add it to a large bowl and cover with plastic wrap or a linen towel. Let rise for 1 hr.
- Separate into Rolls: After the dough has risen, remove it from the bowl and use a dough cutter, or butter knife to separate the dough in half. From each half, cut off about 2.5 oz pieces of dough and roll them into balls. Add those 15 balls to a lightly greased baking dish.
- Preheat and Proof again: Preheat the oven to 350 degrees F and lightly cover the baking dish with a clean linen towel to let the dough balls rise again for 30-45 minutes.
- Bake: After the dough has risen again, add to the middle rack of the oven and bake for 15 minutes.
- Serve and Enjoy!
Video
Notes
Overnight 2nd Rise: Prepare the dough balls and then cover them and pop them in the fridge. Give yourself at least 3 hours before you need them, and then take them out of the fridge for the 2nd rise, about 1-2 hours, before baking.
Freeze: Shape the dough balls and then flash freeze them on a parchment-lined baking sheet. Once frozen, store in an airtight freezer bag/container. When you’re ready for them, take out the frozen dough balls then line them in your greased baking pan and let them thaw and rise for about 4-5 hours before baking.
These are so good! We served these with some ham and the they were gone so fast!
Yum! Great vehicle for ham, so glad you enjoyed them!