Homemade Hawaiian Rolls
Make the classic sweet soft rolls at home with this Homemade Hawaiian Rolls recipe! They’re perfect for all of your favorite sliders and mini sandwiches and are not only easy to make but better than the store-bought Kings Hawaiian sweet rolls!
Use them for our Spianch Artichoke Dip Sliders!

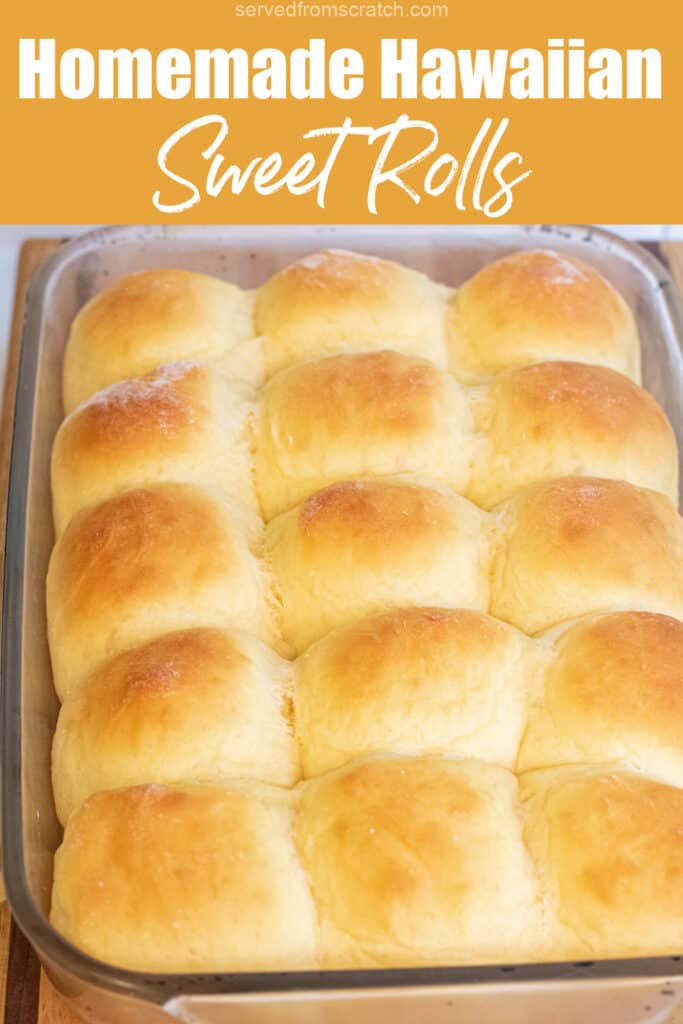
Who knows that classic orange rolls bag? Well, be prepared to say goodbye (or Aloha) to them! We have created our own, Homemade Hawaiian Rolls recipe that, if I do say so myself, are better than the King’s Hawaiian rolls! They have all the sweet flavor you want, but these Hawaiian sweet rolls are even fluffier than the original! Even better, they’re surprisingly easy to make!
Ingredients Needed
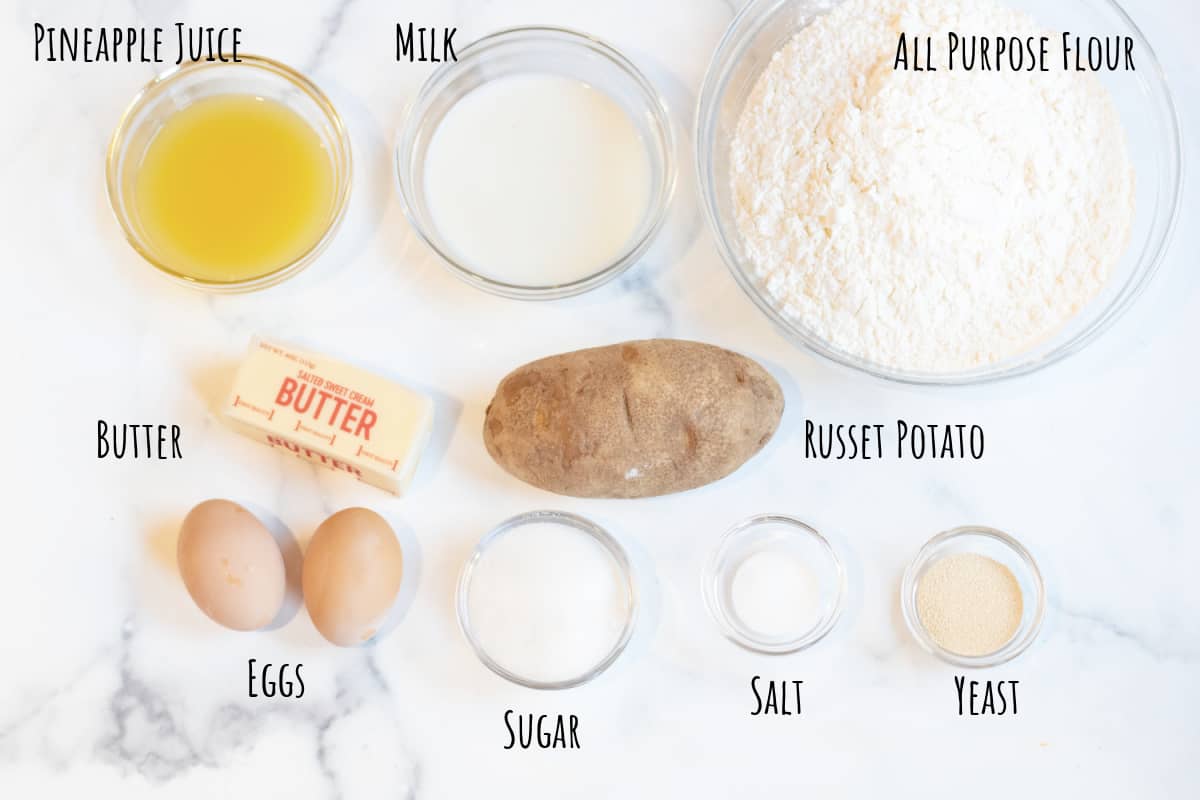
- All-Purpose Flour – Bread flour can also be used for this recipe, but trust me, all-purpose will work just fine and get you all the fluff you need/want out of a roll.
- Russet Potato – I just love adding some potato starch to a bread dough! It helps retain moisture in the dough which adds to the great soft texture of the dough. You can also use Yukon Golds, but stay away from waxy potatoes.
- Pineapple Juice – The Hawaiian in these Hawaiian sweet rolls!
- Sugar – The pineapple juice alone isn’t enough to really bring out that undeniable Kings Hawaiian rolls sweet flavor.
- Eggs, Butter, and Milk – Necessary for structure and flavor!
- Salt and Active Yeast – Other bread necessities.
Easy to Make
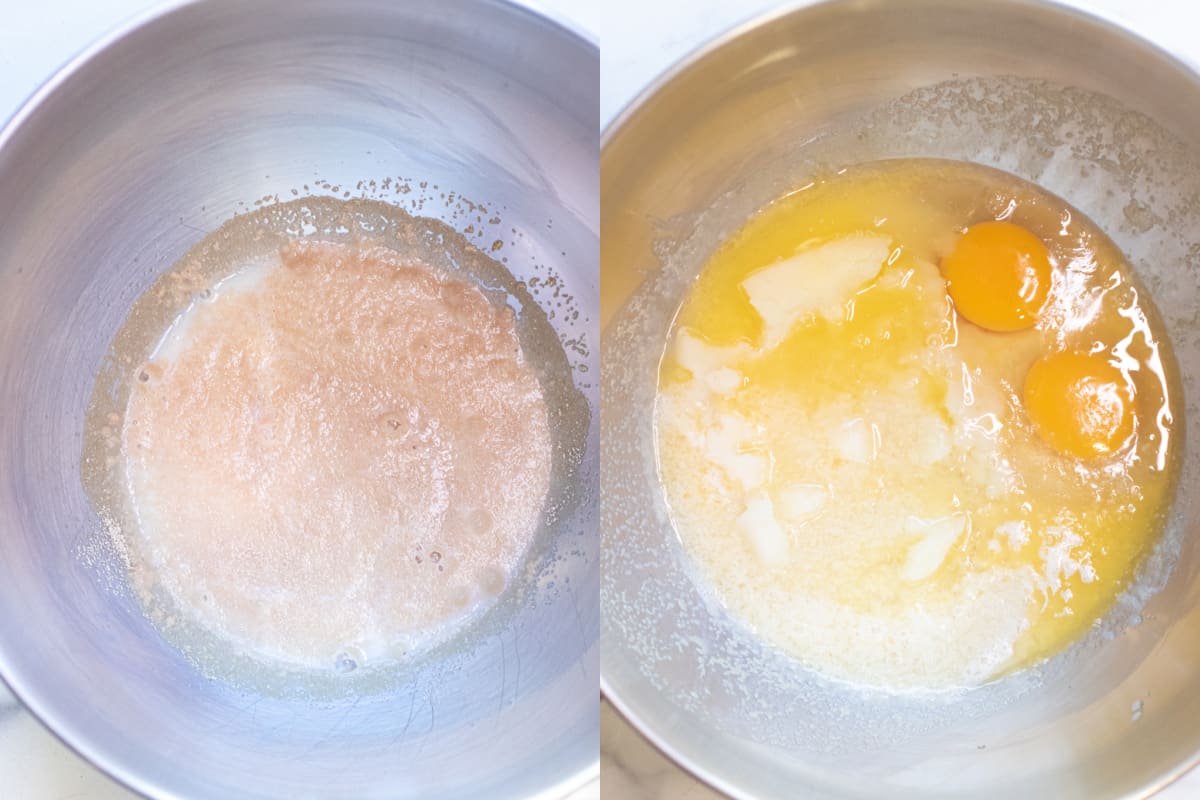
Activate the Yeast
First step, activate that yeast in some warm milk and sugar. Once ready, add your eggs, pineapple juice, salt, mashed potato, and melted butter.
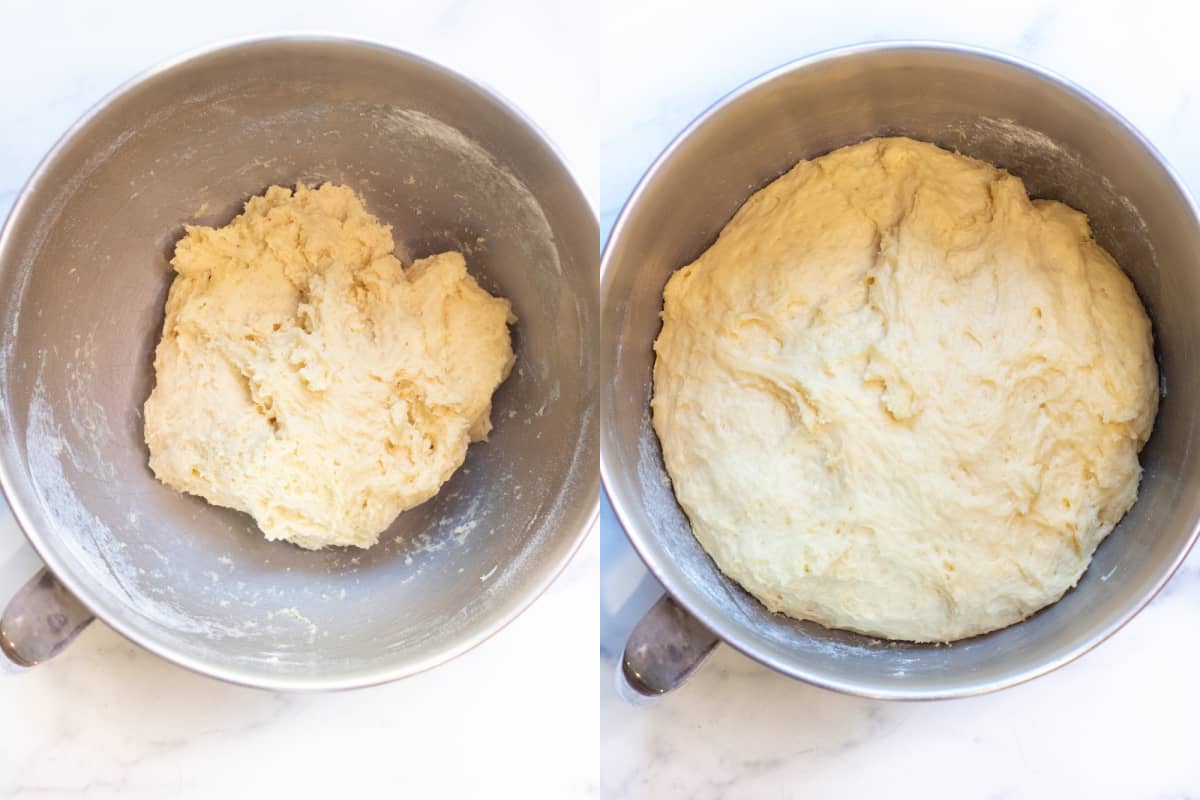
Add Flour
Add that flour and mix with your handy stand mixer in until a super wet sticky dough is formed. Cover and let rise until it has doubled.
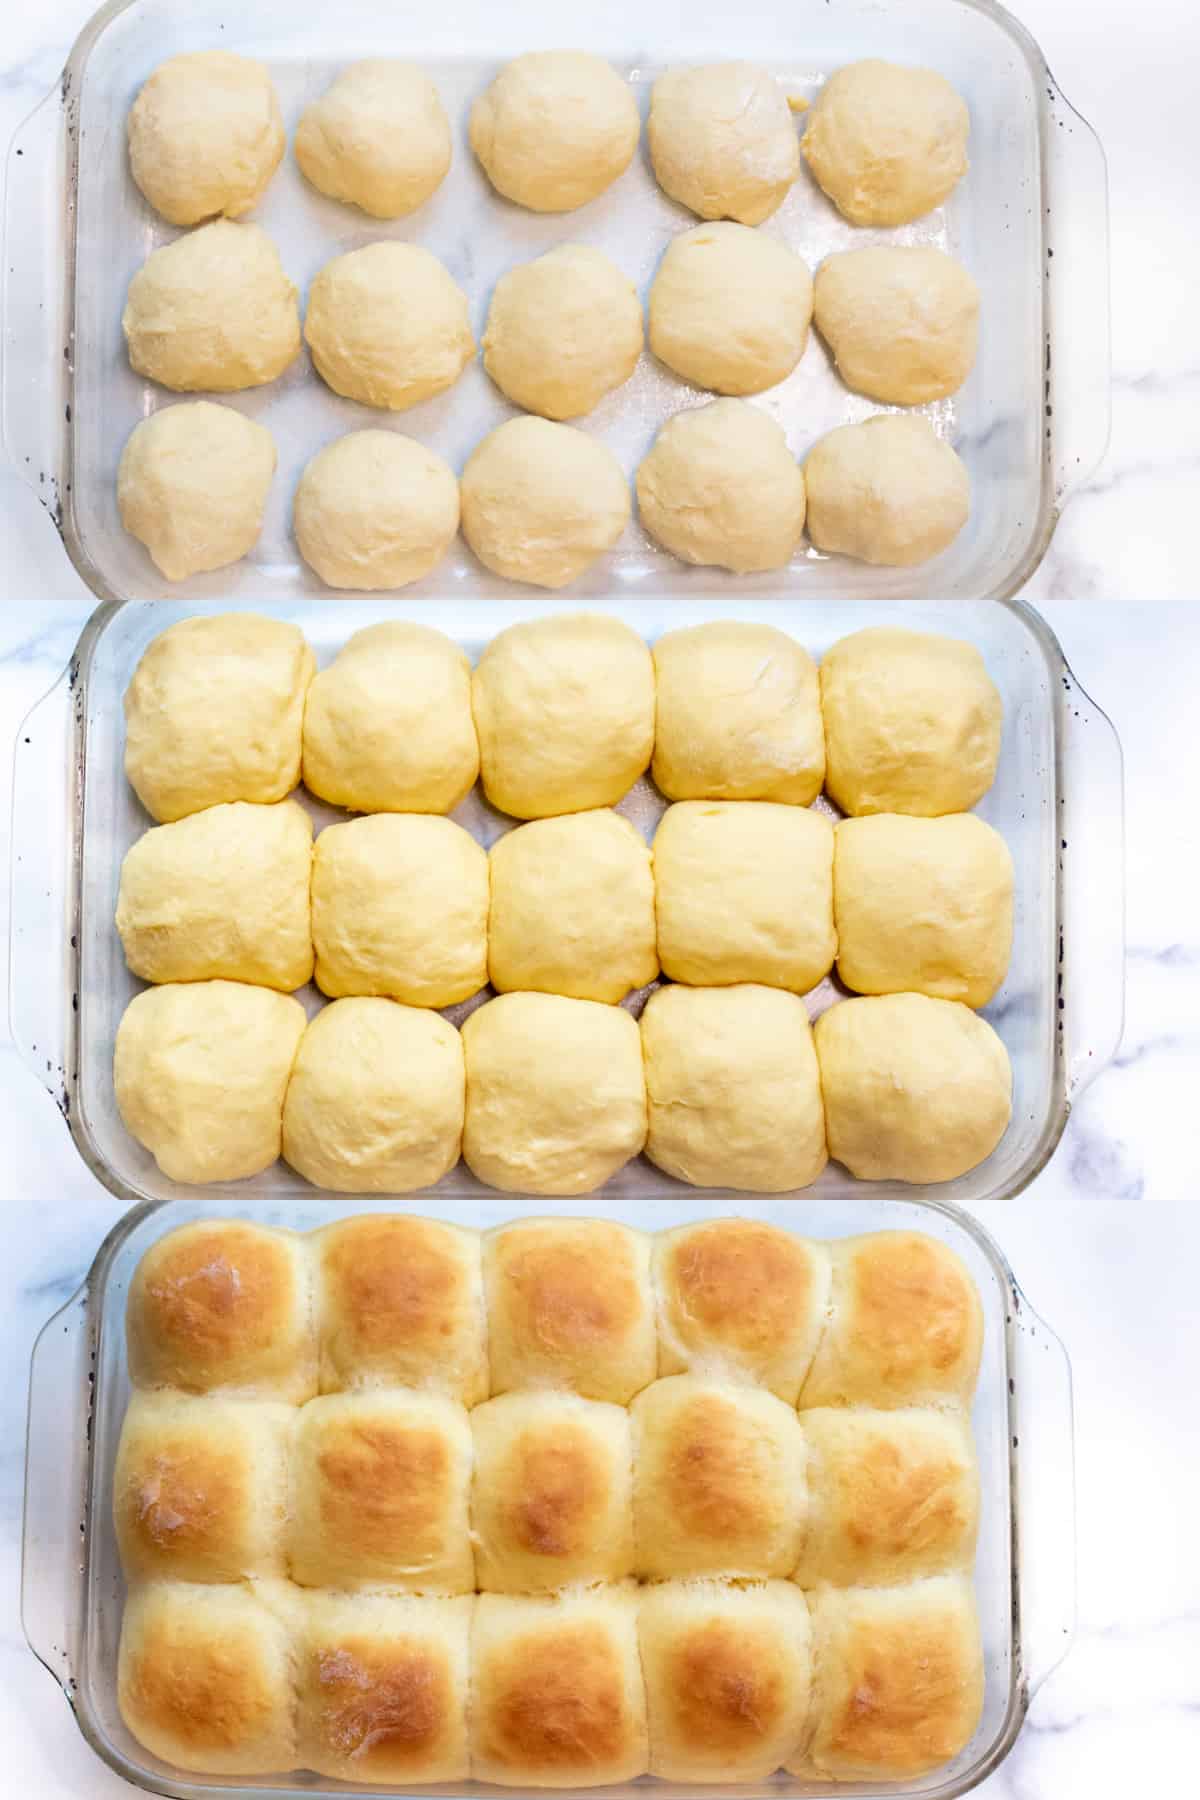
Shape, Rise, Bake!
Shape into little 15 little balls, let them rise again, and then bake!
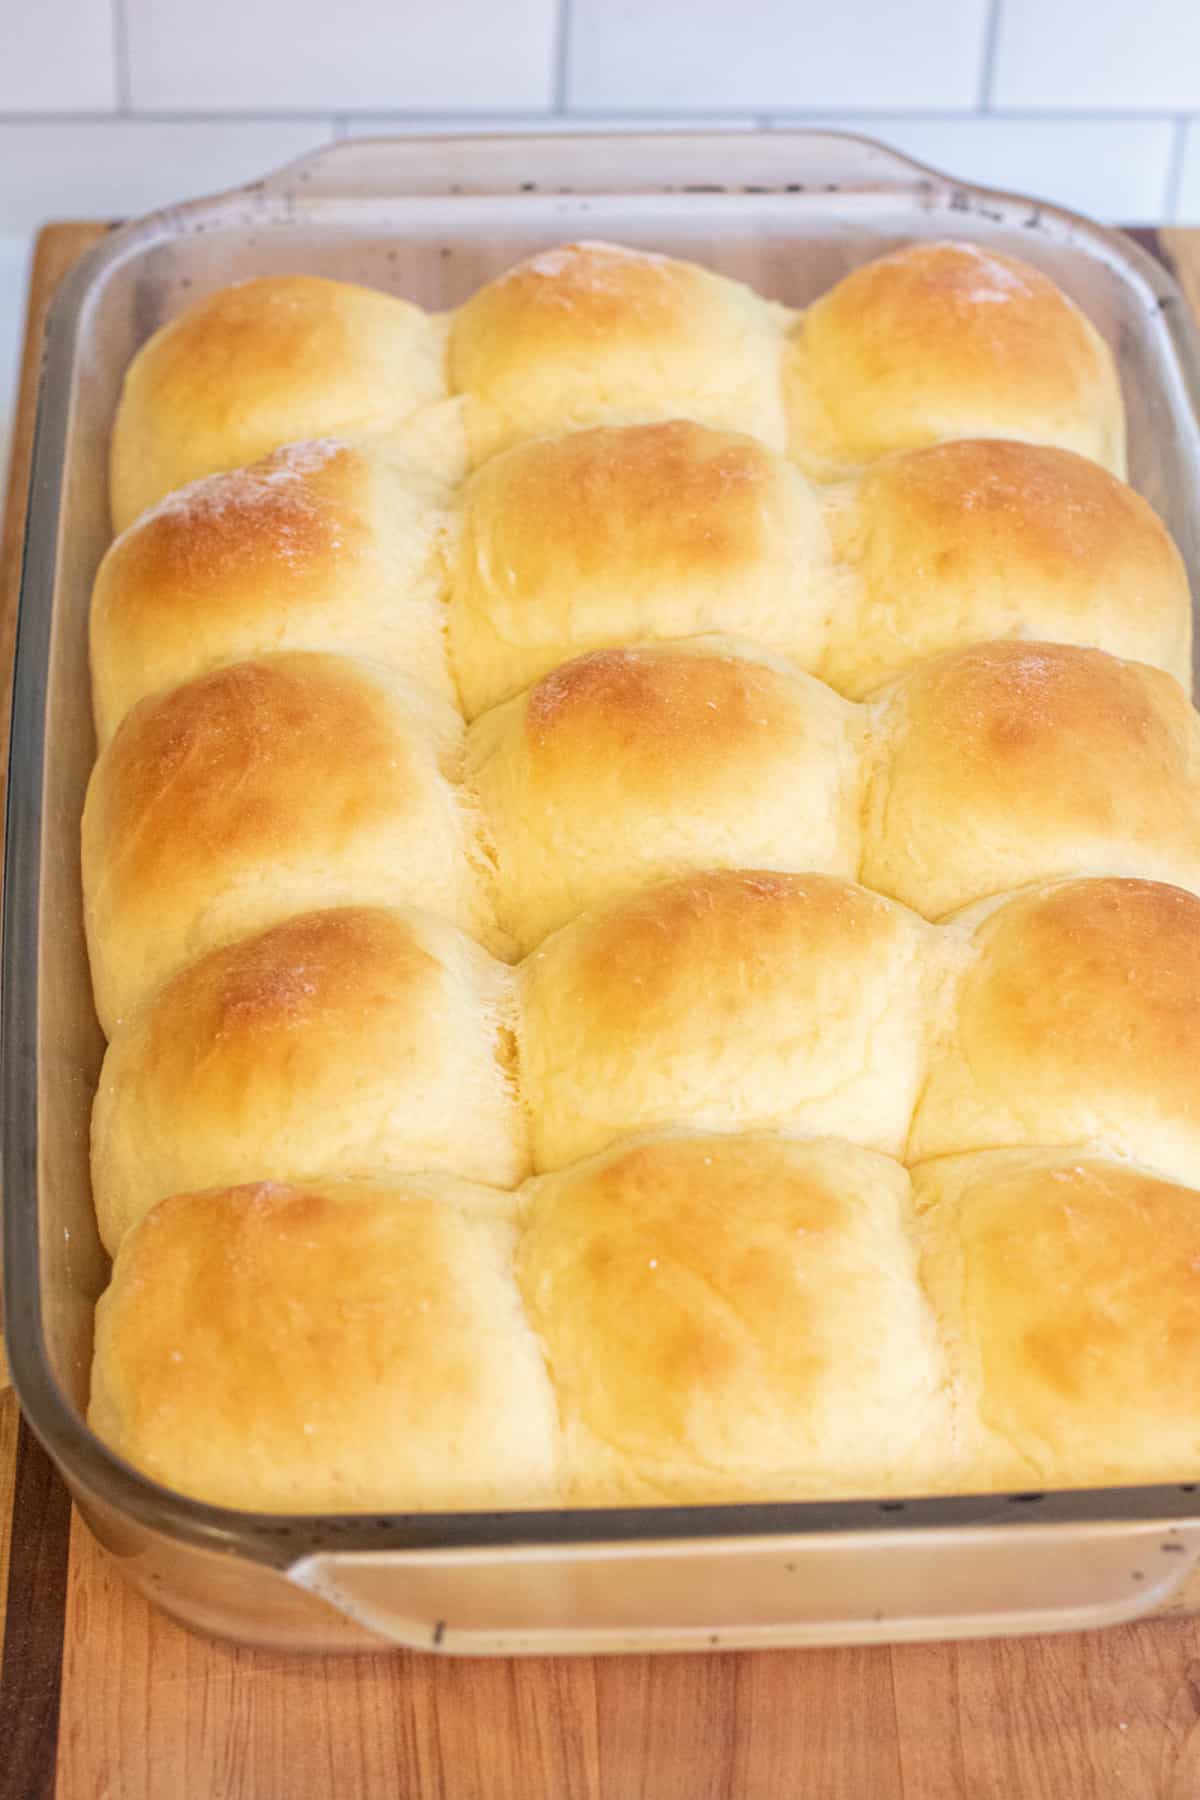
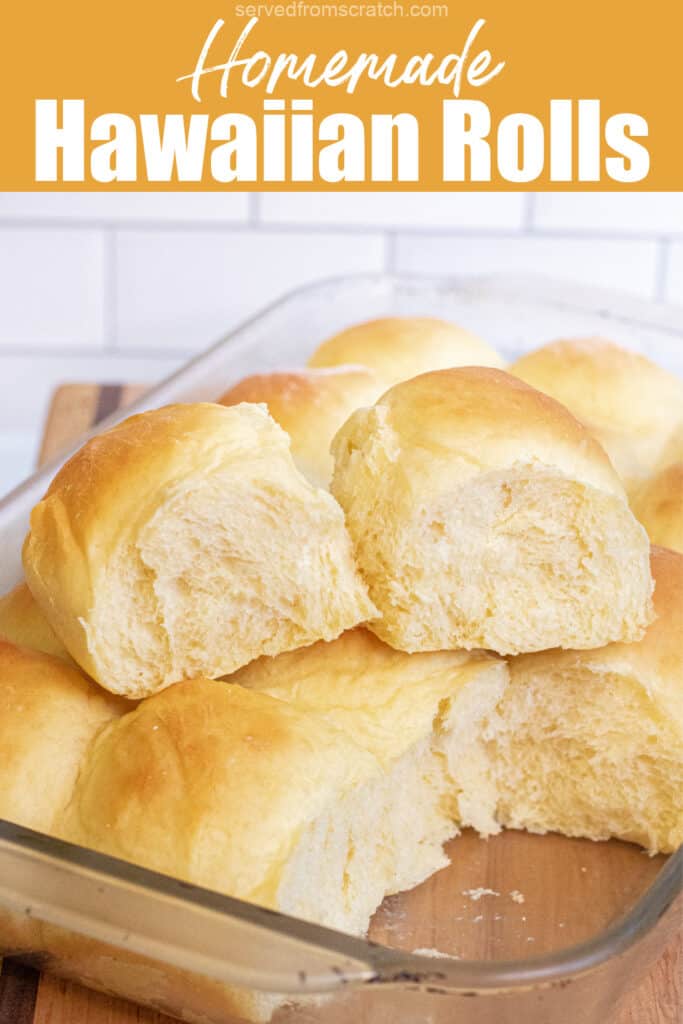
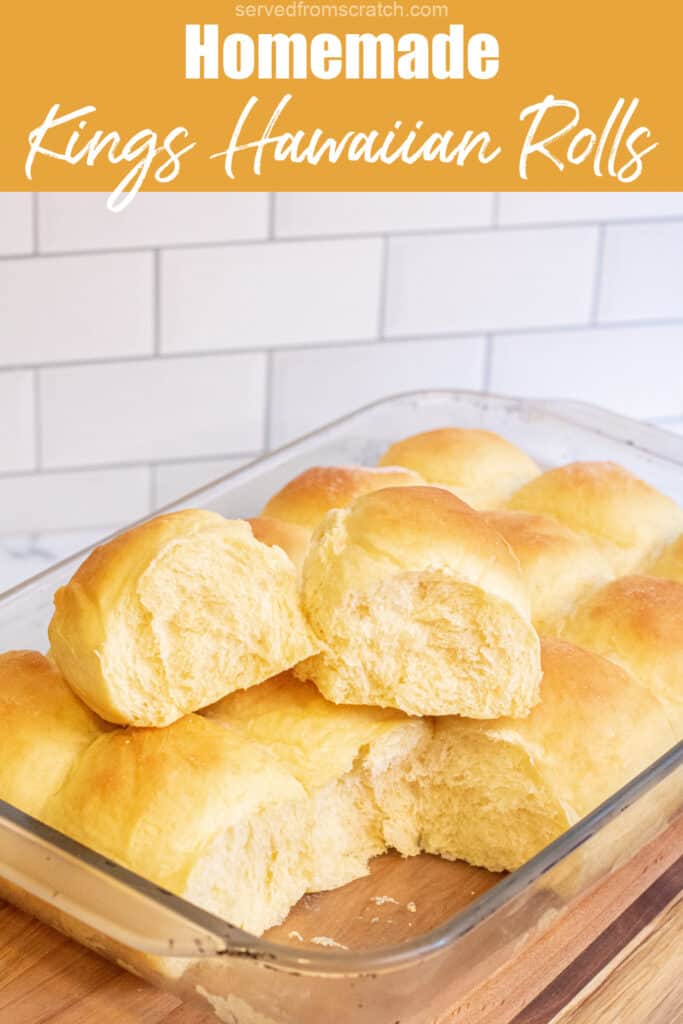
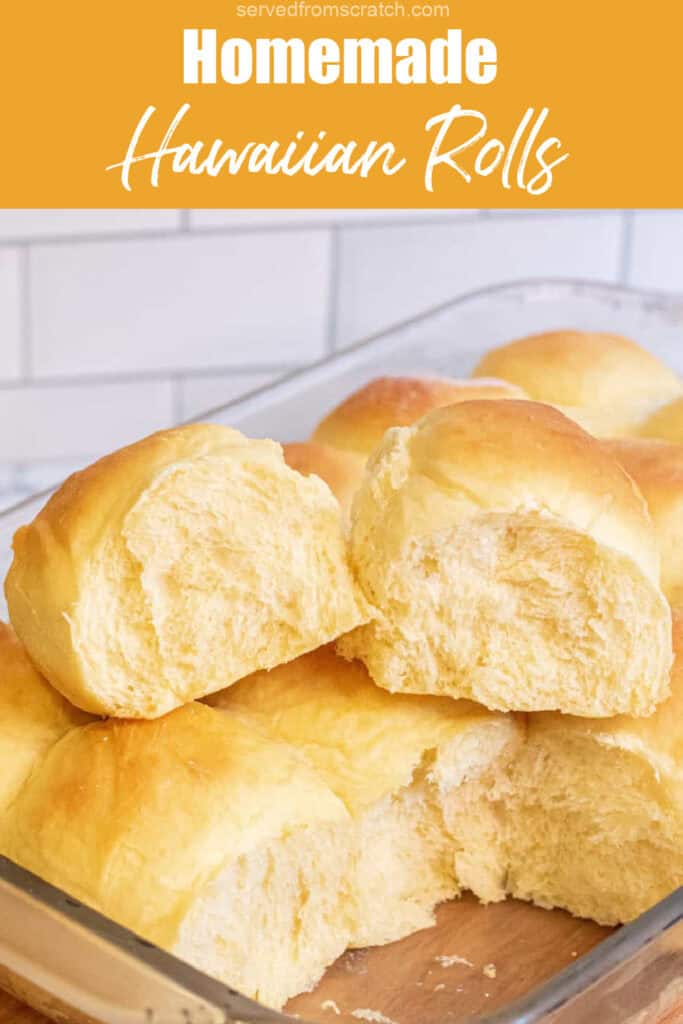
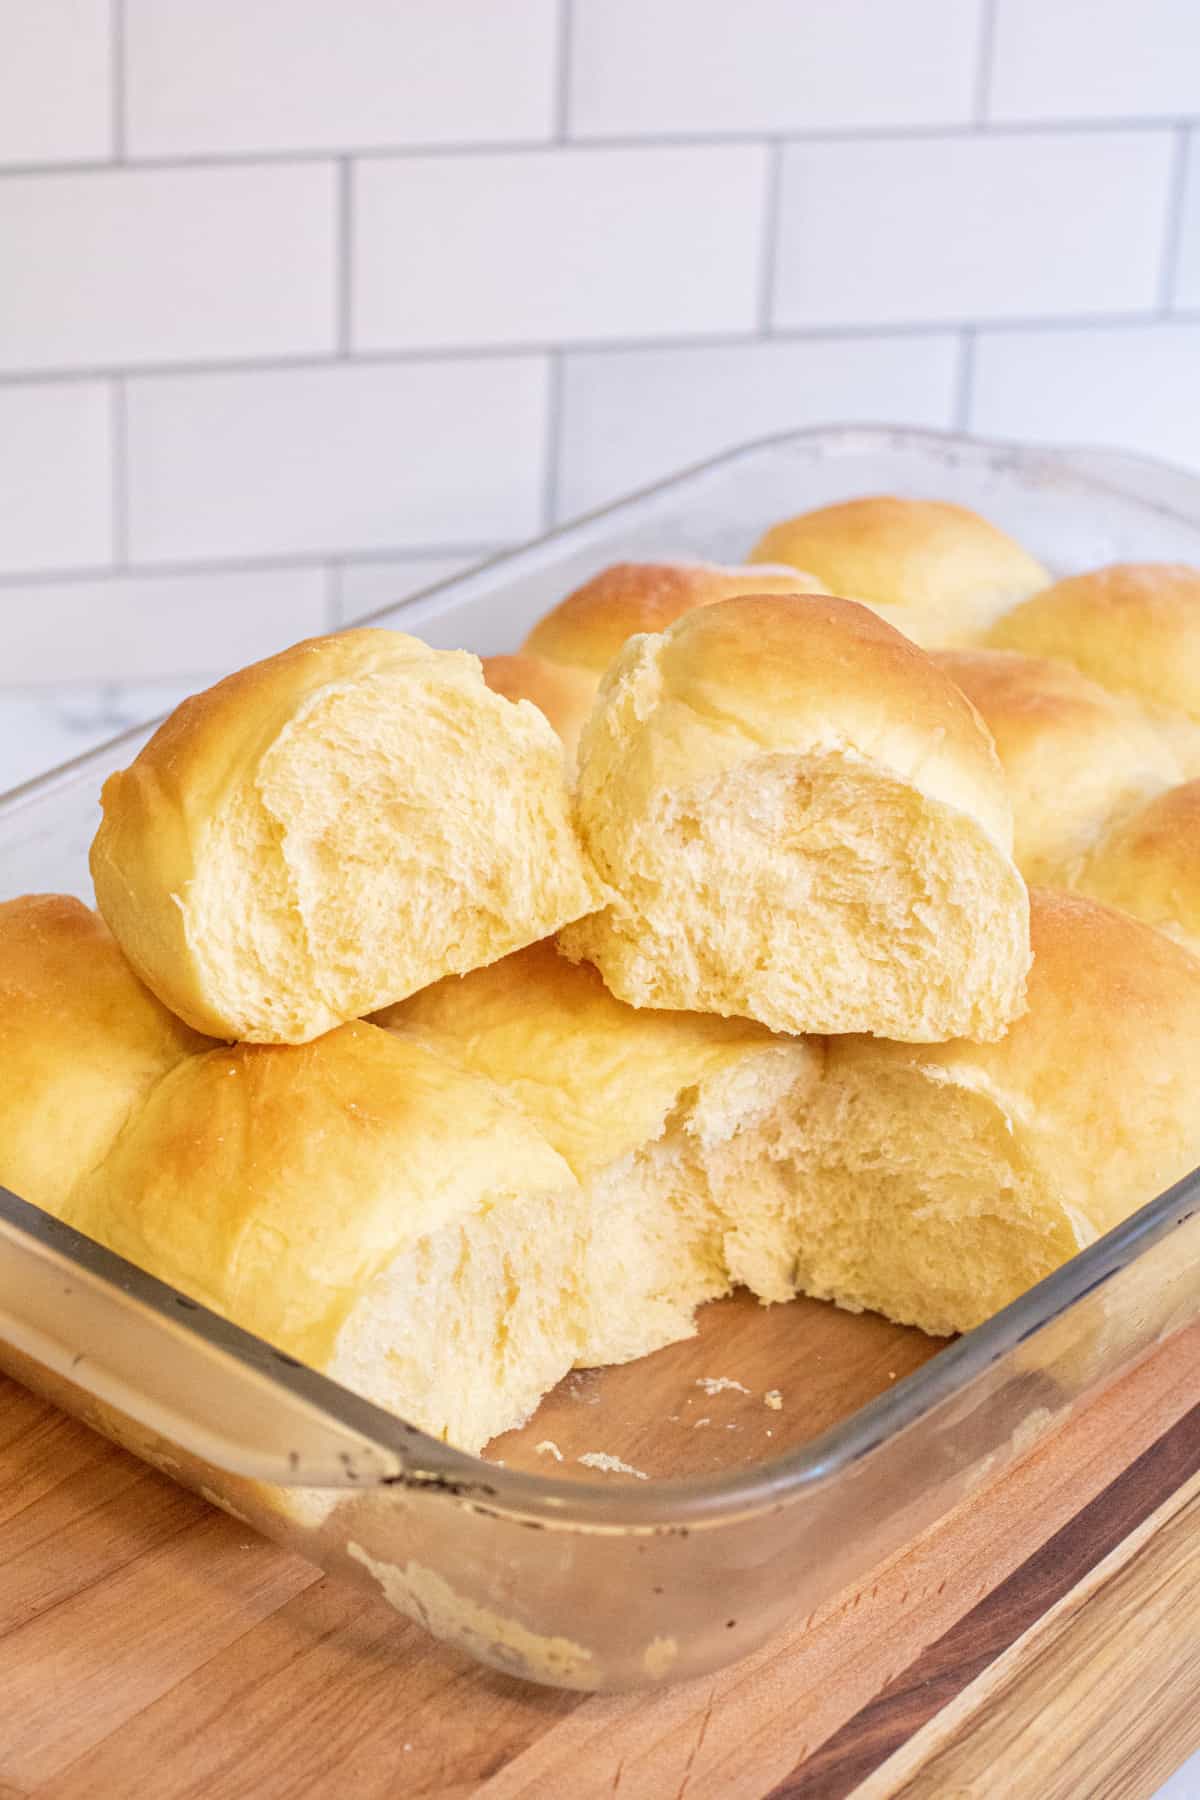
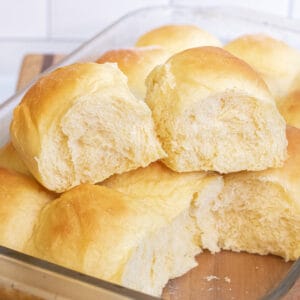
The result, these beautiful fluffy, sweet Homemade Hawaiian Rolls! A love child of our Homemade Hawaiian Bread and our Easy Dinner Rolls From Scratch. While you’re at it, be sure to try our Homemade Sweet Potato Rolls!
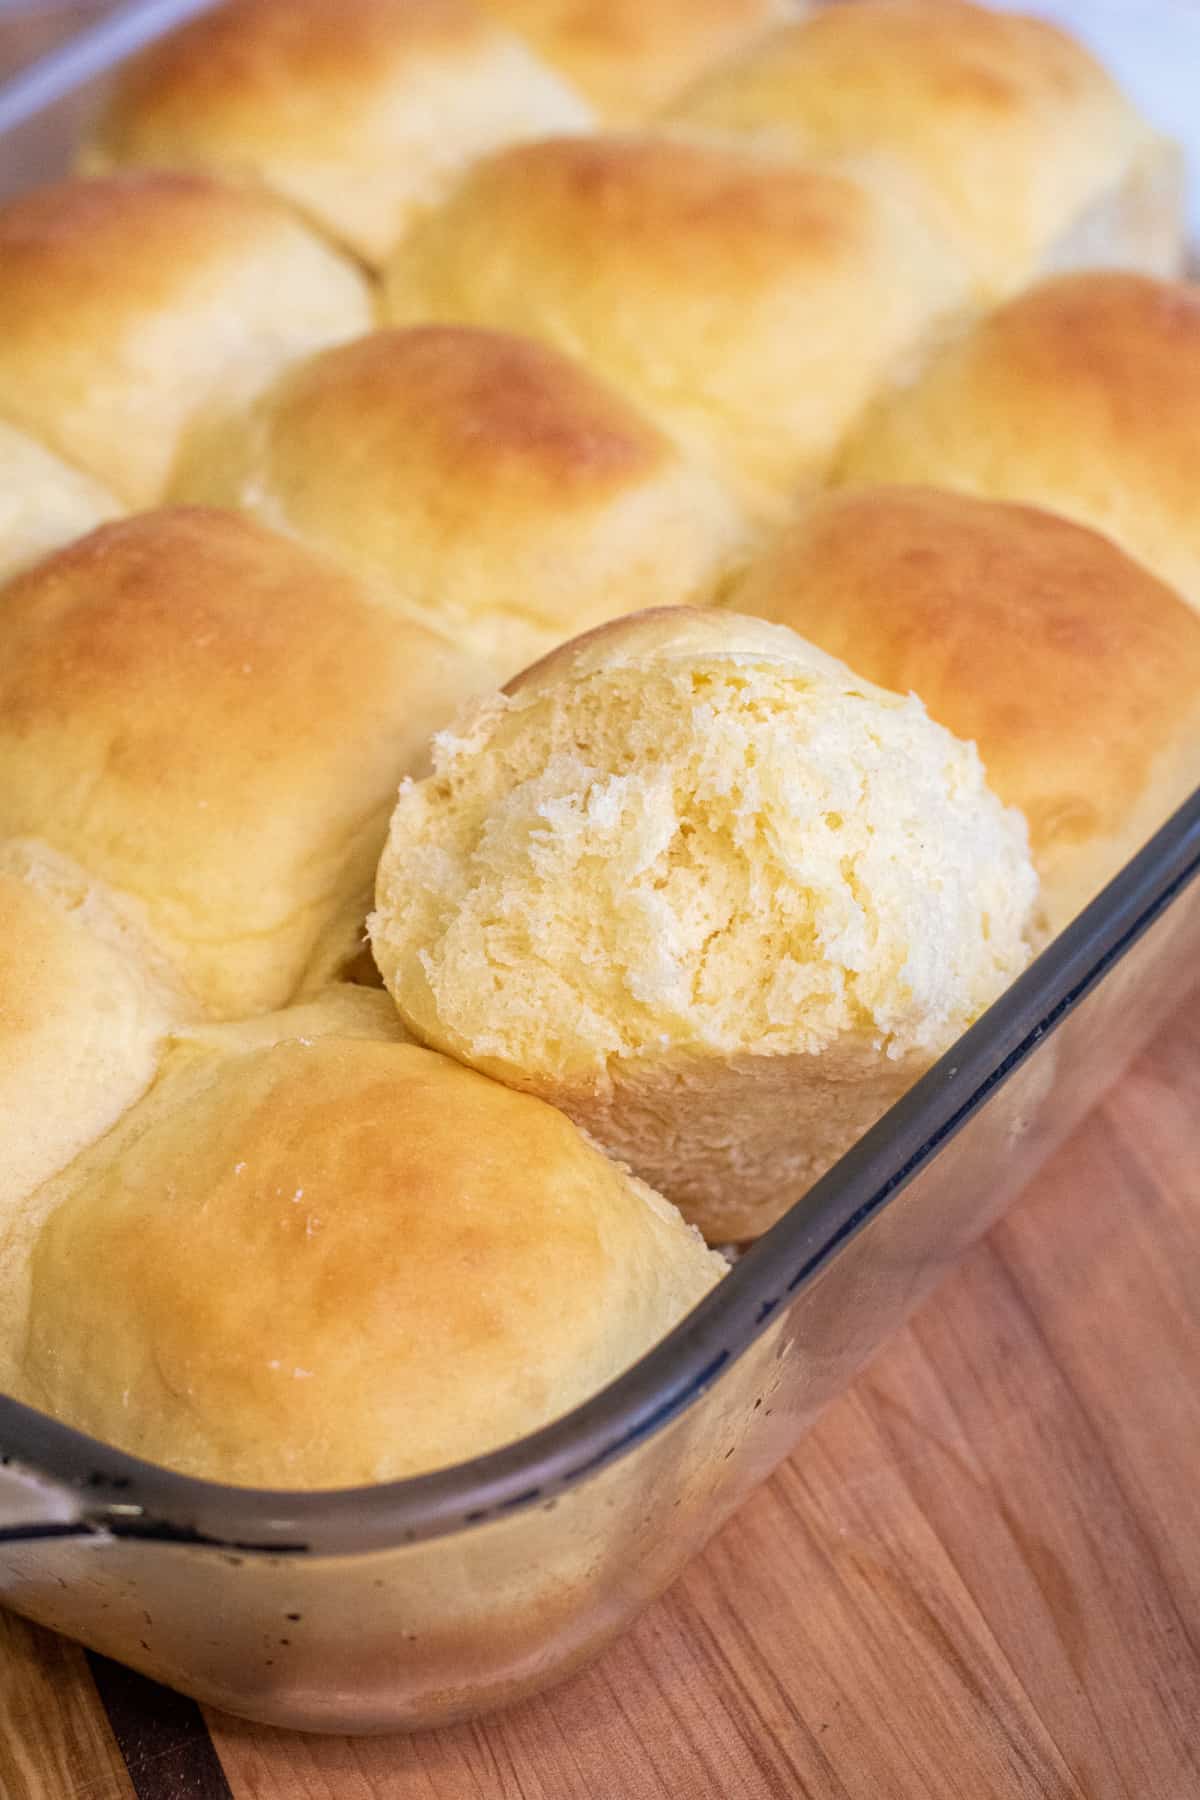
So fluffy. So soft. So undeniably like the King’s Hawaiian rolls – but better!
Pro Tips!
When baking, and especially with bread, it’s best to weigh your flour for the most accurate and consistent results, each time. That’s because there are so many factors that can play into what 1 cup of all-purpose flour will be one measurement to the next. A kitchen scale is a tool that’s really affordable and oh-so useful, especially if you’re doing a lot of bread baking!
Definitely not. You can absolutely do this all by hand, it’ll just take a little extra elbow grease.
Another reason for a kitchen scale! This will help you weigh out your balls of dough to ensure that your rolls are all similarly sized.
There are a couple of ways you can prep this dough in advance!
Overnight 1st Rise: You can prepare the dough and then cover the bowl and pop it in the fridge overnight. The next day, take the bowl out and let the dough rise, although it’ll likely take closer to 2 hours, maybe more to fully double.
Overnight 2nd Rise: Prepare the dough balls and then cover them and pop them in the fridge. Give yourself at least 3 hours before you need them, and then take them out of the fridge for the 2nd rise, about 1-2 hours, before baking.
Freeze: Shape the dough balls and then flash freeze them on a parchment-lined baking sheet. Once frozen, store in an airtight freezer bag/container. When you’re ready for them, take out the frozen dough balls and line them in your greased baking pan and let them thaw and rise for about 4-5 hours before baking.
These Hawaiian sweet rolls make the most delicious little sliders (stay tuned!), and also great sweet rolls to go with any meal, including Thanksgiving!
Enjoy! As always, if you make this recipe or any of my others, I love to hear what you think! Leave a comment below, email me, or you can find me on Facebook, Instagram, and Pinterest!
If you want to see more, be sure to sign up for my 5 Easy Ways to Start Cooking From Scratch!
Equipment
- Dough cutter optional
Ingredients
- 450 grams all purpose flour 3 1/2 cups
- 10 grams active yeast 2 1/4 teaspoons
- 107 grams sugar 1/2 cup
- 1/3 cup 2% milk warmed to about 90 degrees
- 7 grams fine ground salt
- 1/2 cup pineapple juice
- 131 grams mashed potato 2/3 cup or approximately 1 medium sized potato
- 2 eggs
- 2 tablespoons butter melted
Instructions
- Add peeled and cubed potato to a small pot with water and set to high. Let boil for at least 10 minutes until potatoes are fork-tender. Drain and mash extremely very well and set aside to cool. Make sure that your potatoes are cooked very well so that they mash nice and smoothly.
- Heat milk in the microwave for 15-30 seconds to warm it to about 90 degrees. Add milk and sugar to the bowl of a stand mixer and whisk. Add yeast and let sit for about 10 minutes to activate, until yeast is foamy.
- Once the yeast is activated, add melted butter, eggs, salt, mashed potato, and pineapple juice. With the dough hook, mix on medium until the egg yolks are broken and the potato begins to mix with liquids.
- Slowly add the flour with the mixer running. Once all of the flour is added, continue to mix until a very sticky, dough has formed.
- Cover the mixer with plastic wrap and let the dough rise until it has doubled in size, about an hour.
- Sprinkle flour on a clean surface or cutting board and grease a 9X13 baking dish. After the first rise, sprinkle some dough around the edge of the risen dough and scoop the dough out of the mixing bowl onto your floured surface. Sprinkle a little more flour on top and then use a dough cutter to cut off 2.2 – 2.5 oz pieces of dough. Alternatively, you can also cut the dough in half, and then continue to halve the peices of dough until you have 15-16 dough balls.
- Take each ball of dough and either roll them into a ball, or pull the edges down and under the dough to create a ball shape. The dough is very sticky so you will need to flour your hands often. Add dough balls to the greased baking sheet.
- Gently cover with a clean kitchen towel to rise for another 30-40 minutes. Pre-heat the oven to 350 degrees F.
- Once dough balls have risen, add to oven and bake for 20-25 minutes, checking at 20, once the tops of the rolls are golden brown.
- Enjoy!
Video
Notes
Overnight 2nd Rise: Prepare the dough balls and then cover them and pop them in the fridge. Give yourself at least 3 hours before you need them, and then take them out of the fridge for the 2nd rise, about 1-2 hours, before baking.
Freeze: Shape the dough balls and then flash freeze them on a parchment-lined baking sheet. Once frozen, store in an airtight freezer bag/container. When you’re ready for them, take out the frozen dough balls and line them in your greased baking pan and let them thaw and rise for about 4-5 hours before baking. Storage Counter: Cover tightly and store at room temperature for 2-3 days. Fridge: Store in an airtight container in the fridge for up to 1 week. Freezer: Let the baked rolls cool completely and then freeze for up to 3 months. Substitutions Flour: You can also use bread flour. Potato: You can also use Yukon Golds, but stay away from waxy potatoes. You can use a sweet potato too for even more added sweetness, but keep in mind it will alter the color. Milk: Use 1% to whole.

This is my go to recipe everytime I make rolls!! I’ve made a good 15 batches .
Today by accident though I doubled the recipe and got distracted and only used the two eggs and didn’t do four. . I’m worried how it will turn out. Will it effect the batch terribly ?
Hi Savannah! Oh I’m so glad that you enjoy this recipe and have made them so many times! The fewer eggs won’t totally ruin the rolls, but they won’t be nearly as fluffy and they will be denser and a bit drier. Sorry about that – I hate it when that happens!
I followed recipe exactly as is using a scale. My rise time was 1.5 hours on first rise and 1 hr 10 minutes on 2nd. After 25 minutes in the oven I proved and got 204 degrees. 210 is what I shoot for typically, but this will be my recipe from now on. No changes. It’s a sticky mess as described, but I followed it exactly and am very happy with the results..
Wonderful to hear, Nathan!! Thanks so much for sharing and taking the time to leave a review!
look no further for a delicious Hawaiian roll recipe! just wow!
So glad you enjoy them as much as we do, Jennie!! Thanks so much for sharing!
love the instructions!! you have included all the hard parts clearly..thankyou
@newbreadbaker
So excited to try these, we looooove KH buns, but we can’t always get them here in Canada and they’re so expensive. Can you substitute potato starch or potato flour for the actual potato? If so, what ratio would you use? Thanks!
I have always wanted to make these Hawaiian rolls homemade. These are a favorite roll in our house! Great for so many different recipes.
Love this recipe! first trying adding potatoes to my bread and it was so yummy! Had it with a curry and it was perfect for mopping up all the sauce!
So glad you enjoyed them, Zhen! Thanks so much for taking the time to leave a review!
The texture of this bread looks really good. I am sure it is delicious too!
Definitely looks so delicious and yummy! Perfect rolls to pair with any spread we have especially hot drinks this coming Holiday season! Loved it.
So great to hear Jamie!! Thanks so much for taking the time to leave a review!