Dan’s Como Bread
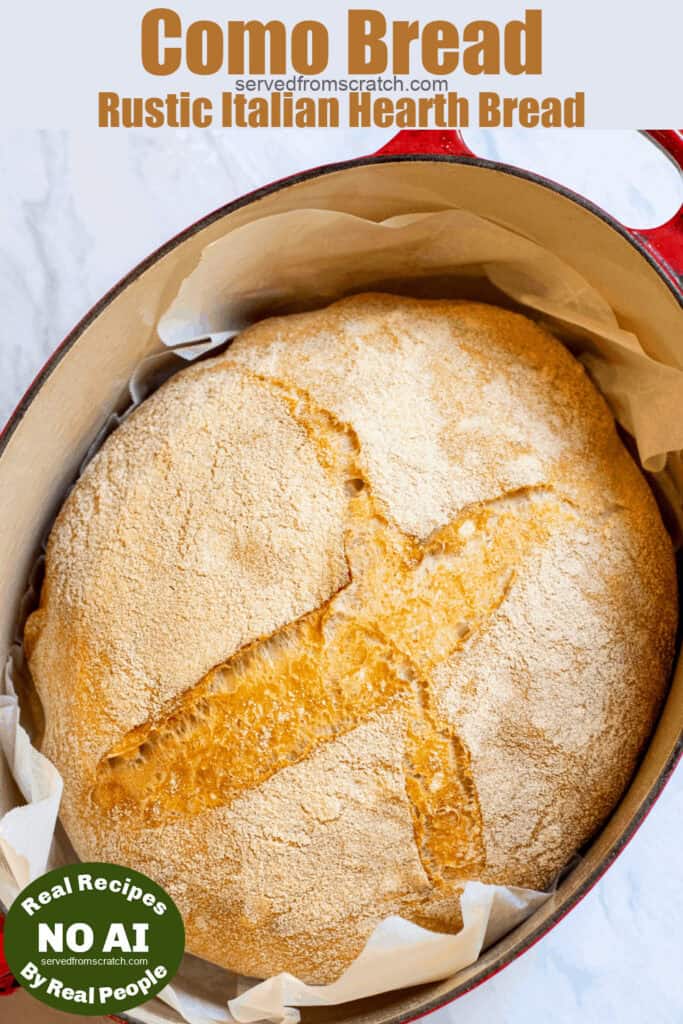
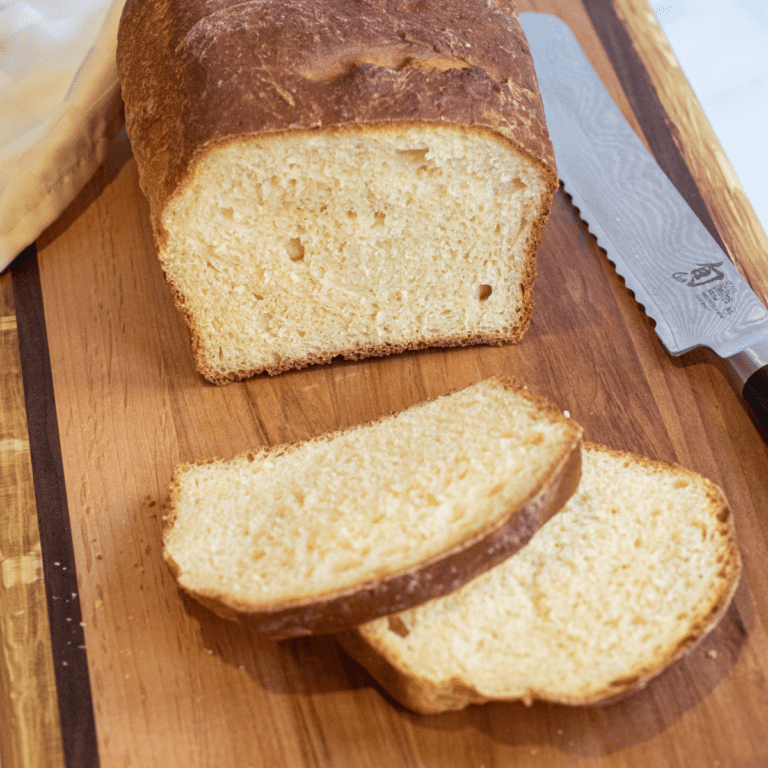
My husband Dan’s Como Bread is a rustic Italian hearth bread that has a delicate crumb but is a crusty bread recipe with a thin crust, perfect for sandwiches or just a comforting slice of bread with butter.
You’ll also love our Easy Crusty French Baguette!
This is one from the archives, friends. Originally posted many years ago and a recipe that we’ve been making for the past 6 years, Dan’s Como Bread is one that you will not regret having in your homemade bread repertoire! Dan has been perfecting it for years and we’ve laid out all the tricks and tips for you!
This crusty bread recipe is slightly adapted from Karen’s Kitchen Stories and originally from Carol Field’s book, The Italian Baker, Revised.
What is Como Bread?
Pane di Como, or Como bread, is a hearth bread from Northern Italy, around Lake Como (Hey George Clooney!). It has an amazing chewy center, and soft crust, with a developed, but subtle flavor due to the “starter” which uses a pre-fermentation process and a bulk fermentation process. It is one of our favorite authentic Italian bread recipes that makes the most perfect crusty bread!
Ingredients Needed
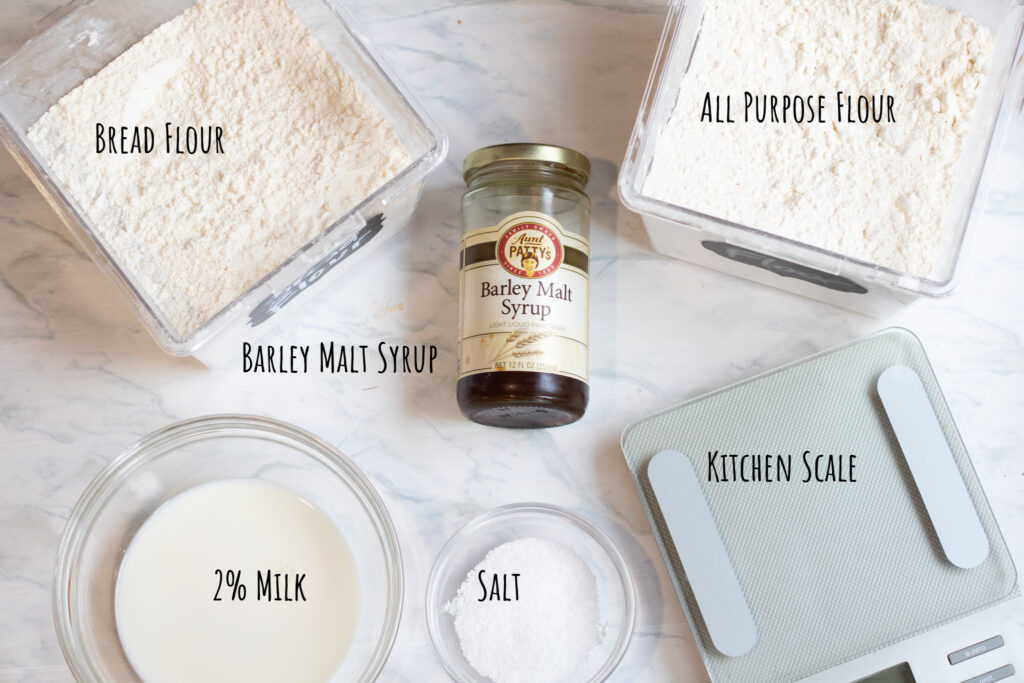
- All Purpose Flour – This is use to make the starter.
- Bread Flour – For the dough of the bread
- Milk – We use 2% for this, but 1% and whole would also work.
- Salt – A finer ground
- Barley Malt Syrup – This is one that you may have to add to your grocery list – except for you beer makers out there! It is made from sprouted barley and is grain syrup and sweetener made from sprouted barley. If you can’t find it at your local grocery store, you can also find it here on Amazon.
- Semolina Flour – For coating the bannetons.
- Parchment Paper – For transferring doughs and baking.
Substitutions: If you don’t have Barley Malt Syrup you can also use Molasses. While it’s also delicious, I do think that there is a richer flavor that comes from the Barley Malt Syrup.
A Note About Flours: Can you use all All Purpose or all Bread? The short answer, yes. However, because of the lower protein count, if you use all purpose for the dough, it makes a looser dough. Also, you could use bread flour in the starter, but it makes for a thicker starter which will change the overall hydration of the dough.
Equipment
While not totally necessary and you can definitely make it without, they will make your life a little bit easier.
Kitchen Scale – This is one that I highly recommend you have. Not only is it preferred for bread baking because the measurements are more accurate, it’s just one of those kitchen tools that you will use ALL of the time (cue to me just using it to weigh packages to be mailed… ha). The one that we have and have loved for many years, they’ve upgraded to this – for still a super affordable price!
- Stand Mixer – This will save your arms / hands from a lot of kneading. Again, not totally necessary, but will help a lot. See recipe notes about kneading by hand.
- Pastry Scraper – Again, not totally necessary but very helpful with shaping the doughs as you’ll see with the dough shaping video in this post.
- Bannetons – These are fun to have but if you don’t have them, you can also just use some linen (don’t use terry cloth!) kitchen towel lined large bowls, too. See recipe notes.
- Bread Lame – A fancy little tool to slash the tops of the bread. If you buys a banneton, they sometimes will come with one. You also can just use a sharp knife.
- Dutch Oven/Large Pots – These are used to bake your bread. You can use either but also could use regular loaf pans, too. See the recipe notes about this.
- Misto – We just love this for any time we need to lightly oil something.
Step-by-Step Instructions
Now I’ll be honest, this Como Bread (Italian hearth bread) is not a super easy bread recipe like some of our others. But I hope to break down all of the steps here and in the recipe card and FAQs to be able to help walk you through it all!

Step 1: Make your starter. This is kind of like when you use a sourdough starter but this is a pre-ferment that uses yeast. The long pre-ferment (which is about 8 hours or overnight) adds a lot of flavor as it’s where the milk and barley malt syrup are incorporated. You’ll know it’s ready and activated once it’s all nice and bubbly!
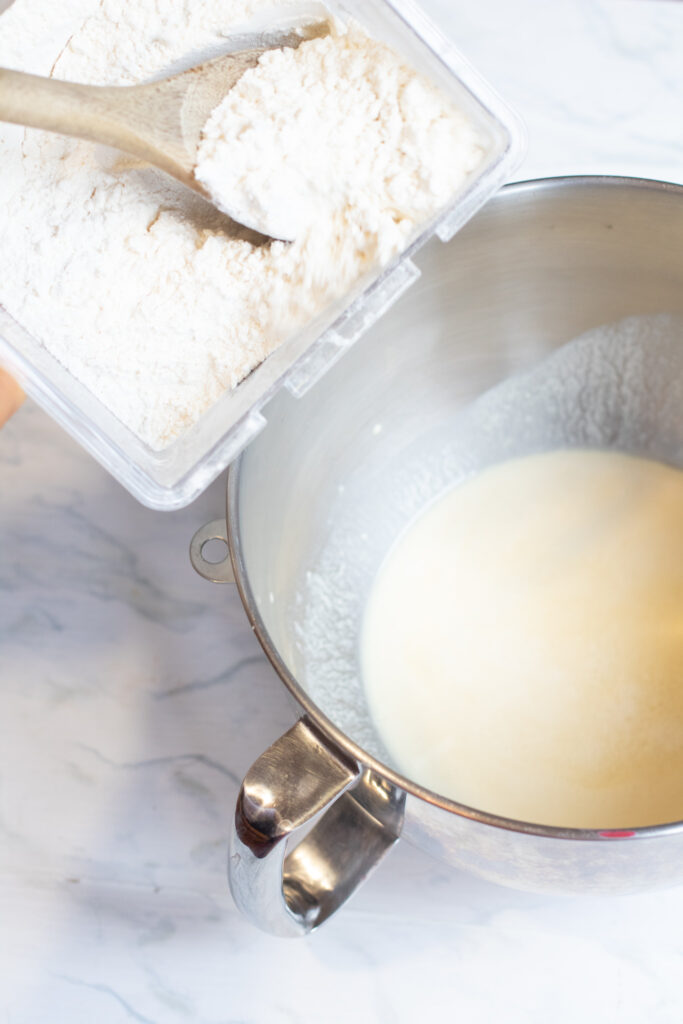
Step 2: Once your starter is all nice and activated, then it needs a little water to thin it out enough to incorporate into the dough. Add it to the stand mixer bowl (or large bowl if not using a stand mixer) to prepare it for the dough.
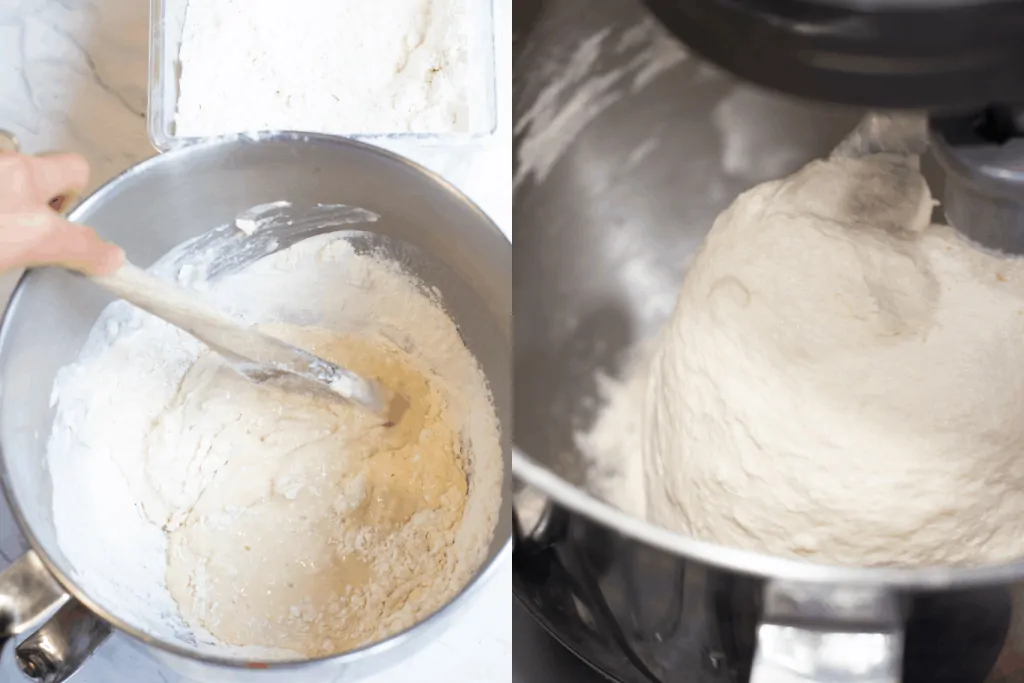
Step 3: Measure out your bread flour with salt and then it’s ready to be added to the starter. Because of the volume of flour, it’s best to add the flour slowly to the bowl of the stand mixer (before attaching the dough hook) and gently fold in the flour to the starter with a large spoon. Just enough to start to incorporate all of the flour and then you can mix the dough in the stand mixer with the dough hook attachment. You’ll let the stand mixer do all the hard work kneading the dough.
Tip: Watch your dough in the mixer. If your dough turns into a ball around the dough hook and is not sticking to the bottom of the mixing bowl at all, then it’s “too tight” and you’ll end up with a loaf that’s way too dense. See FAQs on ways to fix it.
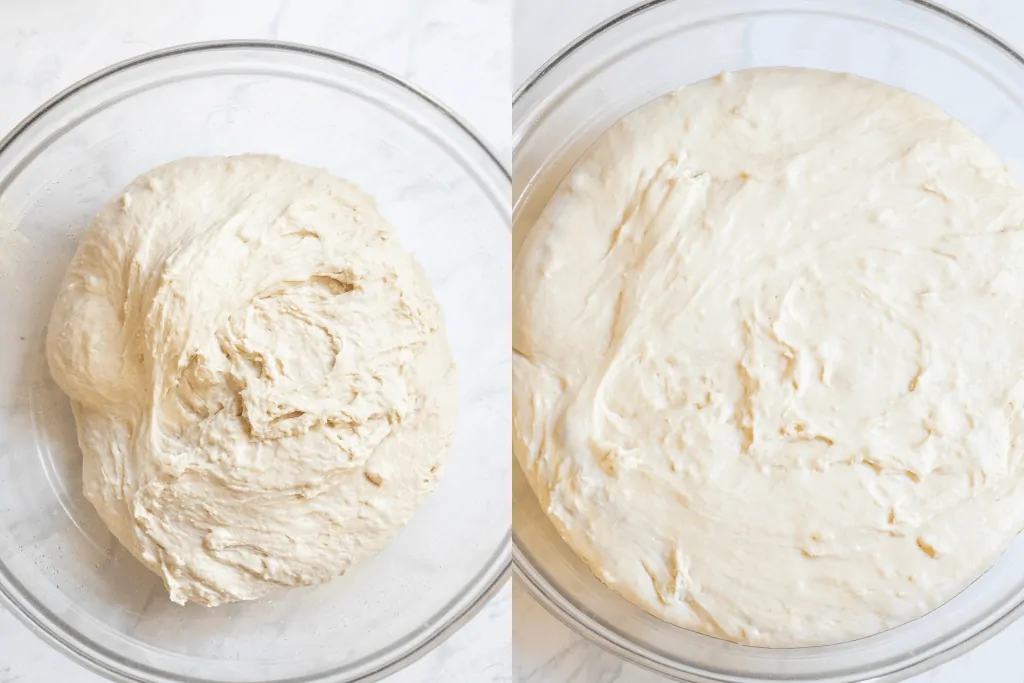
Step 4: After about 4-5 minutes, or until the dough is smooth and pulling away from the side of the bowl but still sticking to the bottom, it’s ready for the bulk fermentation (to rise)!
Tip: You can speed up the proofing process by using a “proof” setting on your oven (if it has it), or even just turning the oven light on. Sometimes the little heat from the oven light is just enough. However, speeding up the bulk fermentation process will effect the flavor because the fermentation process is where a lot of it develops.
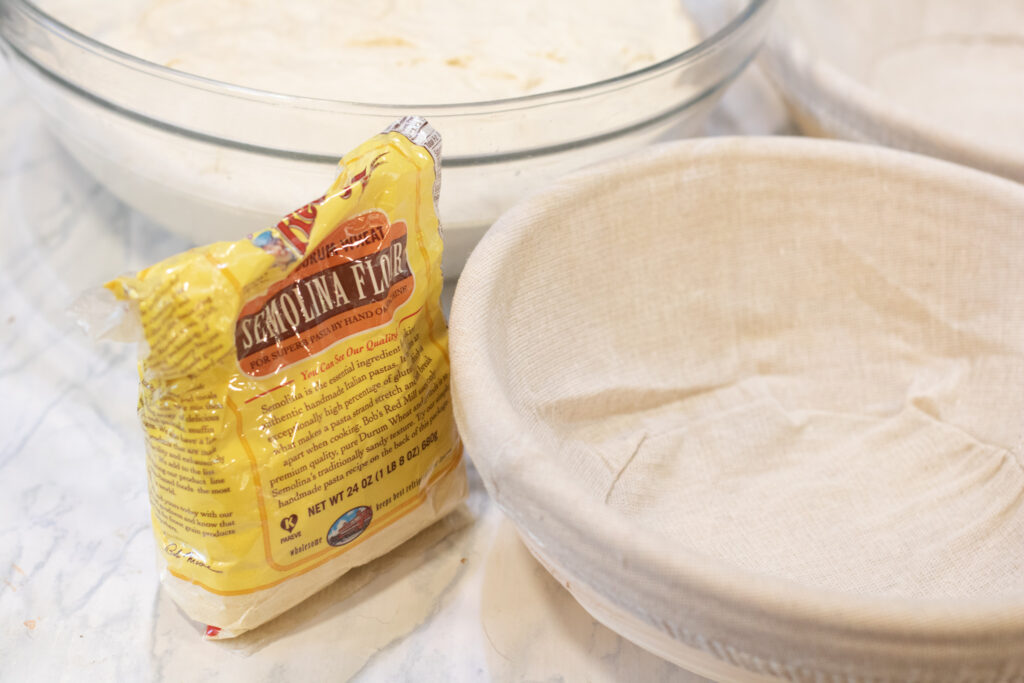
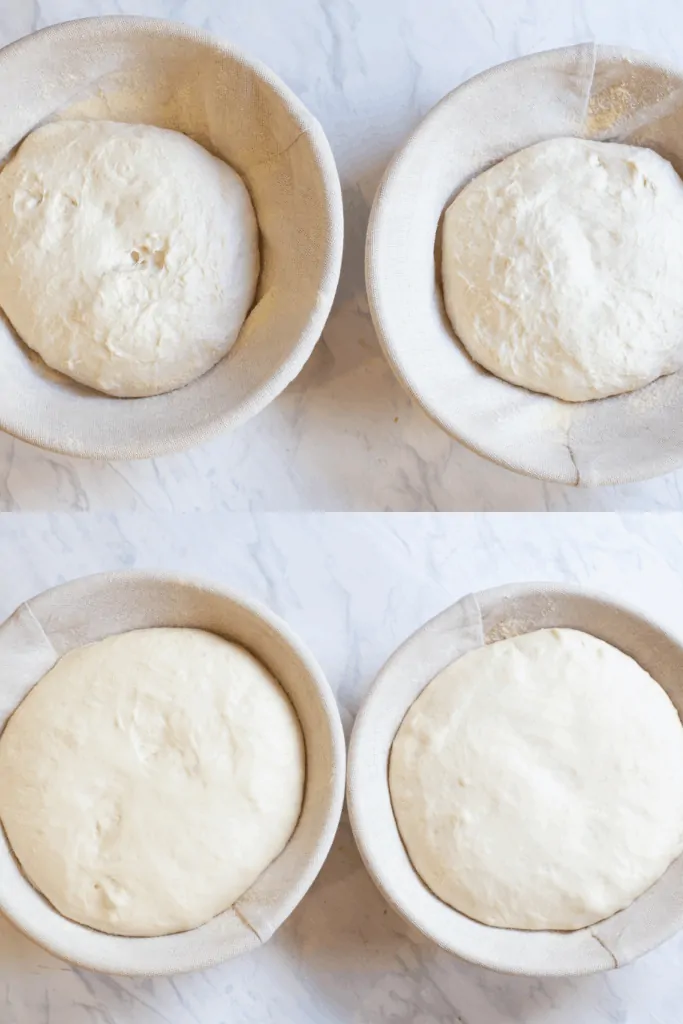
Step 5: Prep your bannetons (or linen lined bowls) by generously coating them with semolina flour (or all purpose flour for linen lined bowls – we always find that the semolina just doesn’t stick to the linen towels for us).
Step 6: Turn risen dough from bowl onto a clean un-floured surface and split in two. Then shape each dough into two balls of dough or boules (See the video below of my husband’s technique!) and then add to bannetons, gently cover and let proof.
Tip: Gently pull aside the edges of your dough when in bannetons (or bowls) and sprinkle in a little more semolina (or flour) to be super sure the dough doesn’t stick.
Step 7: Once your loaves have proofed, they’re almost ready to bake!

Step 8: Transfer doughs to parchment paper. Hold one banneton in one hand and place parchment paper over the top with your other hand. Gently flip the whole banneton over with your hand ready to transfer the dough to the parchment paper and gently place on counter. This is where it’s super important that you floured your bannetons well! Using your bread lame (or a sharp knife) gently score the tops of your doughs.
Tip: If you use a heavy bowls or pots for this crusy bread recipe, enlist the help of someone else to help guide the bowls/pots if heavy. Or you can just turn onto counter and try to keep the round shape.
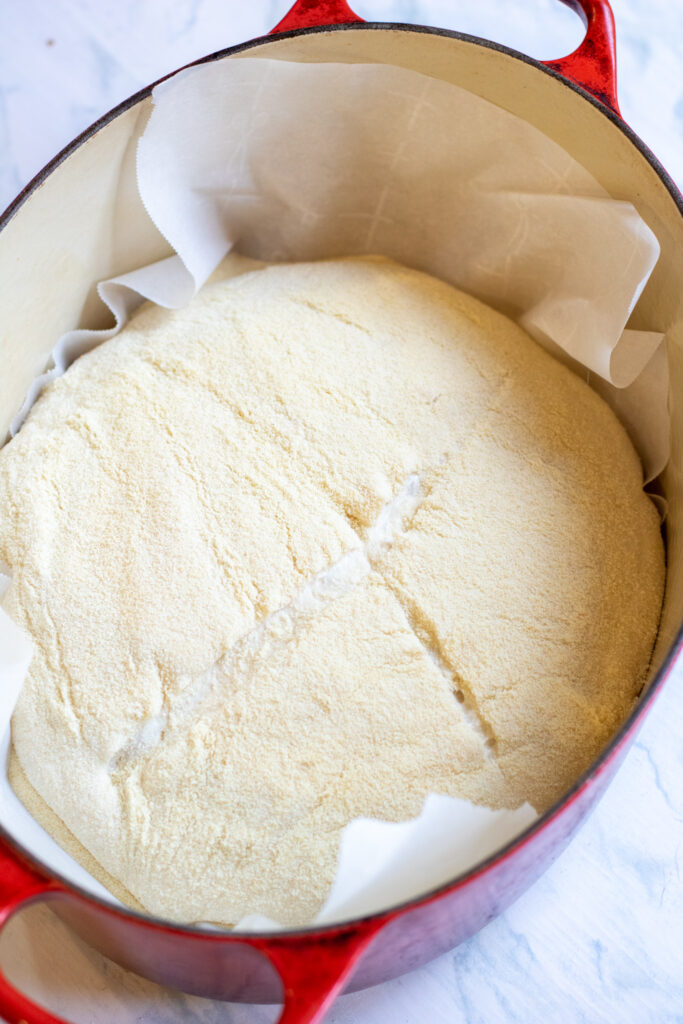
Step 9: Gently transfer parchment paper with dough into a Dutch oven or large pot with lid and bake!
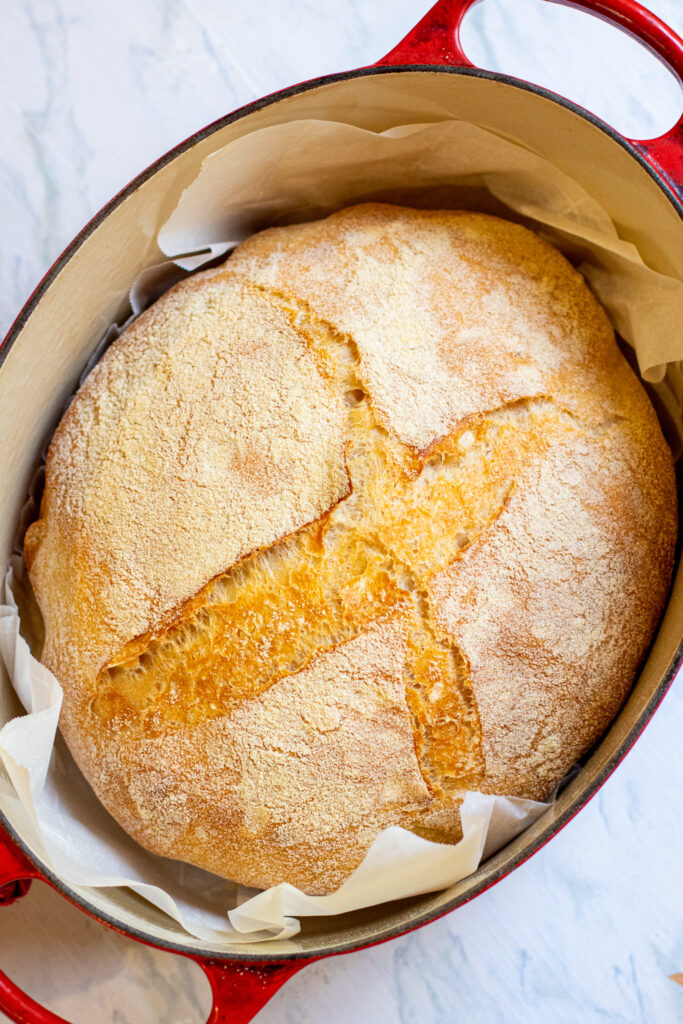
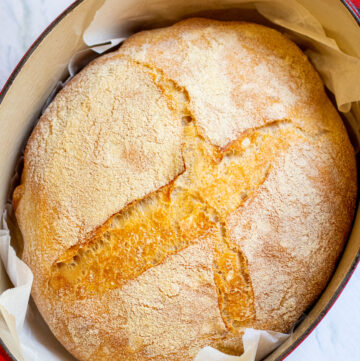
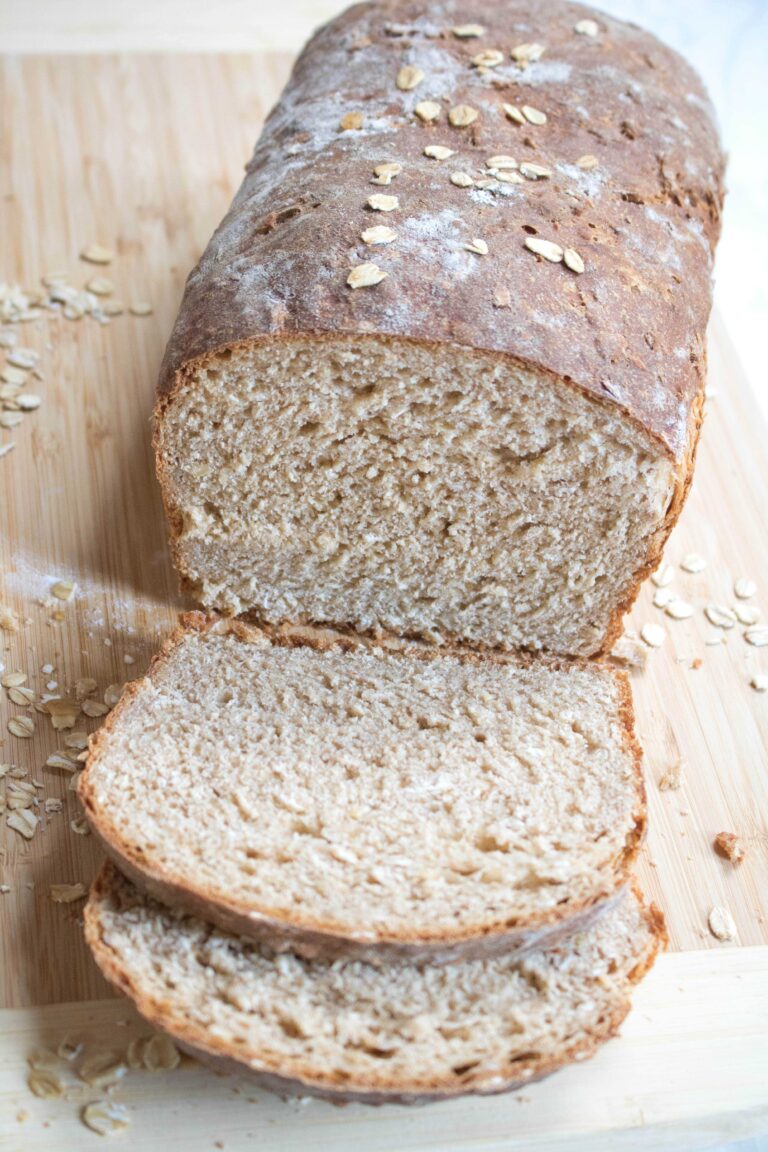
Oh hey, gorgeous. Looking especially rustic and delicious.
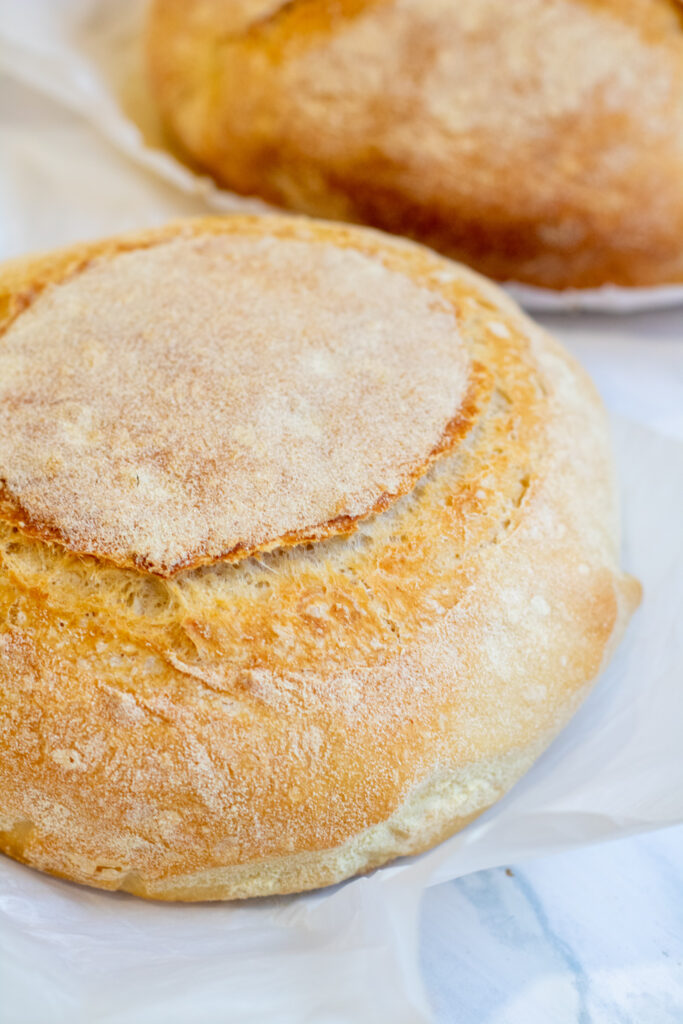
For our loaf baked in a round stock pot, we got this jolly looking fellow with kind of a Friar Tuck like quality.

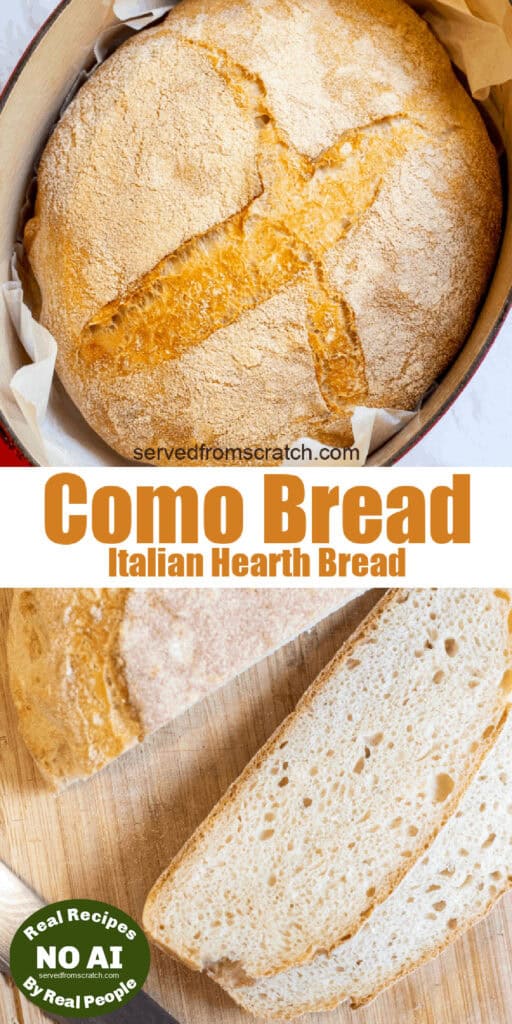
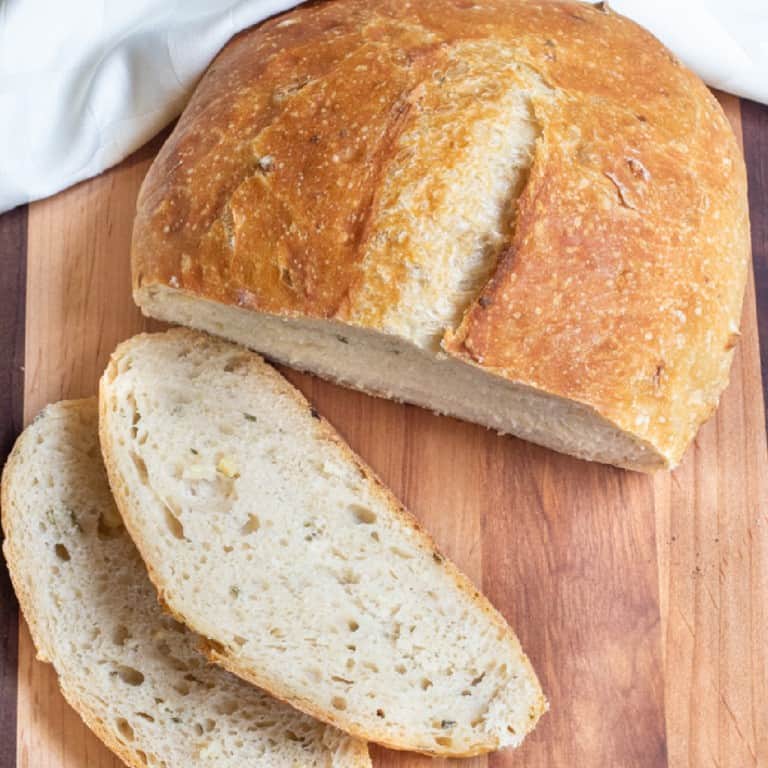
While this is a crusty bread recipe it also has a soft chewy crumb (center). Hearty enough for any sandwich or to sop up any sauce, and flavorful enough to eat with just a pat of butter (or toasted with a drizzle of olive oil with salt, which is how I’d eat it in Italy!)
If you’re looking for a new authentic Italian bread recipe, Dan’s Como Bread is for you! It’s a crusty bread recipe that you will absolutely love! Let our many years of making this and all our tips and tricks encourage you!
FAQs
Yes! You could sub the bread flour for Whole Wheat or Rye Flour, 1:1. Yeast loves rye so actually your dough may rise faster. Whole Wheat is a slower reaction and you’ll have a denser dough.
Nope, but baking by weight is definitely way more accurate. If you’re going to measure by cup, be SURE to spoon and level your flour!
Definitely. It will just take a little more work. After you incorporate all of the flour, turn dough onto clean un-floured surface, and knead with hands for at least 10 minutes until dough is smooth, elastic, and somewhat sticky. Check with the poke test – if it springs back after you poke it, it’s good. Do not flour countertops! It will feel super sticky, but that friction will help stretch the dough and actually make it take less time.
That means it just needs a little bit more water. You can’t add it and then use the stand mixer, you’ll have to knead the dough in the bowl by hand. Just a tablespoon at a time and let mix until it’s tacky and elastic.
No problem. For this crusty bread recipe, you can use pots or large bowls lined with flour – works just as well. Just be sure to not use terry cloth towels!
Yes BUT… this will limit the flavor in your starter because it’s not a slow pre-ferment. Just watch for maximum activity of the starter – when it has doubled in size and when it’s ready.
No problem! You can use molasses or even maple syrup.
No. You can transfer directly to your hand or turn on to counter before forming and adding to parchment lined Dutch oven or pot.
Sure! Instead of using the bannetons all together, you could use large loaf pans. Grease the pans and then cut a piece of parchment paper for the bottoms. Then let them proof in the loaf pans. This will make nice tall sandwich style loaves.
Not for the whole time. For the first 20 minutes (this is what creates steam for the oven spring) and then remove for final browning.
Gently tap the bottom of the bread and if it sounds hallow, it’s done. Or if it has an internal temperature of at least 200 degrees F.
Our Other Homemade Breads
- Easy White Sandwich Bread
- Easy Dinner Rolls From Scratch
- Easy Crusty French Baguette
- NY Deli Rye Bread
- Copycat Dave’s Killer Bread
- No Knead Rosemary Garlic Bread
Enjoy! As always, if you make this recipe or any of my others, I love to hear what you think! Leave a comment below, email me, or you can find me on Facebook, Instagram, and Pinterest!
If you want to see more, be sure to sign up for my 5 Easy Ways to Start Cooking From Scratch!
Ingredients
Starter
- 1 teaspoon active yeast 5 grams
- 1 teaspoon malt barley syrup 10 grams
- 1/3 cup warm water 80 grams
- 2/3 cup 2% milk, at room temperature 151 grams
- 1 cup all purpose flour 135 grams
Dough
- 2 cups warm water 480 grams
- 7 1/8 cups all purpose flour 860 grams
- 1 tablespoon salt 17 grams
- 1/2ish cup semolina for dusting
Instructions
Make the Starter
- In a medium sized bowl, add the water, yeast, and molasses. Mix well and then let sit for 5-10 minutes, until the yeast is frothy.
- Add milk and flour and stir until combined.
- Cover the bowl with plastic wrap and let it sit out on the counter until it is bubbly – at least 8 hrs or overnight.
Make the Dough
- In the bowl of a stand mixer add 2 cups of warm water and stir with a spoon until starter is all incorporated.
- In a large bowl, measure out flour and salt and mix. Then add to the stand mixer with the starter and gently mix with a large metal spoon (by hand) until as much of the flour as your can manage is wet and incorporated. It's ok if all of the flour isn't – the stand mixer will take care of it. This is just helping it along.
- Return bowl to stand mixer with dough hook attachment and then mix on medium for 4 minutes. The dough will be a little sticky and elastic. While mixing, the dough should easily come away from the sides of the bowl, but still stick to the bottom of the bowl. If all of the dough is in a ball around the dough attachment and isn't sticking to the bottom of the bowl, your dough is too dense. See recipe notes.
- Lightly oil a large bowl with misto and add the dough. Cover with plastic wrap and let dough bulk ferment (rise) until it has doubled. About 90 minutes. You can speed this along if you have a proof setting in your oven or you can just turn the oven light on and put in the oven.
- Prep bannetons by generously coating them with semolina flour. If using bowls or pots, line with linen towels.
- Once doubled, turn dough from bowl onto UN-floured counter. Divide the dough in half and then shape them into round loaves. Do this by gently stretching the dough into rectangles, then fold over in thirds (like a letter), and repeat. Then on the sides where you'll see the layers that you just folded on top of each other, pull a small piece of the edge of the bottom layer to the top of the dough and gently pinch it into the center to hold it in place. Do this until you have a pretty round dough. Do for each half and then place in prepared bannetons or bowls. Gently lift the sides of the doughs to add a little more semolina (or flour if using regular bowls). Optional- Use a dough scraper to round the dough and get rid of the "seam" which will help with the oven spring. To do this, use the scraper to pull the dough (while keeping the ball shape) toward you. The dough will stick to the counter, but use the scraper to gently pull it and unstick it from the counter as you pull. Refer to video in post if necessary.
- Gently cover bannetons with linen towels and let the dough proof until it has roughly doubled in size, about another hour. Be careful to not over-proof.
- Meanwhile, pre-heat oven to 400 degrees and set oven rack to center (or as close to it to fit your pot with lid).
- Once doughs have proofed, gently cover with parchment paper. Hold banneton in one hand and parchment paper covered top with the other. Gently turn out the dough onto the parchment paper and on to a clean countertop. If using heavy bowls or pots, enlist some help or you can just gently turn doughs on to parchment paper, trying to maintain round shape as much as possible.
- Using a sharp knife or bread lame, score the top of your loaves at least 1/2 inch deep.
- Lift doughs on parchment paper and gently place in dutch oven or pot. Cover with lid and bake for 20 minutes – you can bake both at the same time.
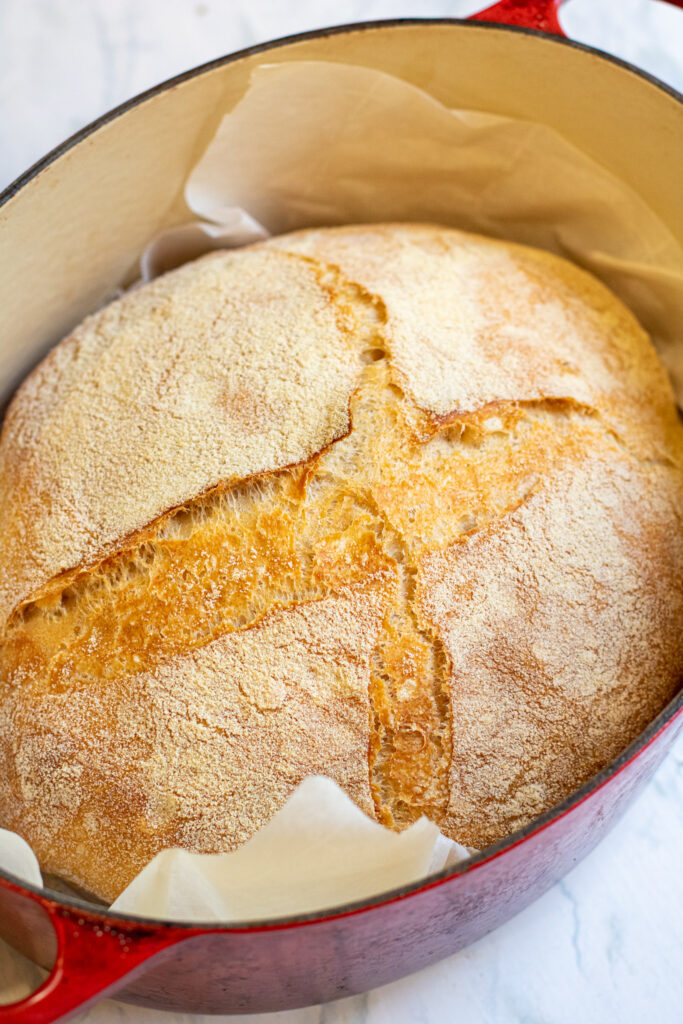
- After 20 minutes remove the lids and continue baking for another 40 minutes or until tops of loaves are golden brown.
- Gently tap the bottom of the loaves and if they sound hallow, they're done. You can also check the internal temperature and if it is 200 degrees F, it is done.
- Allow the loaves to cool completely on a wire rack (at least an hour otherwise you can make the crumb of your loaf gummy) before slicing and enjoy!

Fantastic recipe! The first time I made this straight out of Carol Field’s book….but something didn’t quite turnout. A fellow baker on Reddit recommended Dan’s recipe to me and I think I nailed it! Thank you for the video too – it was so helpful.
I love to hear it, Jamie! Thank you SO much for taking the time to share!
Update: The bread was delicious with all-purpose flour!! One of my favorites to make and eat. Thanks again.
I found your detailed instructions really helpful. The bread is out of the oven, but I am waiting for it to cool. When I dumped it out of the bannetons, even though careful, it deflated. I was happy to see that once in the oven, it rose again. One note on your recipe, on the ingredients under “dough” it should say bread flour not all-purpose flour. I had read through the entire recipe instructions the day prior and forgot your initial instructions to use bread flour in the dough that was said at the beginning. I was following the printed directions on the recipe and used all-purpose. I then remembered it was recommended to use bread flour for the dough. Too late. Although it will turn out okay, you may want to correct that. Other than that, it was a joy to make with all of your pictures and detailed instructions. Thanks so much! Kaye
I am currently making this bread because it looked very intriguing to me. It looks very tasty. One thing I have noticed which has been very confusing to me and I found out the hard way is that will you convert from the two loaf to a one loaf batch That the volume amount change accordingly but the weight measurements in grams do not change. These confusion continue on through the instructions on how to assemble this and where I got caught was adding 2 cups of water to my starter when I should’ve added one. I have since corrected all of the weights That are listed. Just be aware of this. I would think if you were going to change the volume accordingly that you would’ve changed the weight also but I guess not.
I’ve many loaves of Italian bread………….this one is the best ever! m Love, love, love it!! Great video also!!
Thank you so much for sharing, Christine! I’m so glad you enjoyed it! 😀
Thank you for this. This is almost the same as Carol Field’s como bread in The Italian Baker. But I’ve made hers (the classic) many times and the dough was impossible. I knew I needed to use more flour but was hesitant since the recipe was classic. Dan did use more flour, even though the weight was the same. The bread turned out terrific. This post gave me the courage to do what I needed to be done.
This is so wonderful to hear, Andree!! Thanks so much for sharing!
We have fallen in love with Dan’s Como Bread recipe! Thank you for sharing.
This bread is totally delicious! From now on I will be baking our Como bread and not purchasing it. It tastes excellent fresh, and it also works perfectly as toast with some creamed honey on top.
I love love to hear it, Karen!! So glad that you all enjoy it as much as we do! Thank you so much for taking the time to rate and share!
Recipe sounds great. The commentary from the author is hilarious.
I have one question (and I am great at math…). After about how long should I expect to test the loaves’ internal temperature? Without it, I will likely pace around the kitchen, irritating my wife.
Thanks.
Hi Donald, thank you! Cooking time is about 40 minutes – so please don’t subject your wife to 2400 seconds of pacing! I’m not good at math, but I am good at using a calculator! 😉 Enjoy!
After looking at four other recipes for Como bread, I found your recipe. It seemed the most straightforward one. I tried it today. The results were excellent. A really big hit with my wife.
I did make a few minor changes. I had no barley malt as we have never used it before, so I substituted 2/3 teaspoon of molasses for the 1 teaspoon of barley malt syrup. I checked the loaves for doneness at 22 minutes since bread I made in the past finished early. They passed the doneness tests. Also, as I don’t have a pizza peel I simply put parchment paper on a baking sheet and baked the bread that way. I omitted the cornmeal step. This is definitely a make again recipe.
Donald this just made my day!! So great to hear and thank you for your feedback! You know – I meant barley malt syrup for the recipe! But molasses was a great sub. So glad you enjoyed it!
This bread came out perfect the first time. Delicious with a thin crisp crust. I used Molasses and 1% milk. and only did a 6hr. Pre-ferment. Can’t wait to try this with an overnight sponge. Thanks so much for this great recipe.
Have you ever made the bread with an overnight dough ferment in the refrigerator?
Hi Mike!! This is SO good to hear, thank you so much for sharing! Yes, we have! We thought that it muted the sweetness a little bit, but that it also enhanced the overall wheat flavor. Please let me know what you think if you make it again, this way!
Love the blog ! I bow to your superior Herman experiencedness. We are having our own adventures with our very own addition to the kitchen. My question for you is: Do you think we can use our already 12 day old starter for this recipe? If so how much would you say to match this recipe’s version of starter? I suppose I could just do the maths 🤷♂️
Thanks in advance for your time and again I really enjoyed the blog. Great pics and commentary. You guys make a great team!
Check out our YouTube chronicles of Fermen the Herman. @TheCooksCreate. We’d love your feedback👍
Yay! Thank you! I have always wondered why Grand Central’s breads are so much better than everyone else. I am guessing the malt has something to do with it. So I just decided to try to make either their Como or Rustic Baguette. Since I don’t have a baguette form I was looking for a Como recipe. I can’t wait to try it!