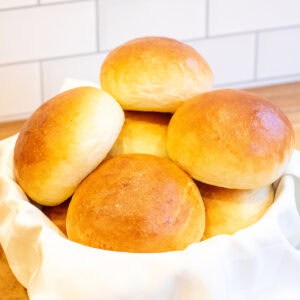
Homemade Brioche Buns

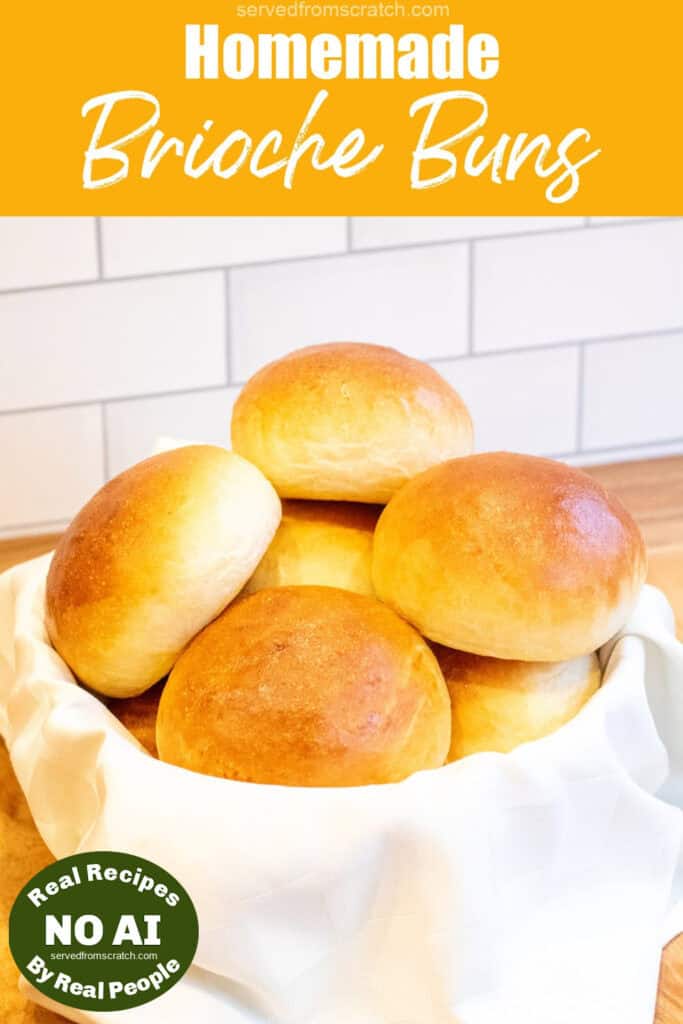


Soft on the inside, golden on the outside, and oh so delicious! Save money and learn how surprisingly simple it can be to make your own Homemade Brioche Buns with just a few staple ingredients and some time.
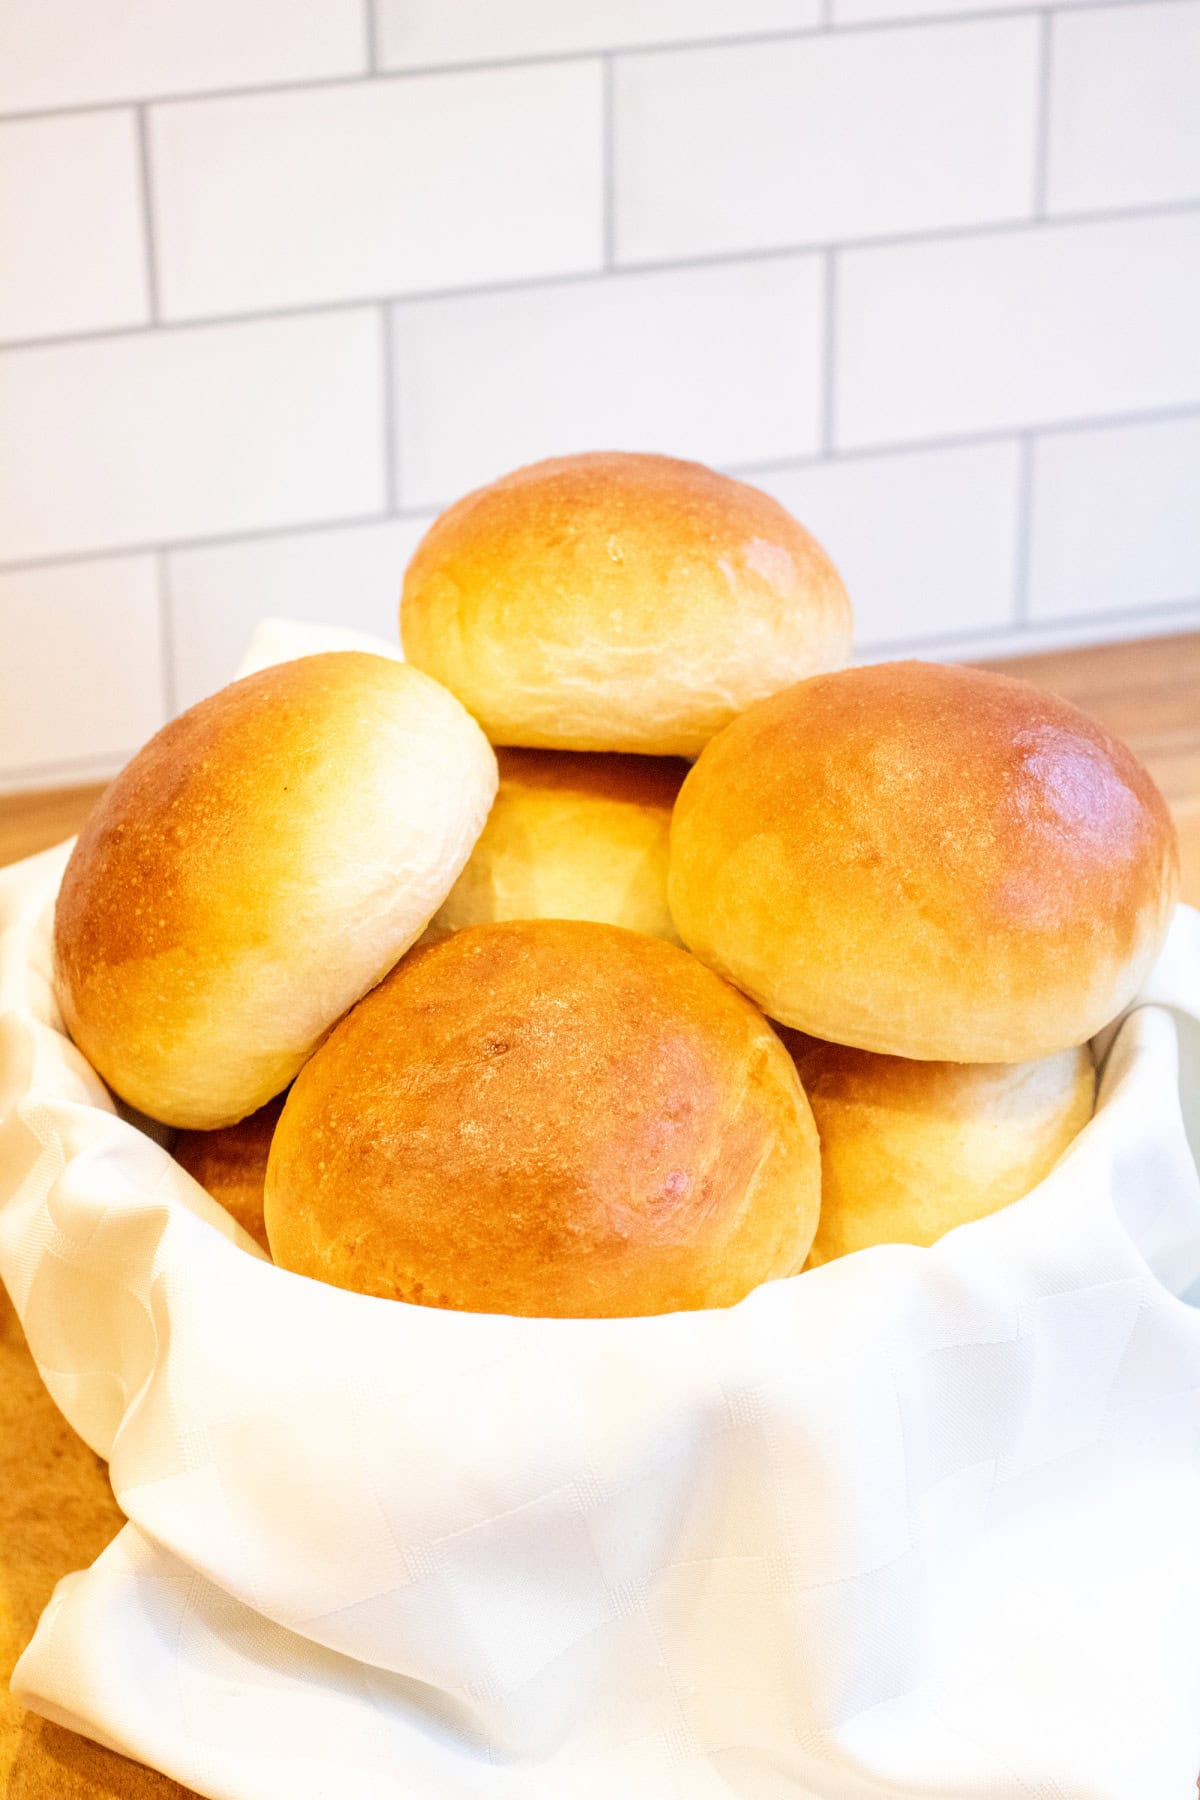
We have a treat for you all today! Our Homemade Brioche Buns recipe is one that my husband has been working on for years. Many, many batches of buns have been made over the years, and finally, we have a recipe that is everything you want from this classic bun. They’re soft with a tender crumb, a beautiful golden top, rich, and subtly sweet, making them the perfect vessel for everything from a juicy burger to your favorite sandwich!
What are Brioche Buns?
Brioche Buns are tender, rich buns that are made with an enriched dough. Enriched dough means that it is made with butter, sugar, and eggs in addition to the standard (lean) doughs of flour, water, salt, and yeast. The added fat from the butter and eggs and sweetness from the sugar all work together to create a rich, soft, and tender bun.
Ingredients Needed
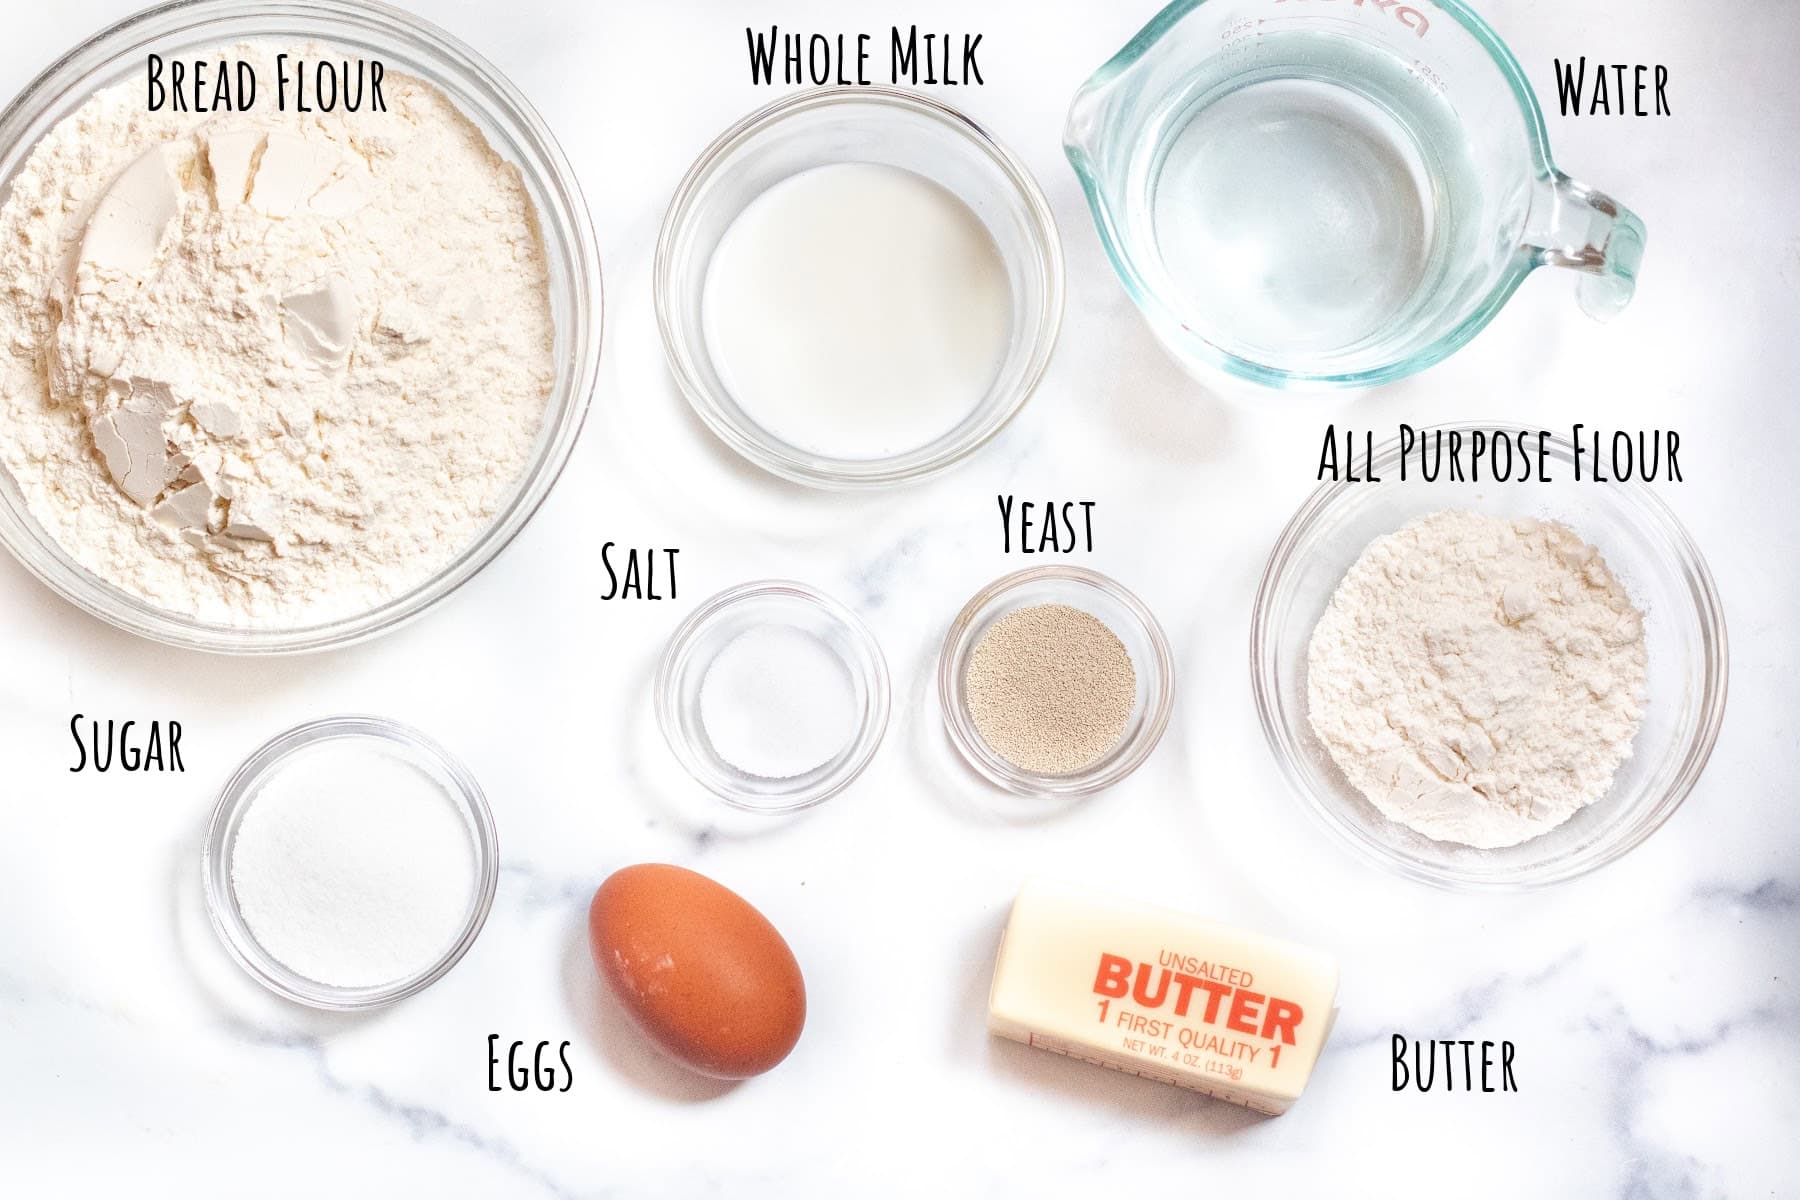
- Bread Flour and All Purpose – We use both bread and all purpose flour because using some all-purpose flour reduces the overall protein count in the bread, which ultimately yields a fluffier, softer roll.
- Egg, Butter, and Whole Milk – This is the “fat” and leavening of the “enriched dough.” It is important to use whole milk here, you want that full fat milk!
- Sugar – Just enough to add the right amount of subtle sweetness.
- Salt, Water, and Yeast – Key ingredients for any bread!
Helpful Tools
(Amazon affiliate links)- You can find all of my kitchen essentials here!
Stand Mixer – You can make this dough without a stand mixer and just by mixing by hand, or a hand mixer, but a stand mixer will make it much easier and faster!
Kitchen Scale – The most important tool for your kitchen when baking. They’re fairly inexpensive and will be worth every penny because weighing your ingredients is truly the best way to ensure the most accurate and consistent results when baking. Not only for the dough, but also to help ensure you have buns that are all uniformly sized, too!
Mixing Bowls – We love these glass mixing bowls and use them for everything!
Baking Trays– To bake those beautiful brioche beauties on and also to create some steam in the oven when baking.
Oil Spray – We love this little oil sprayer, it makes spritzing oil (of your choice) so easy!
Dough Cutter– This will make separating dough balls easier, and also great to use to scrape/clean up excess dough on a counter!
Spatula and Wooden Spoon – These will help with the first mix of the dough and also with turning the dough out of the bowl.
Easier Than You Might Think
While certainly not as easy as our No Knead Rosemary Garlic Bread, these buns do take a bit more care and technique, but with our step-by-step instructions, you’ll be surprised by how they’re easier than you might think to make!
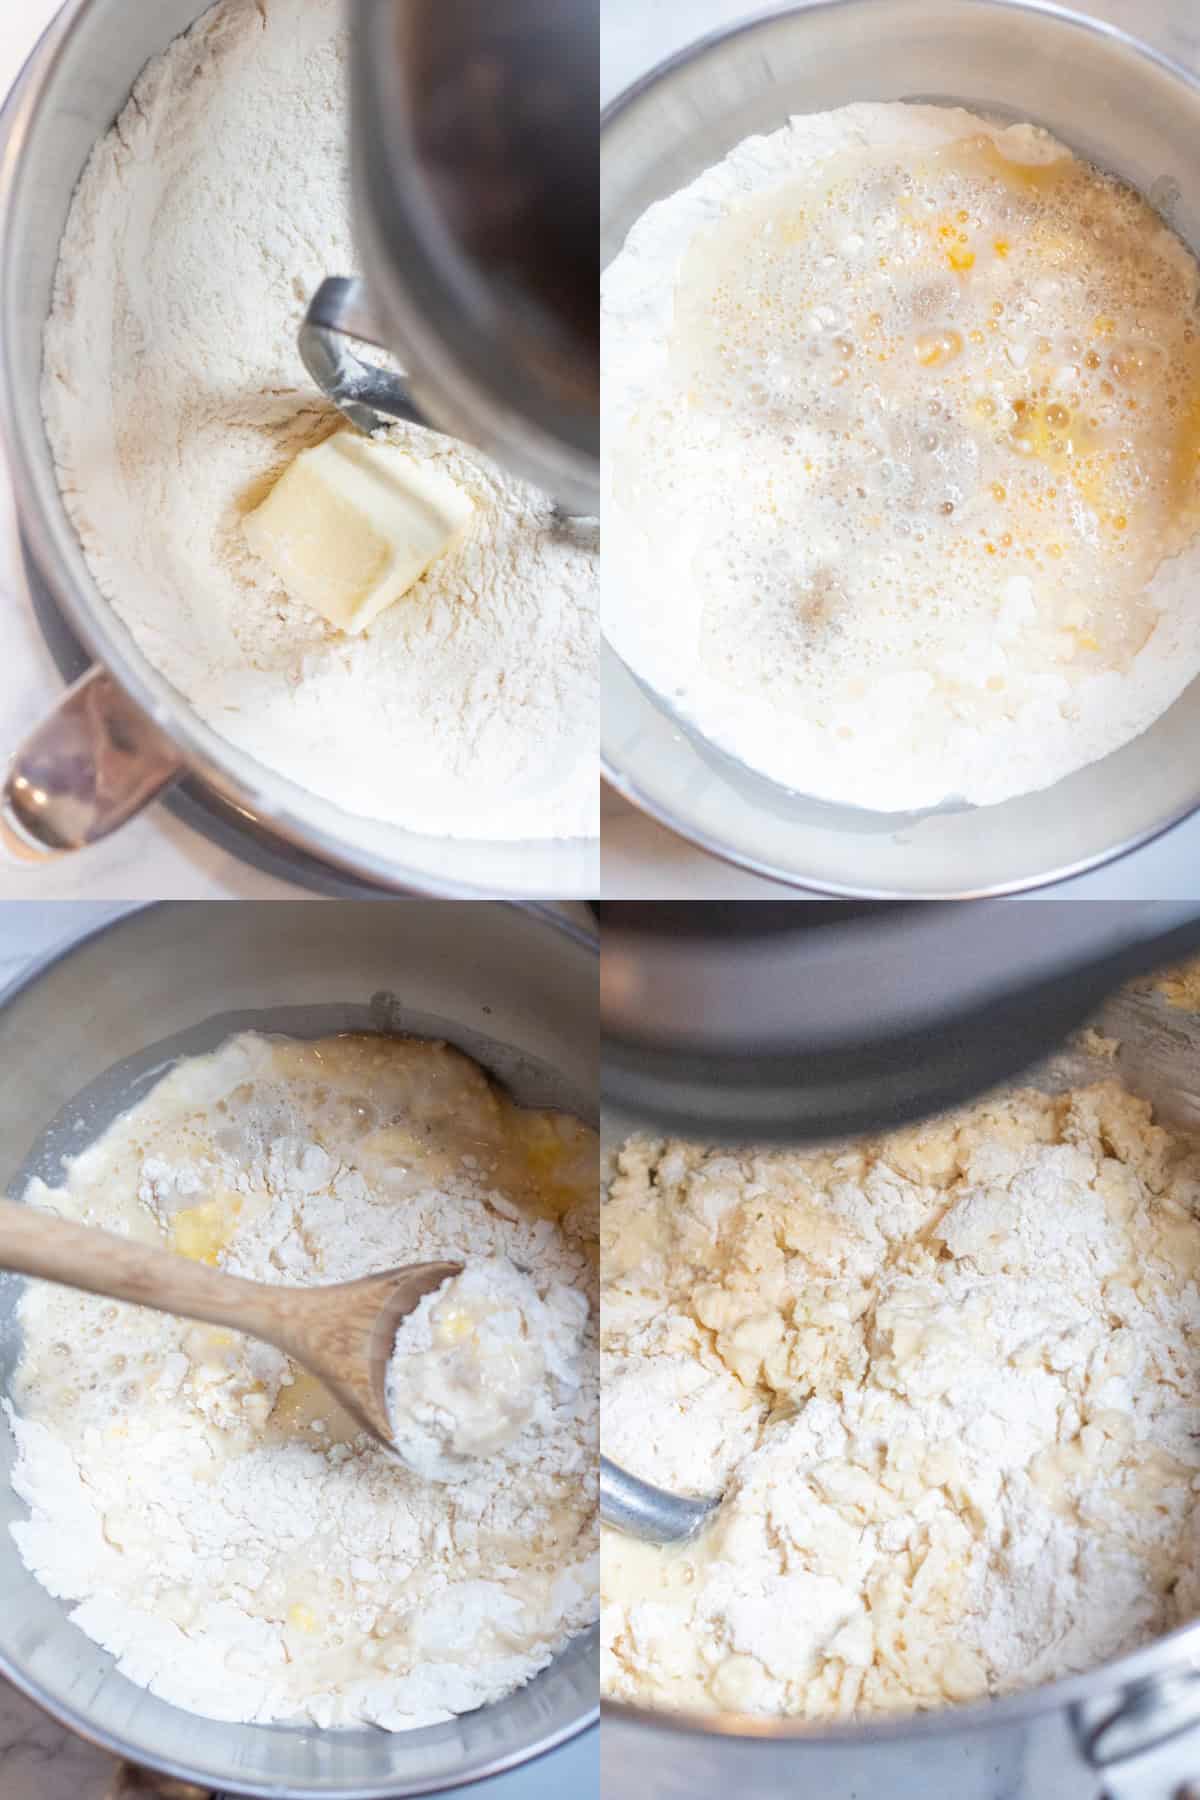
The first step is creating the dough. This involves mixing in some very soft butter into the flour before adding the activated yeast, water, milk, and egg.
Pro Tip – Dough Mixing
Grab a wooden spoon, or another large spoon, and give the dough with the milk, water, egg, and yeast a few quick turns by hand before turning on the mixer. This will ensure that the flour incorporates better during the mixing process.
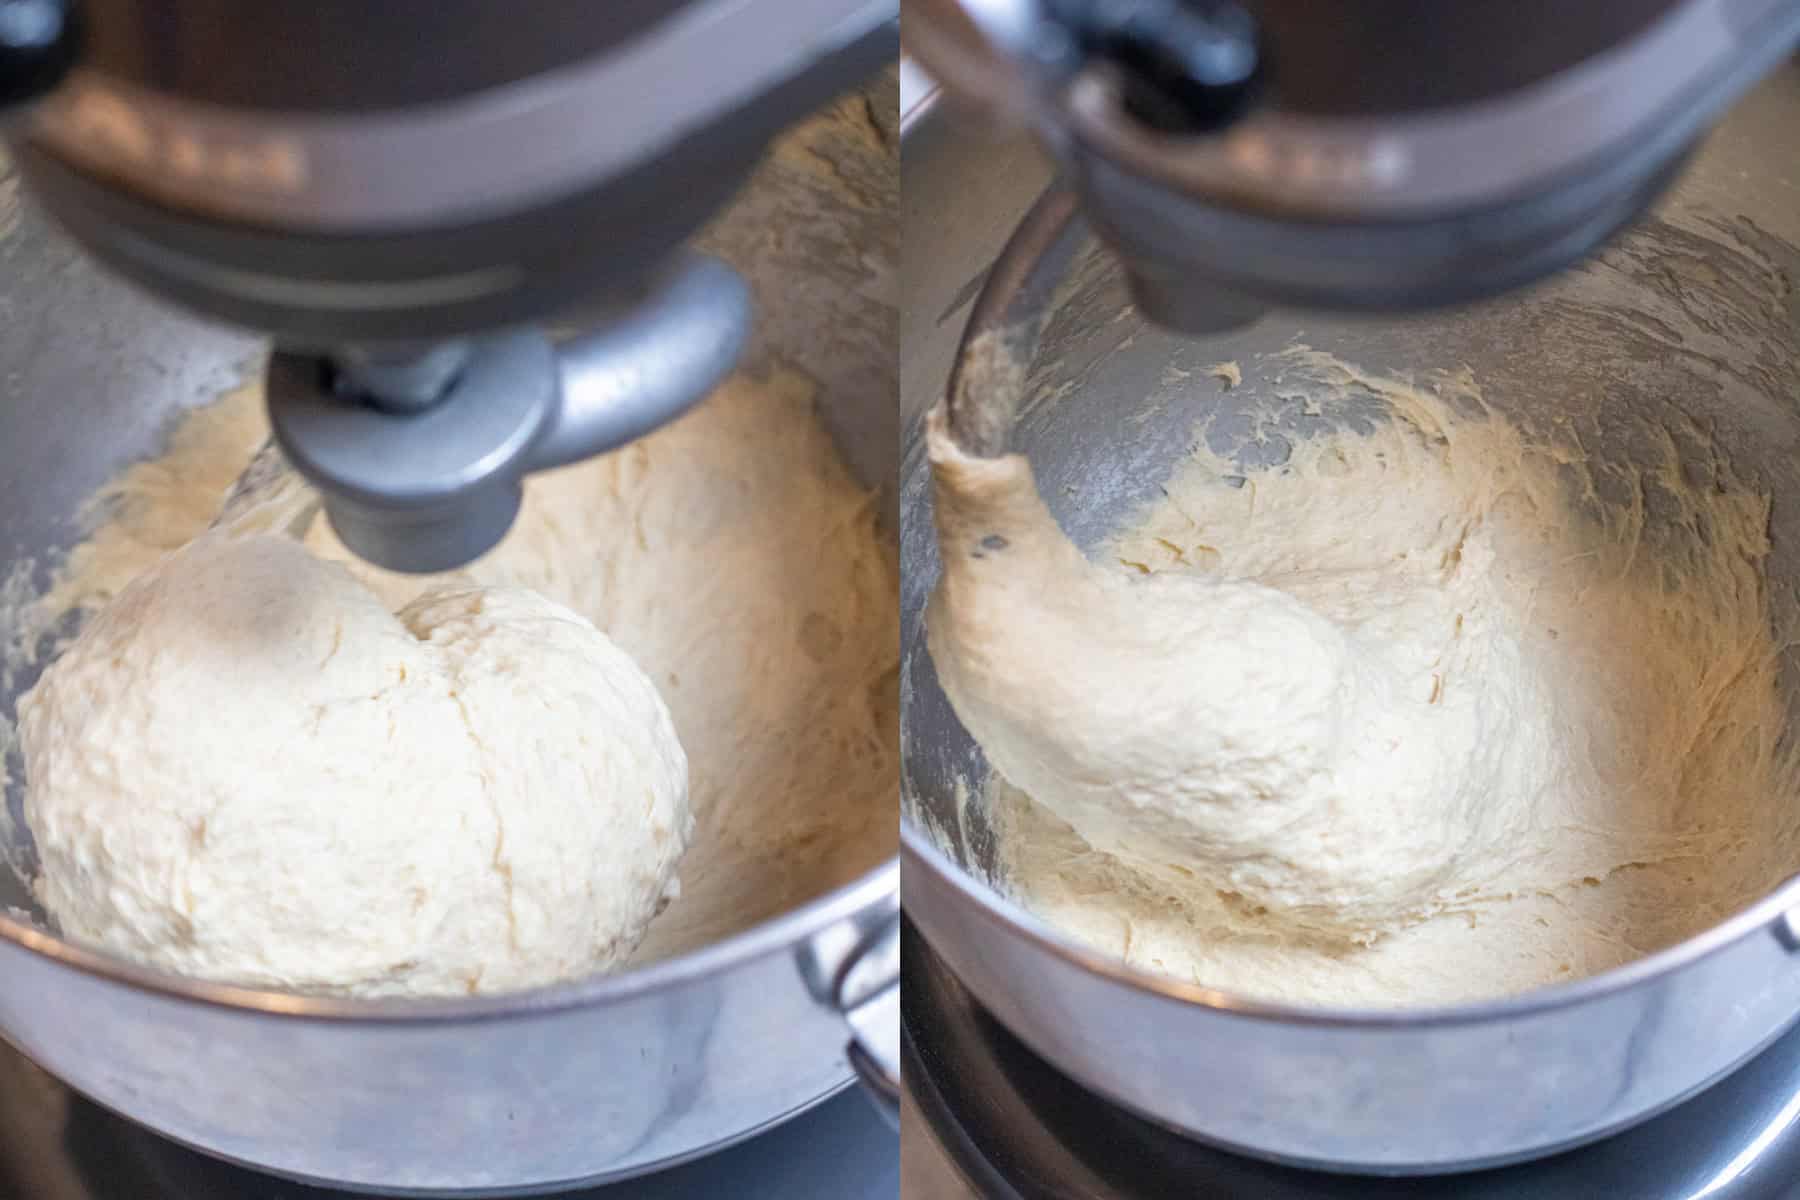
Now, let your stand mixer do the rest of the work! Medium speed for 7 minutes and you’ll have a very, very sticky dough.
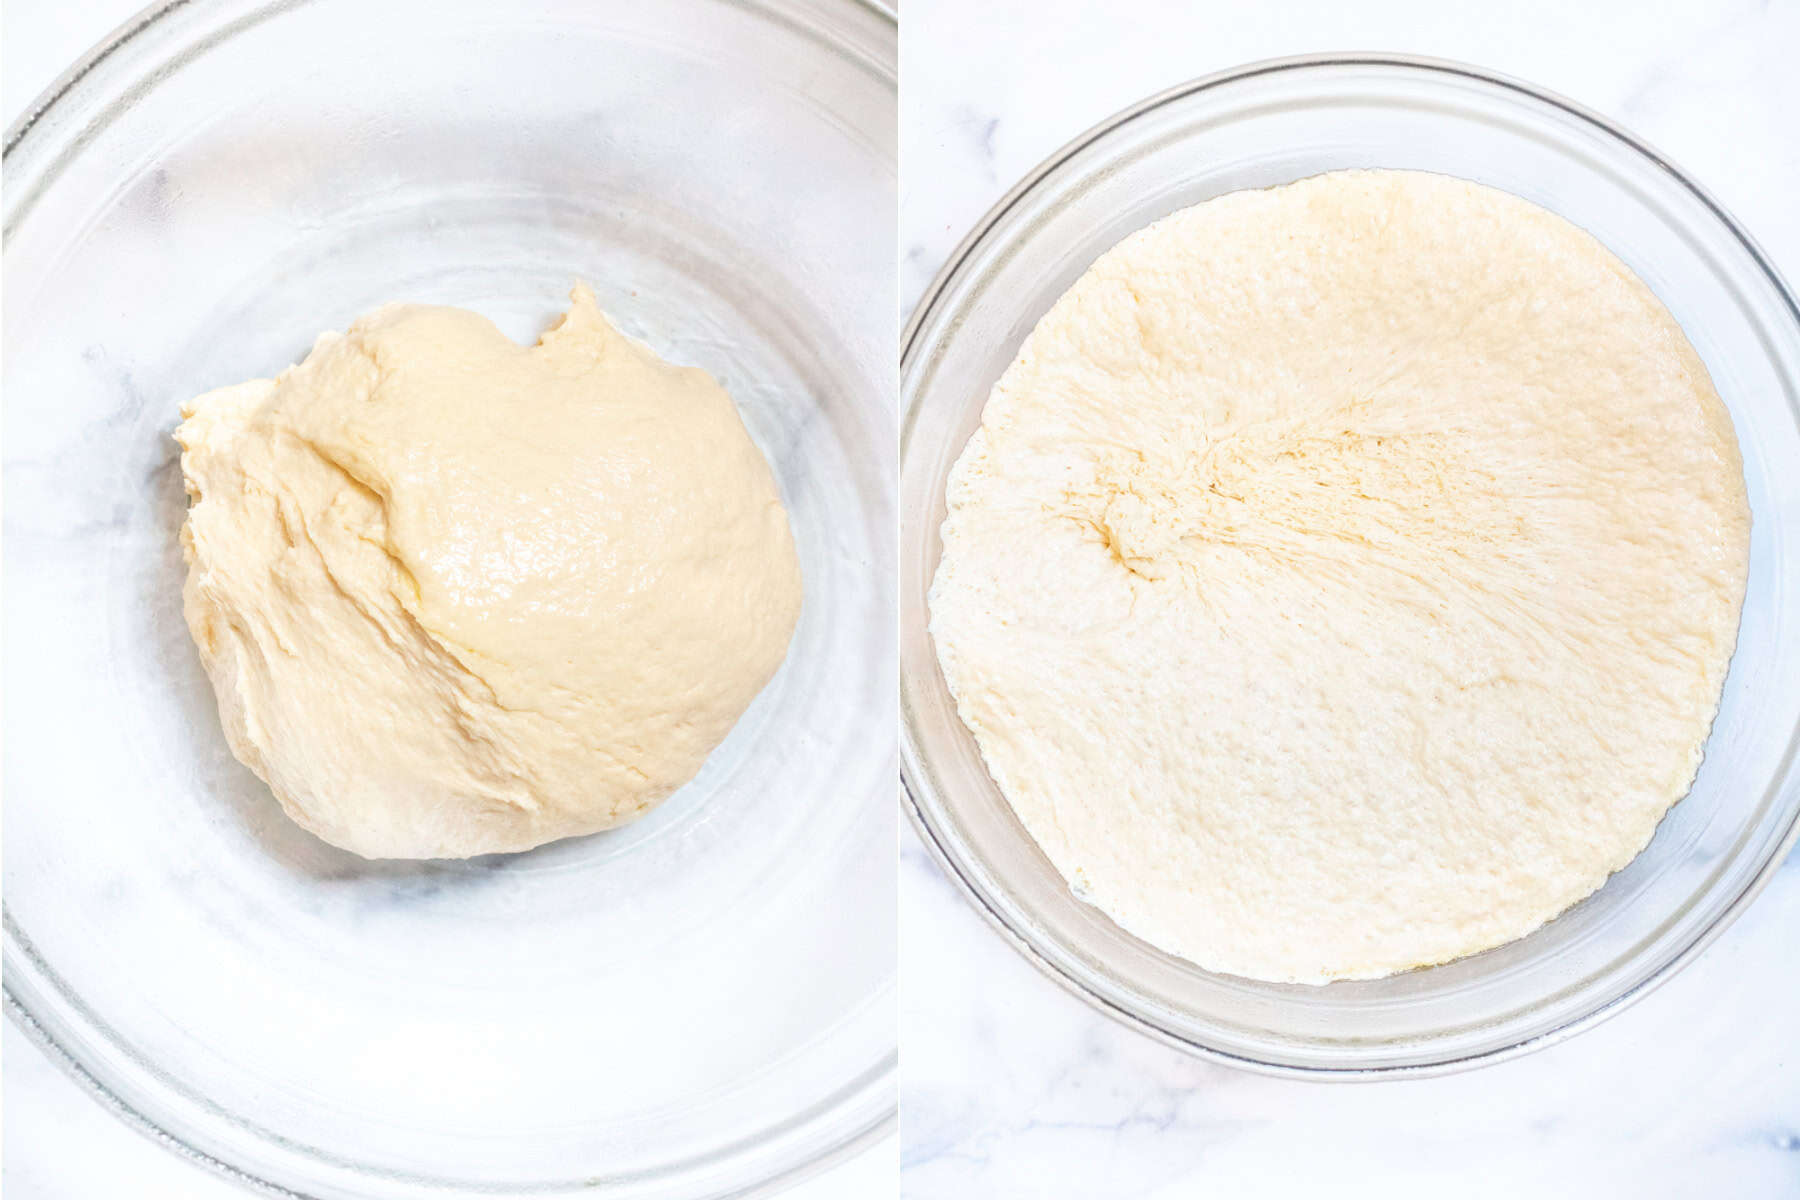
Add that sticky dough to an oiled bowl and let it rise!
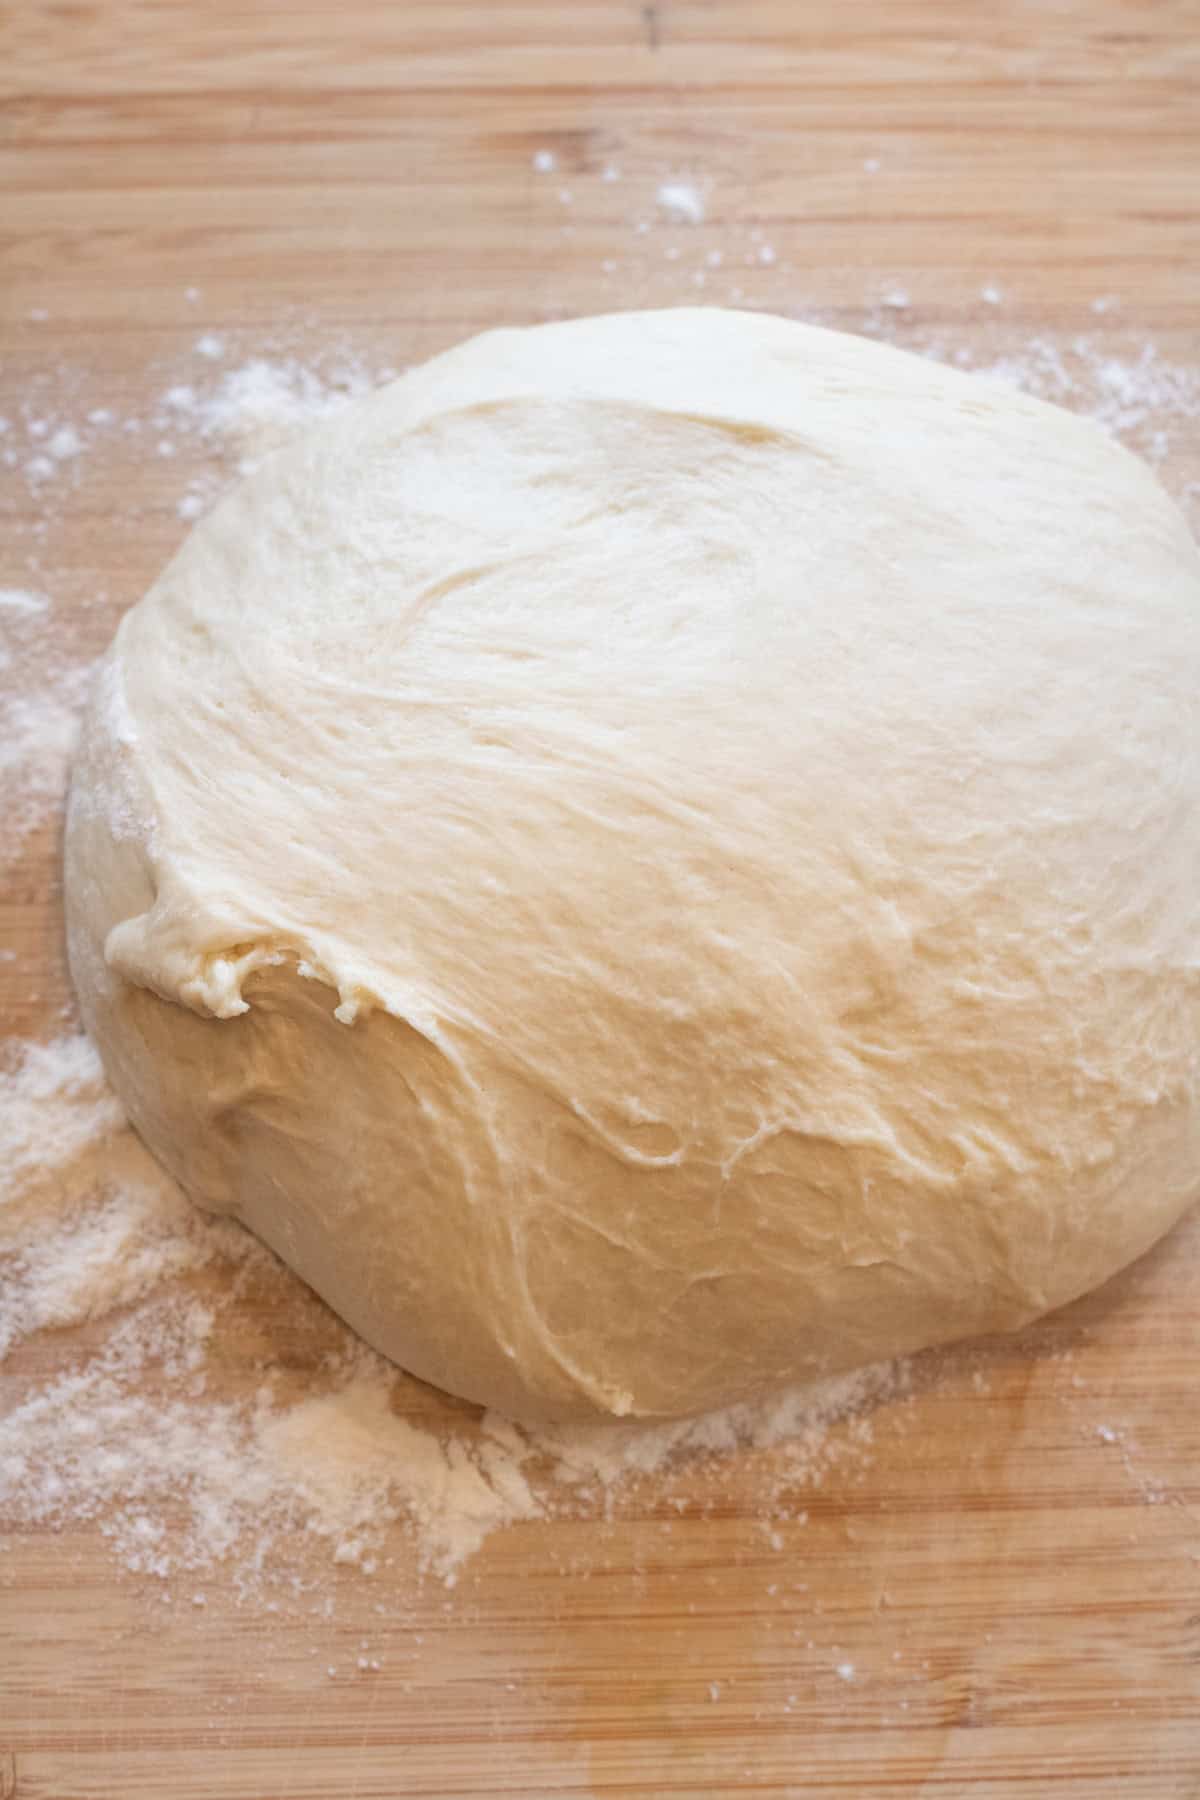
Turn that dough out onto a floured surface and you’ll have a super soft, beautiful dough, ready to become Homemade Brioche Buns!
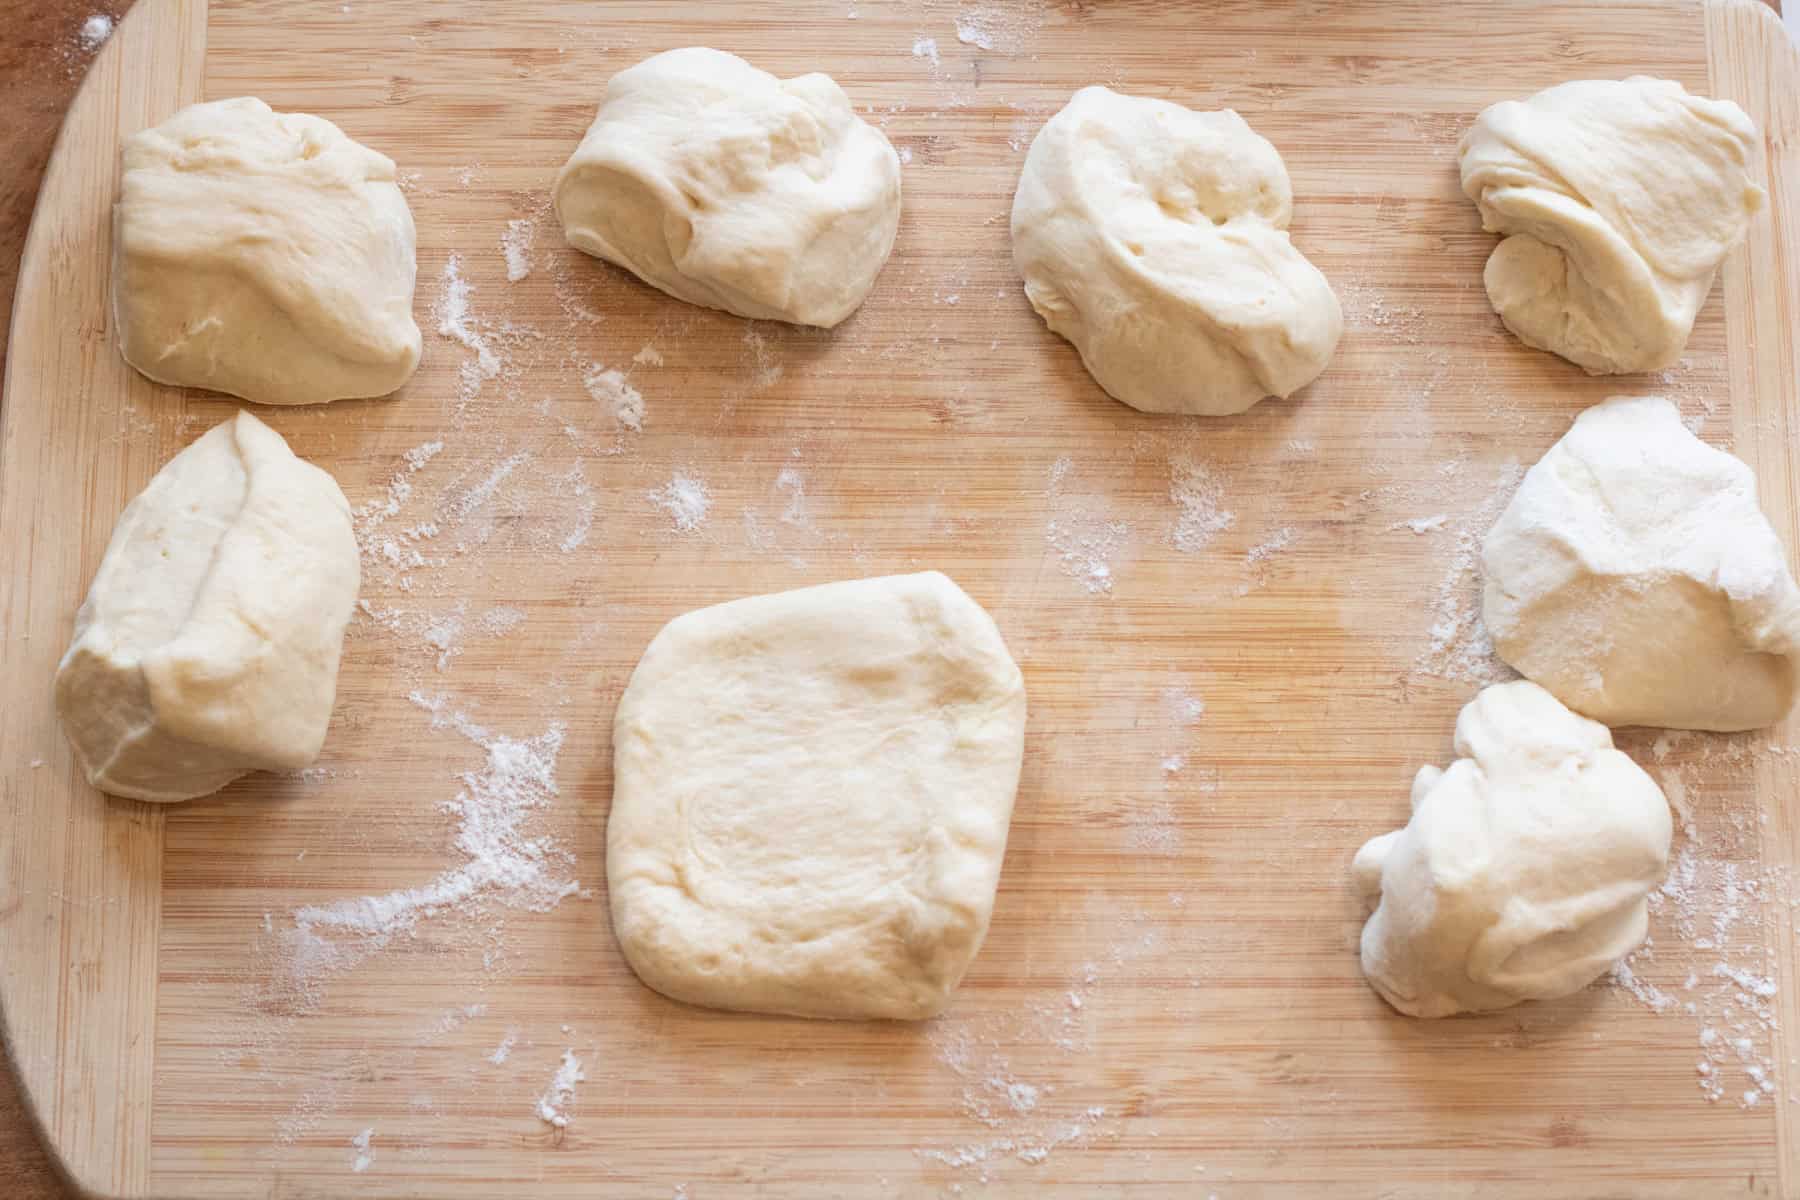
Use your handy dough cutter and kitchen scale to separate 8 little dough balls.
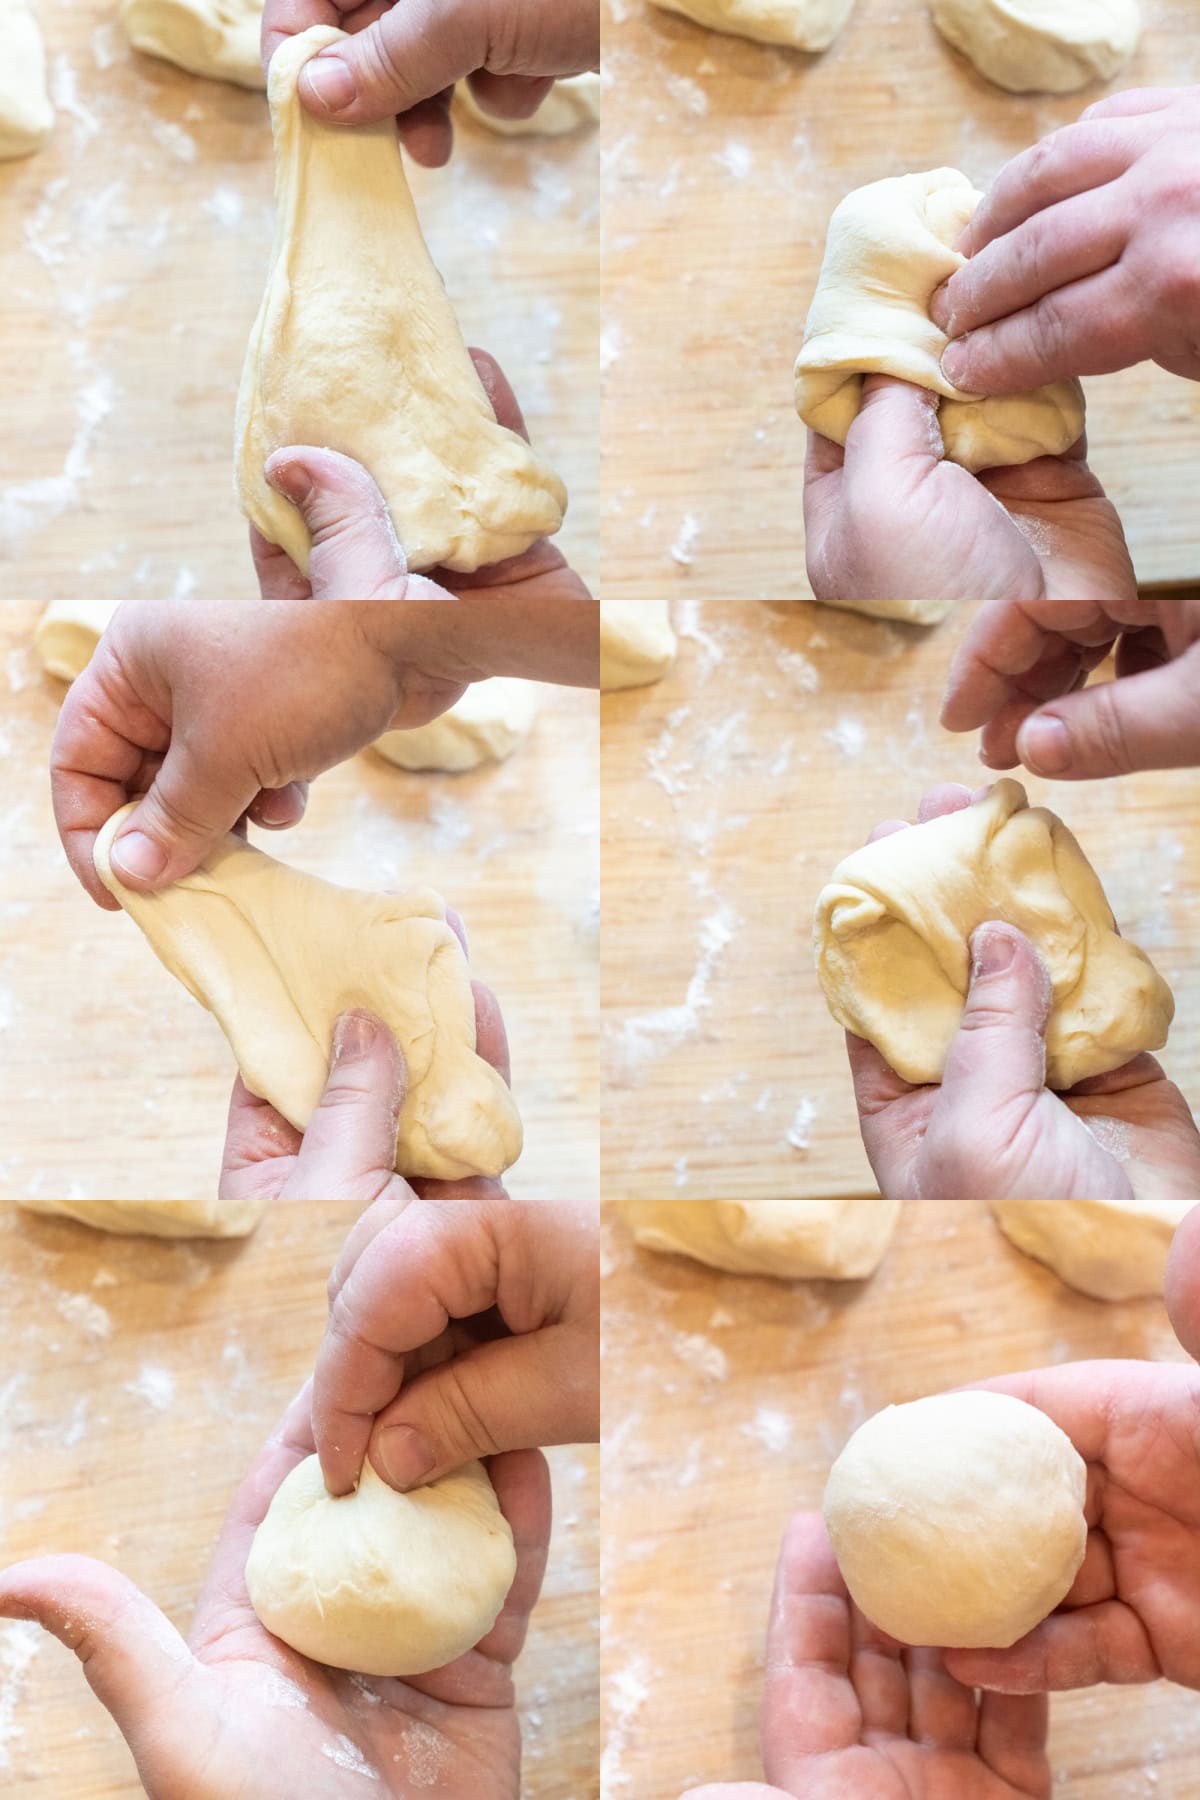
Now the fun part – shaping the balls! To ensure the right texture of the final baked Homemade Brioche Rolls, be sure to follow our step-by-step instructions in the recipe card to shape these beautiful little rolls.
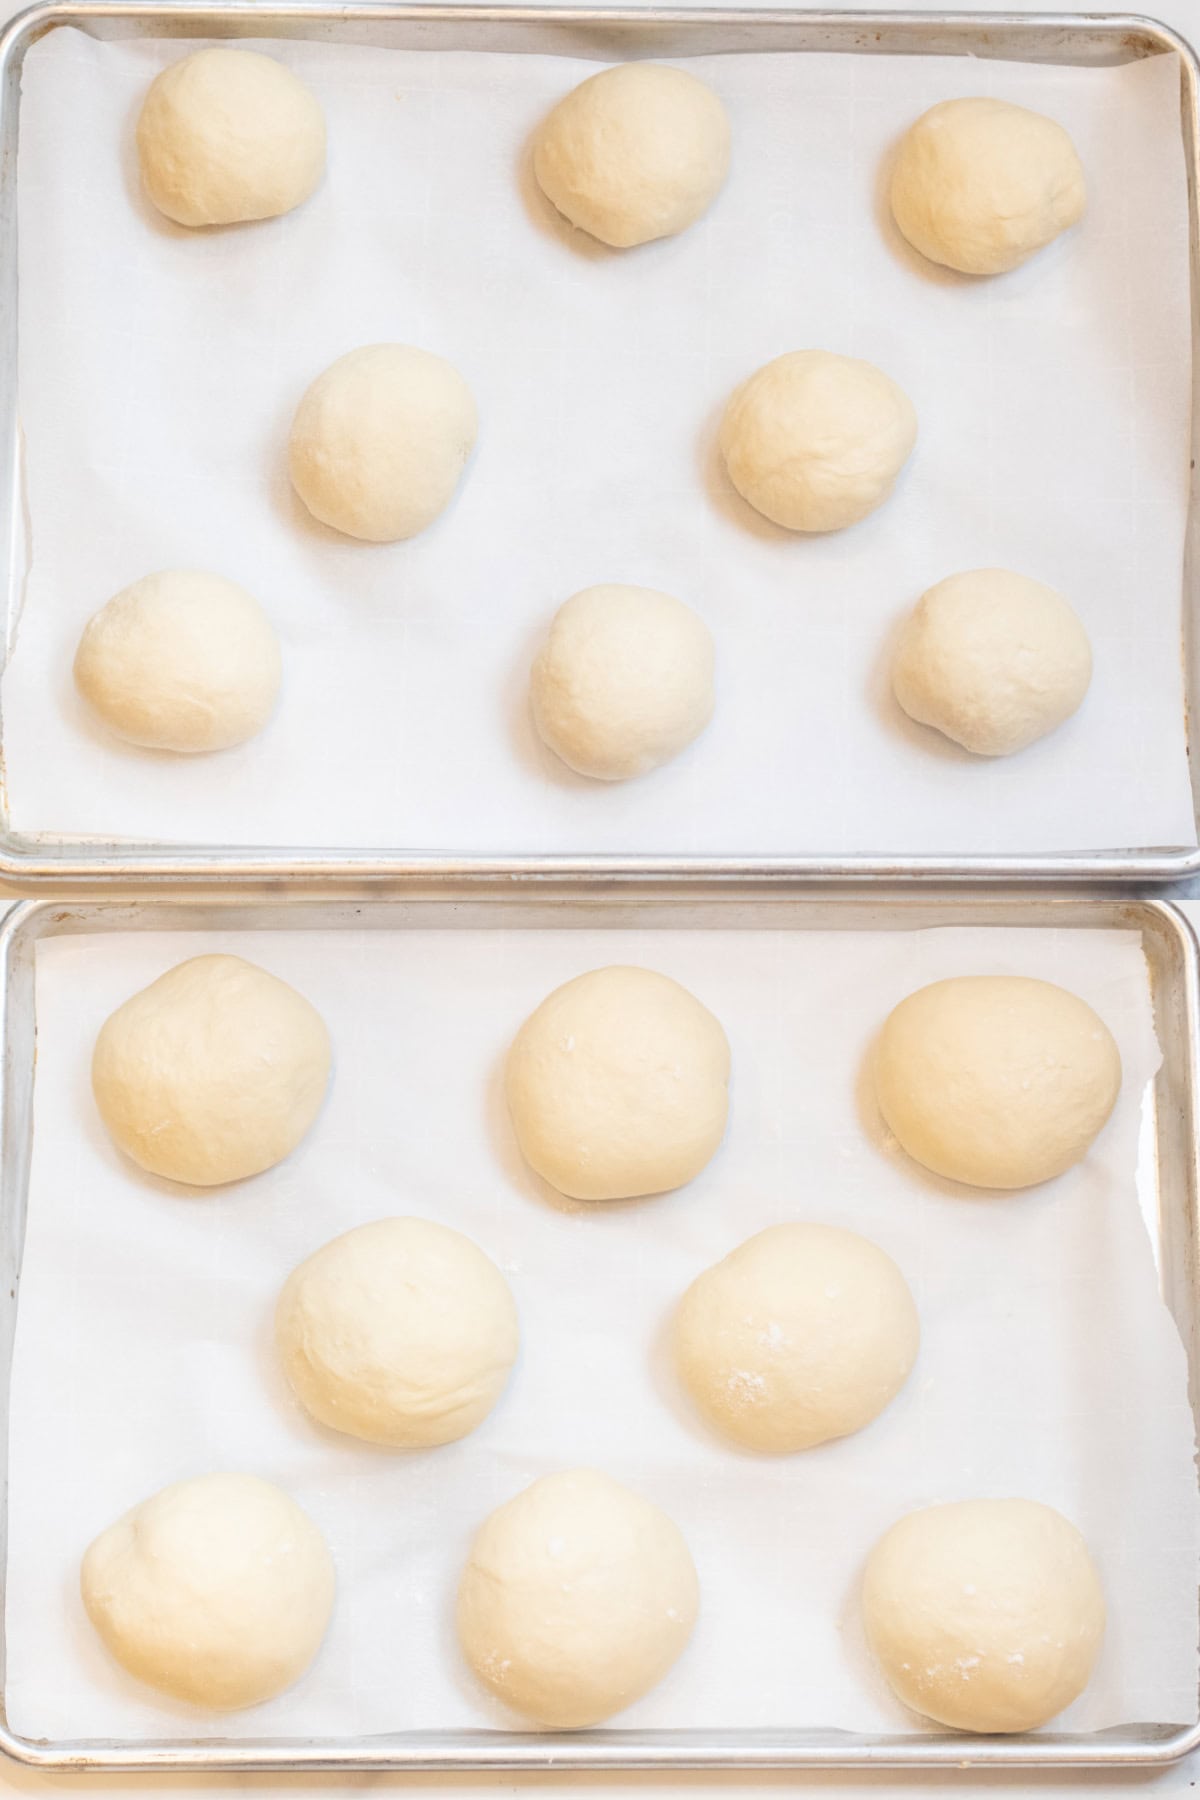
Once all of your dough balls are shaped, place them on the parchment paper lined baking sheet, gently cover them with a clean tea towel, and let them rise one last time.
2nd Rise – Pro Tip
For that second rise, because this dough is so soft and sticky, sprinkle just a tiny bit of flour on the top of your little dough balls before covering. This will prevent them from sticking to the towel and messing with the shape of your little dough balls.
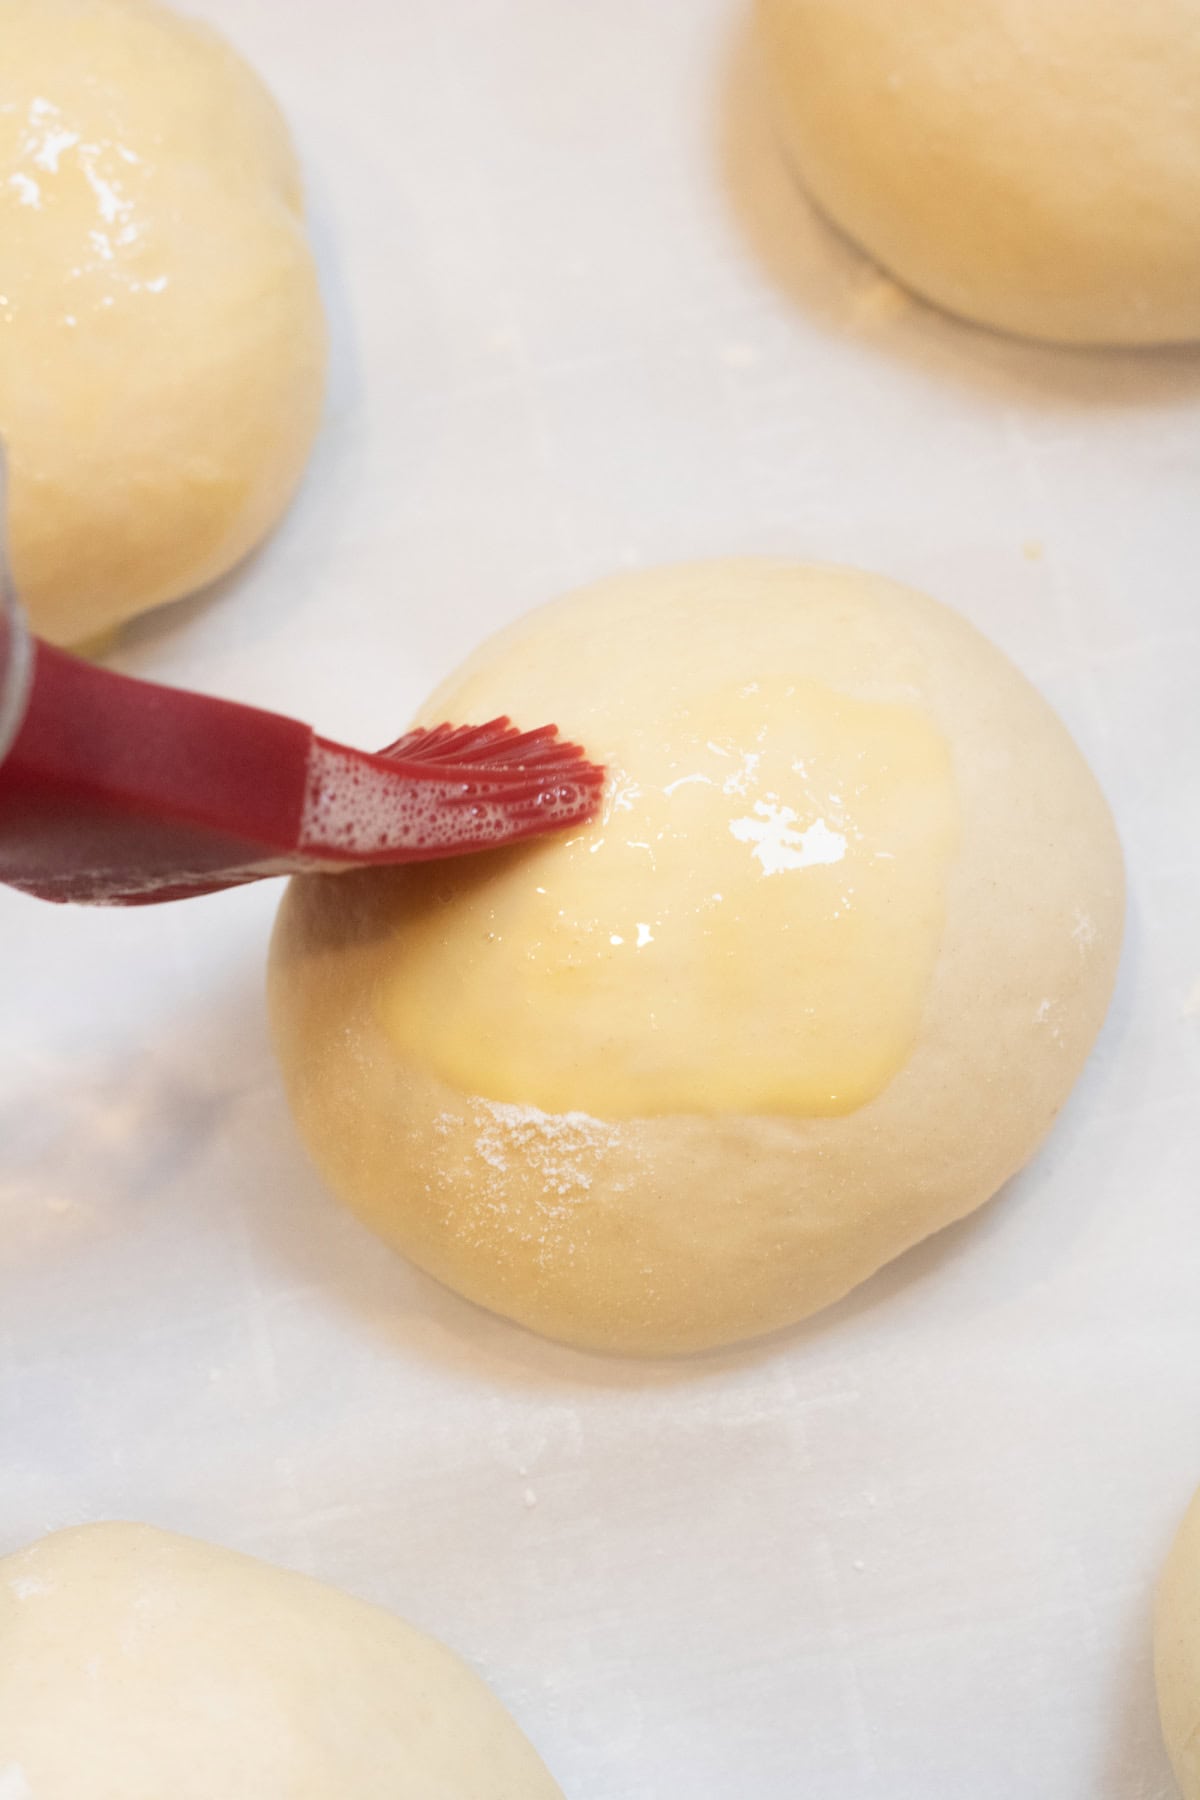
Finally, a little egg wash to create the classic look of a beautiful brioche.
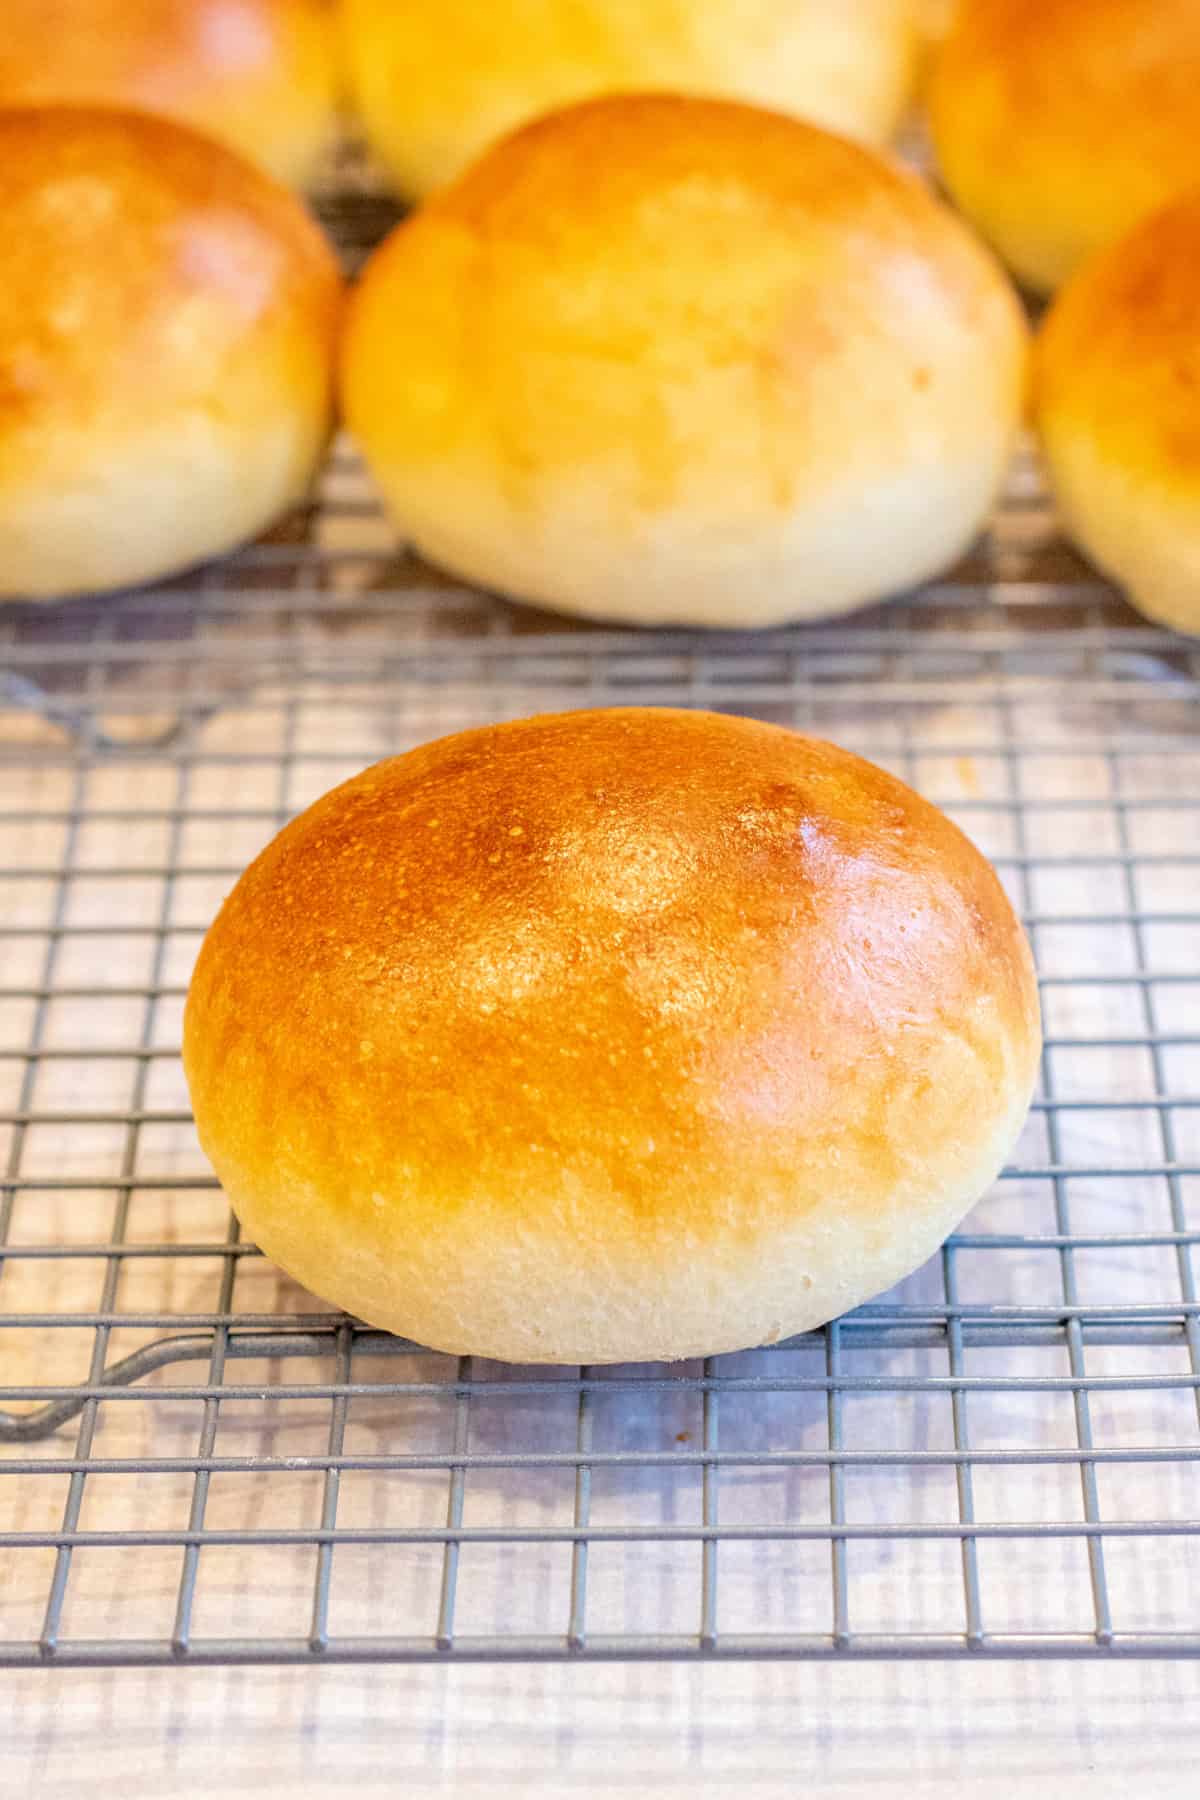
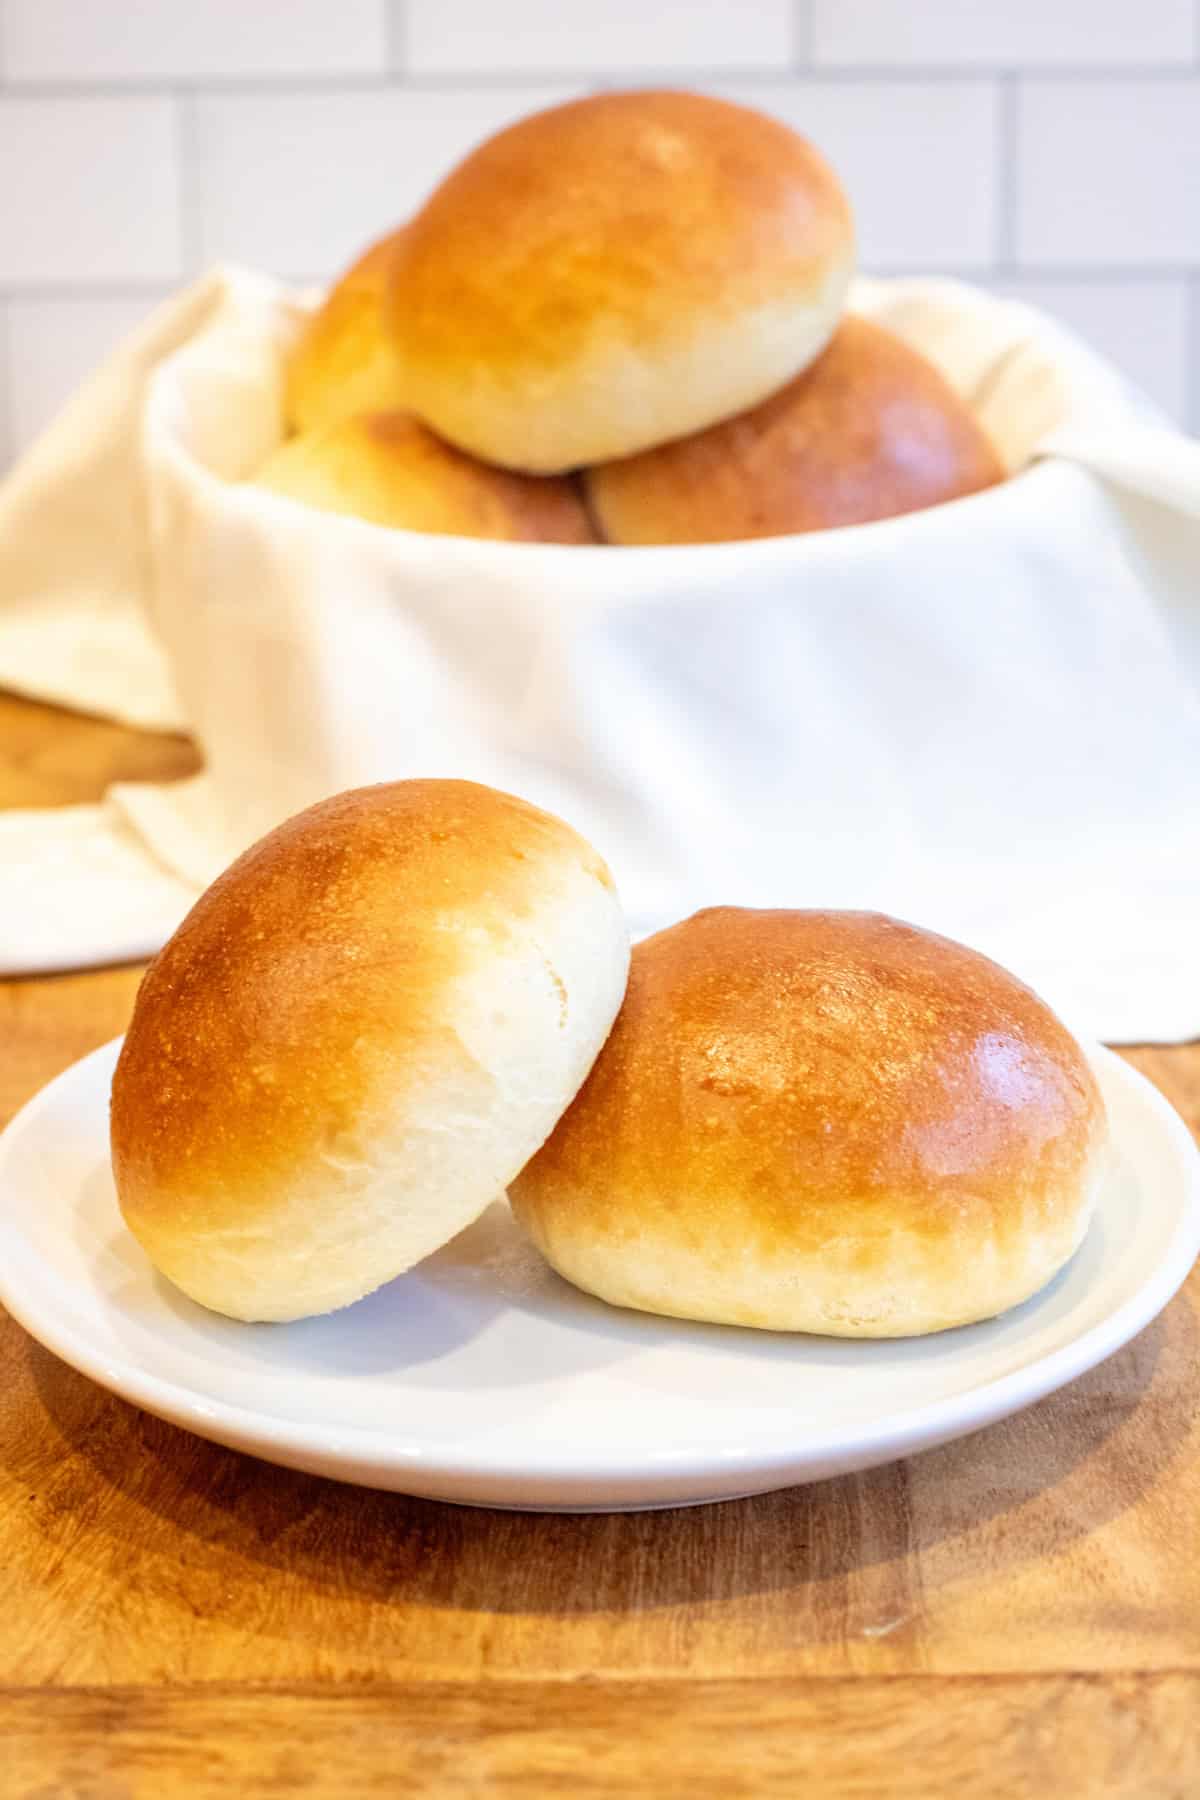
In the oven for just 20 minutes, and you have Homemade Brioche Buns! Ready for all of your favorite burgers, sandwiches, or with just a tab of butter.
Delicious For:
Use them with our Easy Ham Salad, Curry Chicken Salad, make a Kimchi Sloppy Joe with them, or use them for our Homemade Fish Fillet Sandwiches!
Recipe Tips
Adding the softened butter to the flour mixture first is important because in our recipe testing, we have found that it ensures that the butter is incorporated best (and more evenly) in the dough by mixing it in with the flour first, and having nice soft butter is key.
This dough is extremely sticky, that’s good! This is a higher hydration dough, which gives these buns a lighter crumb and a thinner crust. Tips for using a sticky dough: Lightly flour your hands before handling the dough, and use a dough cutter/scraper to help cut and portion the dough.
When proofing the dough, you don’t want to fully seal the plastic over the top of the bowl. This is because it is such a high hydration dough, and by fully sealing your cover, you can add additional hydration from condensation. In our experience, with this brioche recipe, it rises best when it is only loosely covered.
Taking your time to shape the doughs is extremely important when it comes to the structure of the baked dough. By following our step-by-step instructions in the recipe card.
This step is a very important part of the baking process. It helps to create tall, golden, shiny-topped brioche buns! Read more about how here!
These Homemade Brioche Buns are perfect to store in the freezer for long-term storage.
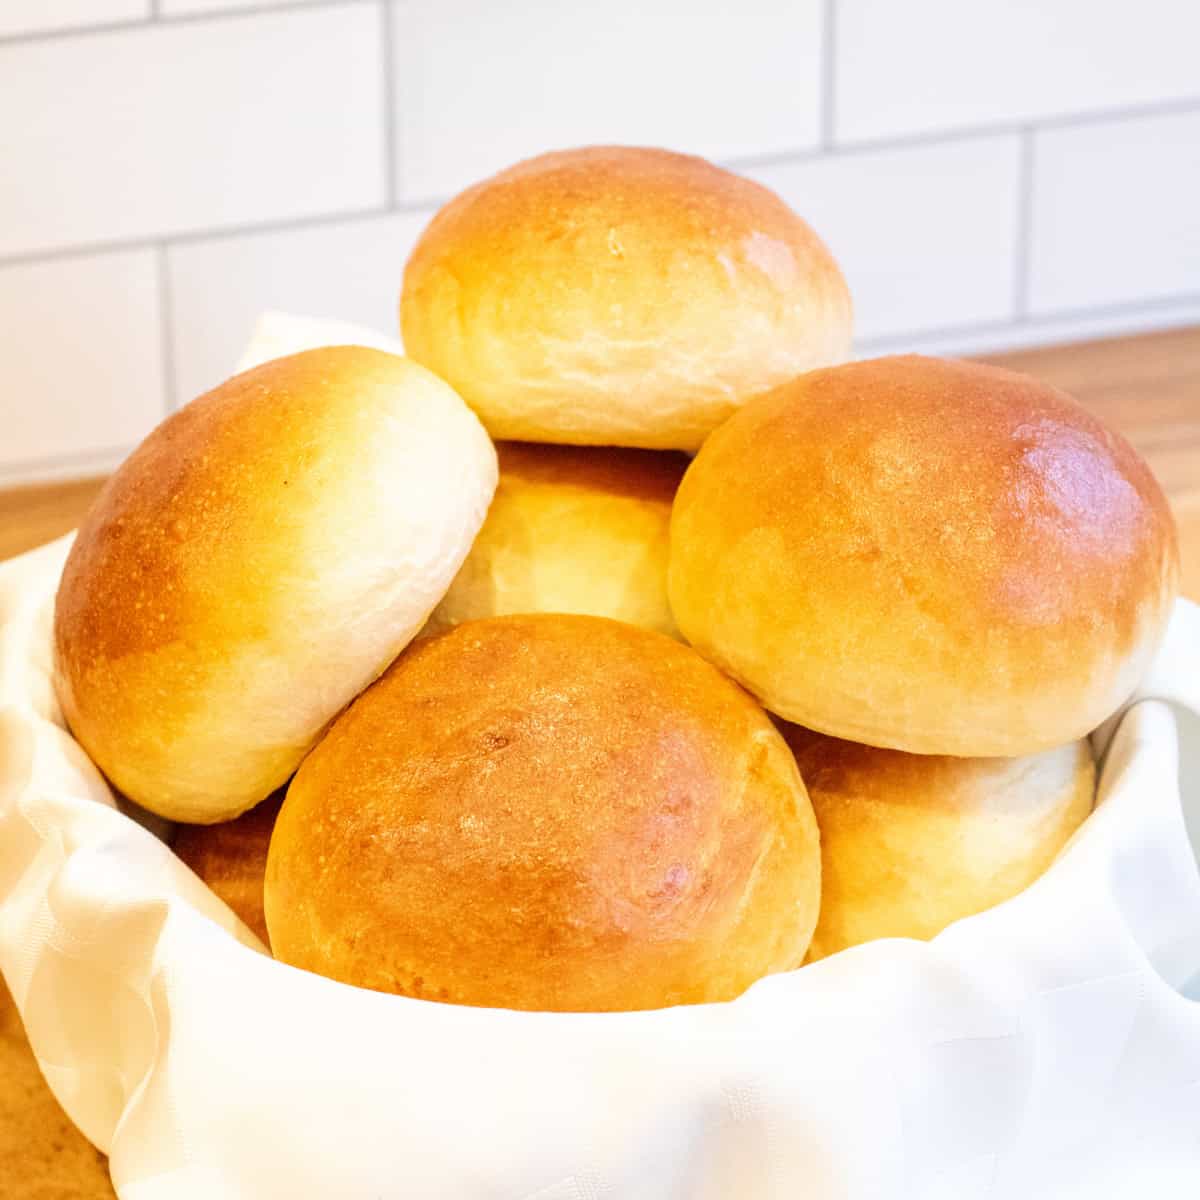
Beautiful brioche buns made at home!
Enjoy! As always, if you make this recipe or any of my others, I love to hear what you think! Leave a comment below, email me, or you can find me on Facebook, Instagram, and Pinterest!
If you want to see more, be sure to sign up for my 5 Easy Ways to Start Cooking From Scratch!
Homemade Brioche Buns
Equipment
- 2 Baking trays rimmed, and 1 for baking 1 for steam. Can also use an oven safe skillet
- Oil Sprayer optional
- instant read thermometer optional
Ingredients
- 1 cup warm water 90 degrees, 233 g
- 3 tablespoons warm whole milk 90 degrees, 48 g
- 3 tablespoons sugar 40 g
- 2 1/4 teaspoons active yeast 10 g
- 2 large eggs divided, one for dough one for wash
- 3 cups bread flour 427 g
- 1/3 cup all purpose flour 46 g
- 1 1/2 teaspoon fine ground salt 10 g
- 4 tablespoons unsalted butter very soft
Instructions
- Activate Yeast: Add the warm water and milk to a small bowl of Pyrex (if milk is coming straight out of the fridge, pop it in the microwave for about 20 seconds). Add sugar and whisk to dissolve. Sprinkle yeast on top and activate. In about 10 minutes it should be bubbly and frothy.
- Prep Flours: Add bread flour, all purpose flour, and salt to the bowl of a stand mixer. Give a quick whisk. Add softened butter and mix with the paddle attachment until all of the butter is well incorporated.
- Create Dough: Crack the egg in a small bowl and whisk well with a fork. Remove the bowl of the stand mixer from the mixer (or tilt the head back). Once the yeast is activated add it with the flour and milk to the flours and add the whisked egg. Use a wooden spoon or another large spoon and give everything a few good mixes, ensuring your mixing up the flours from the bottom of bowl. Return bowl to the mixer.
- Mix: Switch paddle attachment for the dough hook. Turn on mixer to level 4 (medium) and mix for 7 minutes. A very very sticky dough will form.
- Proof: Grease a large mixing bowl with oil (an oil sprayer is helpful for this). Use a spatula to turn the sticky dough from the bowl of the stand mixer into the greased bowl. Cover loosely with either a lightly damp towel (see recipe notes), or loosely with plastic wrap. You don't want to fully seal the dough during this proof. Proof until doubled, 1-2 hrs.
- Split Dough: Once the dough has doubled, turn it out onto a clean and lightly floured work surface. The dough will be very soft and slightly sticky, but not nearly as sticky as before it was proofed. Use a dough cutter and a kitchen scale to separate 8 evenly sized dough balls. Approximately 3.5 oz/100 g in size. Or split the dough in half, each half in half, and then those halves in half again until you have 8 doughs.
- Shape into Balls: Add parchment paper or a silicone mat to the baking tray and set aside. To shape the dough into balls, first lightly flour your hands. Then flatten the dough in the palm of your hand into a rectangle shape. Pull out an edge of the dough away from your palm about 2-3 inches, then fold that back into the center. Repeat on the other corners of the dough, about 5 times. All of the folded-up corners will be layered in the center of the dough. Pinch the center together, rotating the dough as you pinch to remove the seams of those folded-in edges. This will create the surface tension of the dough ball that is needed for that signature smooth brioche bun top. Place the dough pinched side down, on the parchment paper. Repeat for all dough balls. Line parchment paper 3, 2, and 3 on the tray. (See photo in post)
- Second Rise: Sprinkle a tiny bit of flour on the top of each of the dough balls and then cover gently with a (dry) tea towel or plastic wrap. Let rise a 2nd time until dough balls have almost doubled, 30-60 minutes.
- Preheat: Preheat oven to 350℉ and place oven racks in the middle and lowest positions. Add an empty oven safe skillet or a rimmed baing tray to the lowest rack and allow to preheat with the oven.
- Egg Wash: Add an egg to a small bowl and whisk well with a tablespoon of water. Use a pastry brush to gently brush the tops of the buns with the egg wash.
- Bake: Add the tray of the buns to the middle rack of the oven, and then add 1 cup of water to the preheated skillet or rimmed baking tray underneath. Close the oven door quickly, as it will create a blast of steam, which you want for your buns! Bake for 20 minutes.
- Cool and Enjoy! Remove from oven and place on cooling racks to let cool completely (or at least 30 minutes to allow the texture to set) before slicing and enjoying!


These are my new go-to burger & sandwich buns! I make these at least once a month. The best!!!
I LOVE to hear it, Cassandra! Thank you so much for sharing! 😀
I make these about twice a month, Our new go-to for brioche buns!!!
I LOVE to hear this, Cassandra! Thanks so much for sharing!