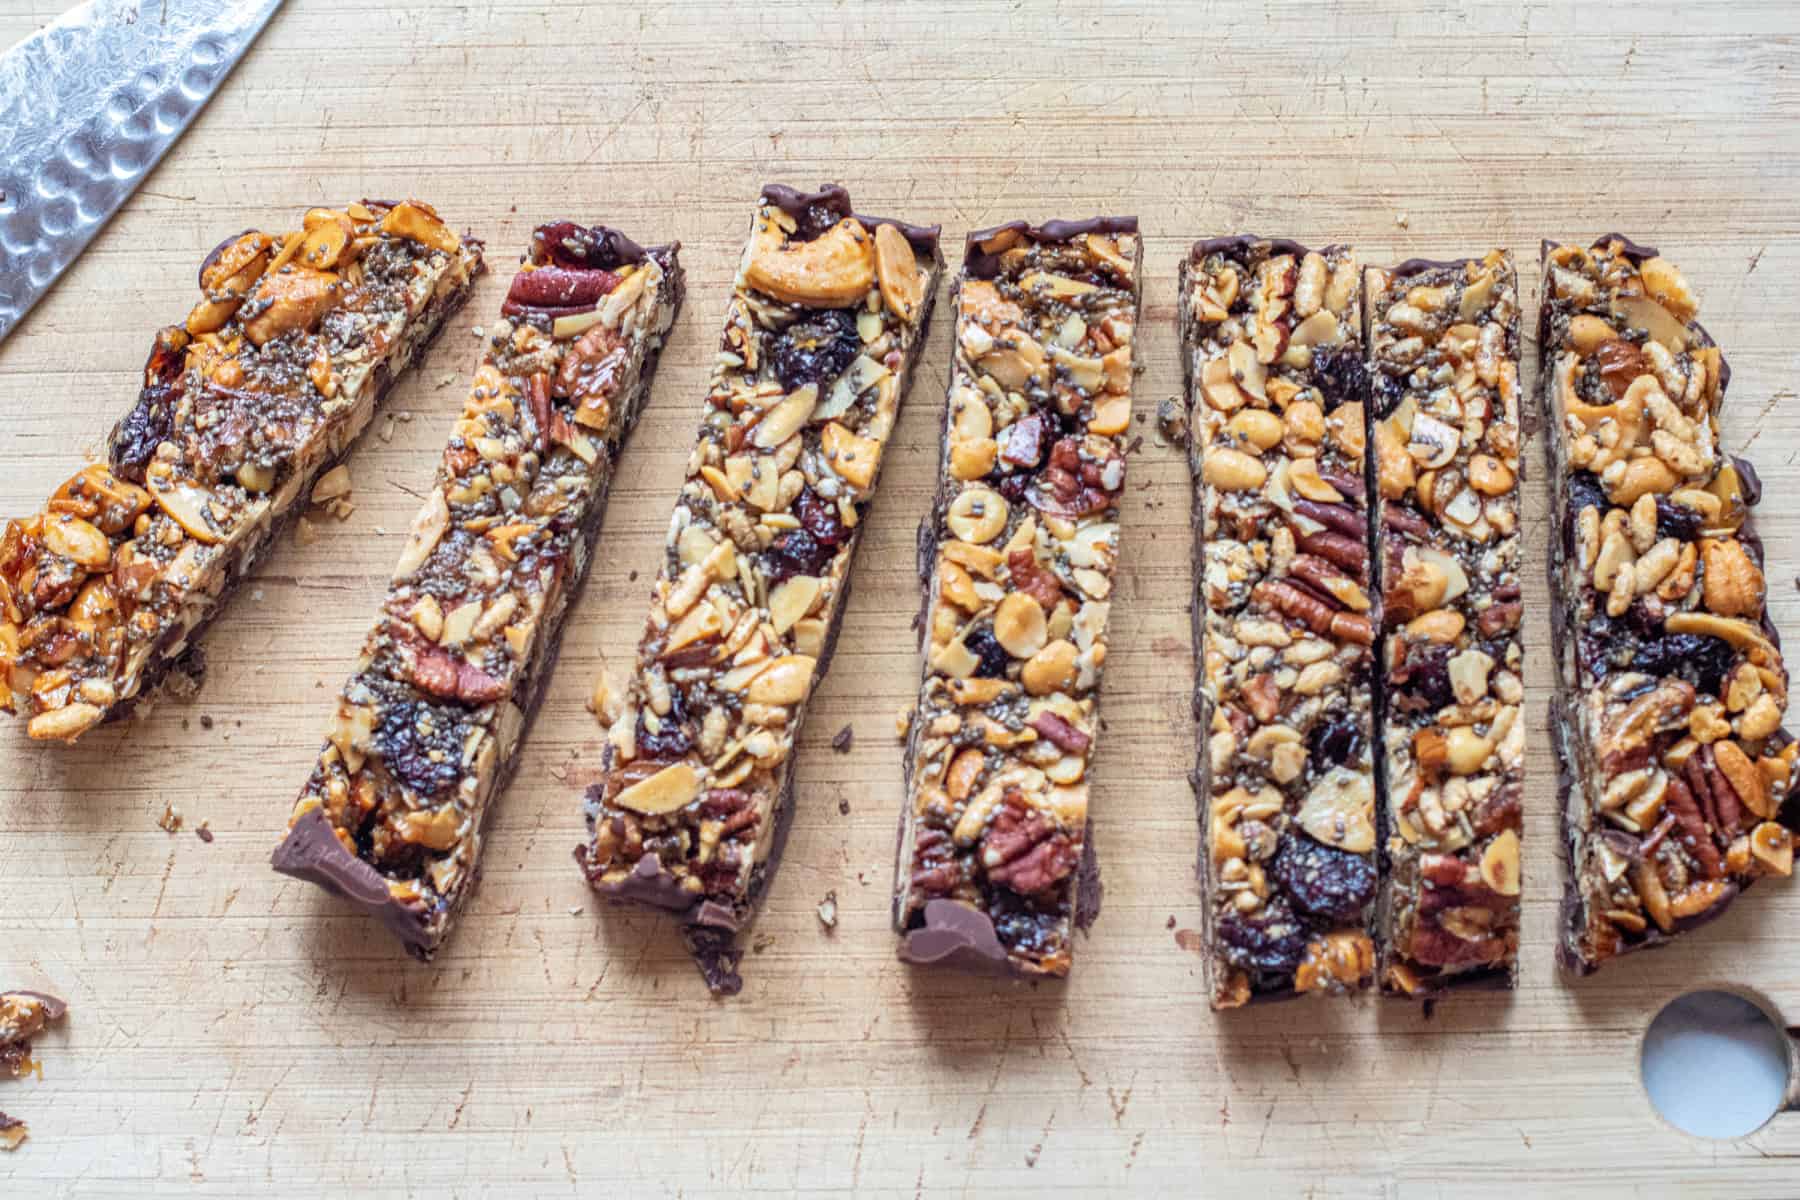
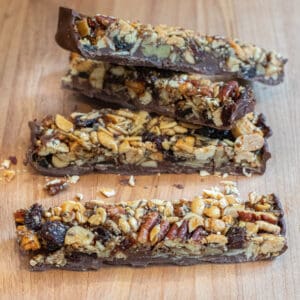
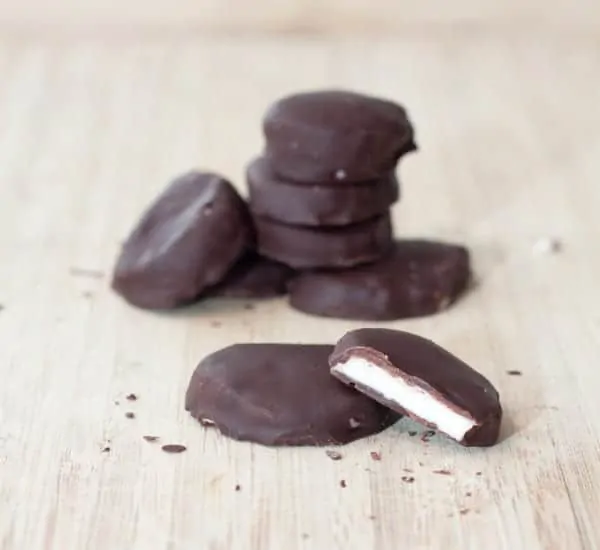
Chocolate Trail Mix Bars
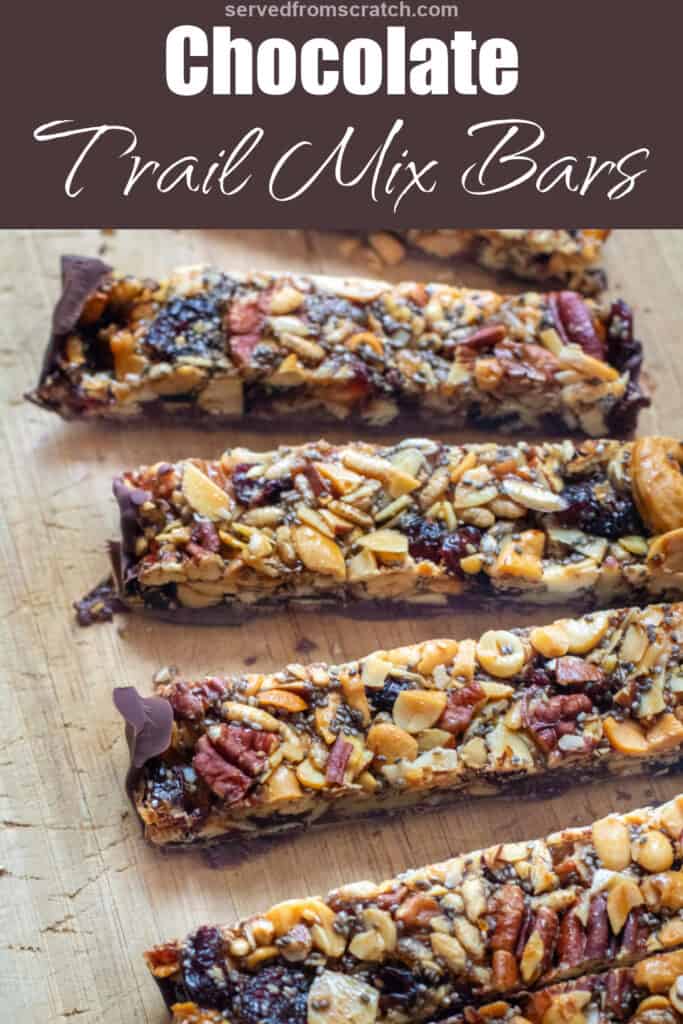
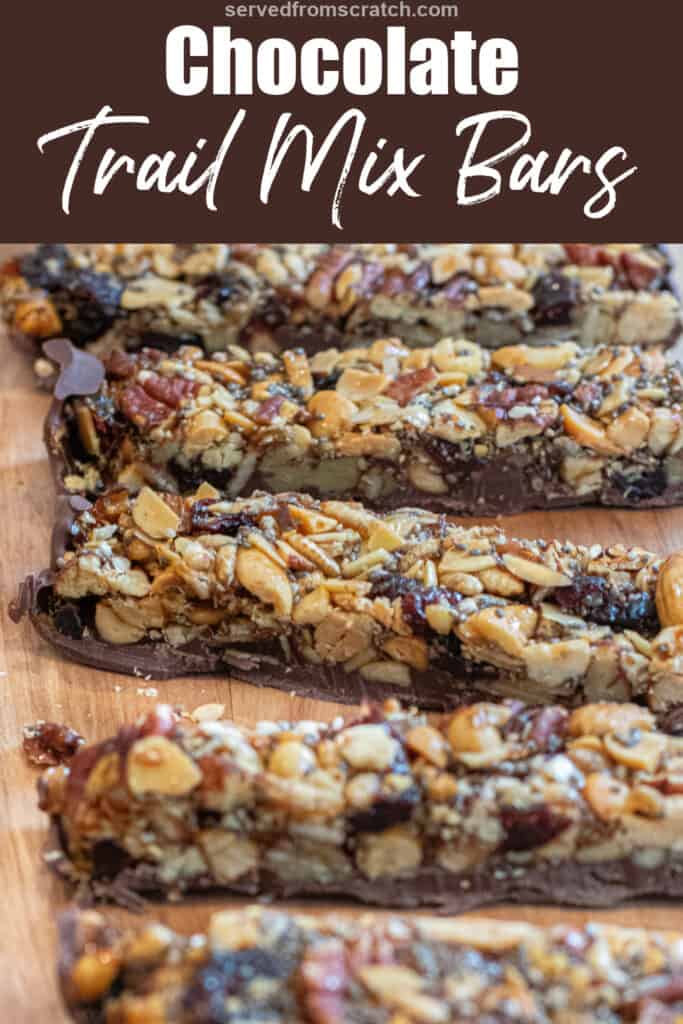
Know exactly what is in your kid’s snacks by making your own, homemade snacks that are just like the ones you buy in the store. Our Chocolate Trail Mix Bars are a kid and mom-approved school snack that is packed full of protein and nutrition making them a healthy and delicious lunchbox addition!

Snacks from scratch! One of my favorite things to make for my girls – and especially when they replace a store-bought item! Our Chocolate Trail Mix Bars are inspired by a chocolate-coated nut bar that my girls like from Costco, but now we get to have our own, from scratch version! Just as beloved, and something that they love to help make, too! It’s like a handful of trail mix in one delicious bar. It’s become one of my favorite snacks, too!
Ingredients Needed

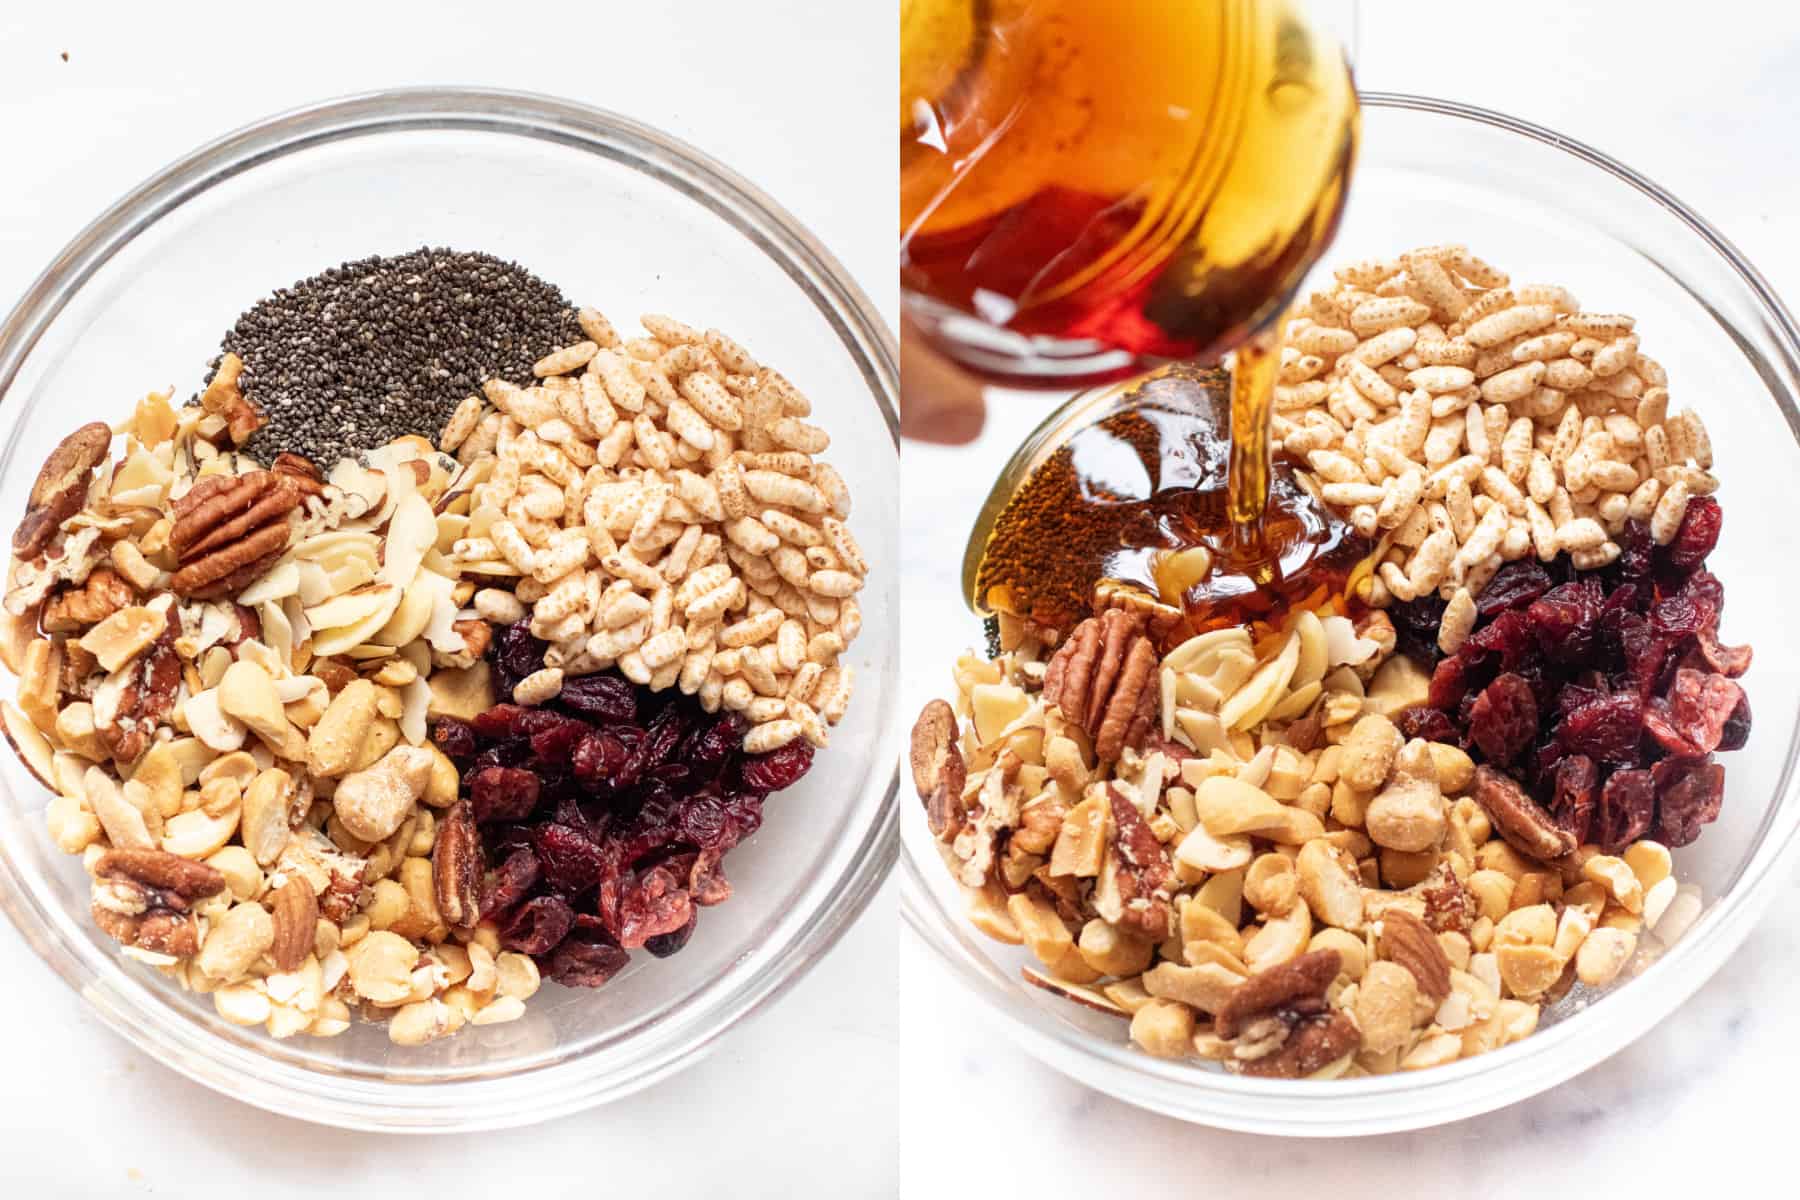
- Nuts – You can use whatever combo you’d like, we love a cashew, peanut, almonds, and pecans combo!
- Puffed Rice Cereal – This adds just a little bit of added puffed crunch.
- Dried Cranberries – These are my kiddo’s favorites, but raisins would also be great!
- Maple Syrup and Honey – We love to use both, but you can also use all maple or all honey if you prefer.
- Chia Seeds – My favorite way to sneak in some omega-3 fatty acids and fiber.
- Chocolate Chips and Coconut Oil – For the chocolate coating!
Easy to Make
Prep
When it comes to easy kid’s snacks, easy needs to be key! Adding it all to a bowl and mixing it with maple syrup and honey, doesn’t get much easier than that!
Bake
In order to get the maple and honey coating to set, these Chocolate Trail Mix Bars are baked in the oven. Then they will need to cool so that they set, key to making them a full crunchy little bar that won’t fall apart.
Chocolate Coating
Now for the kiddos favorite part – the chocolate coating! You can use chocolate melts or your favorite chocolate chips with just a little bit of coconut oil (even more great nutrition!) and give it all a melt in the microwave or a double boiler.
Once your nut bars have cooled and everything is set, then gently remove it from your pan (thanks handy parchment paper) and get ready to coat.
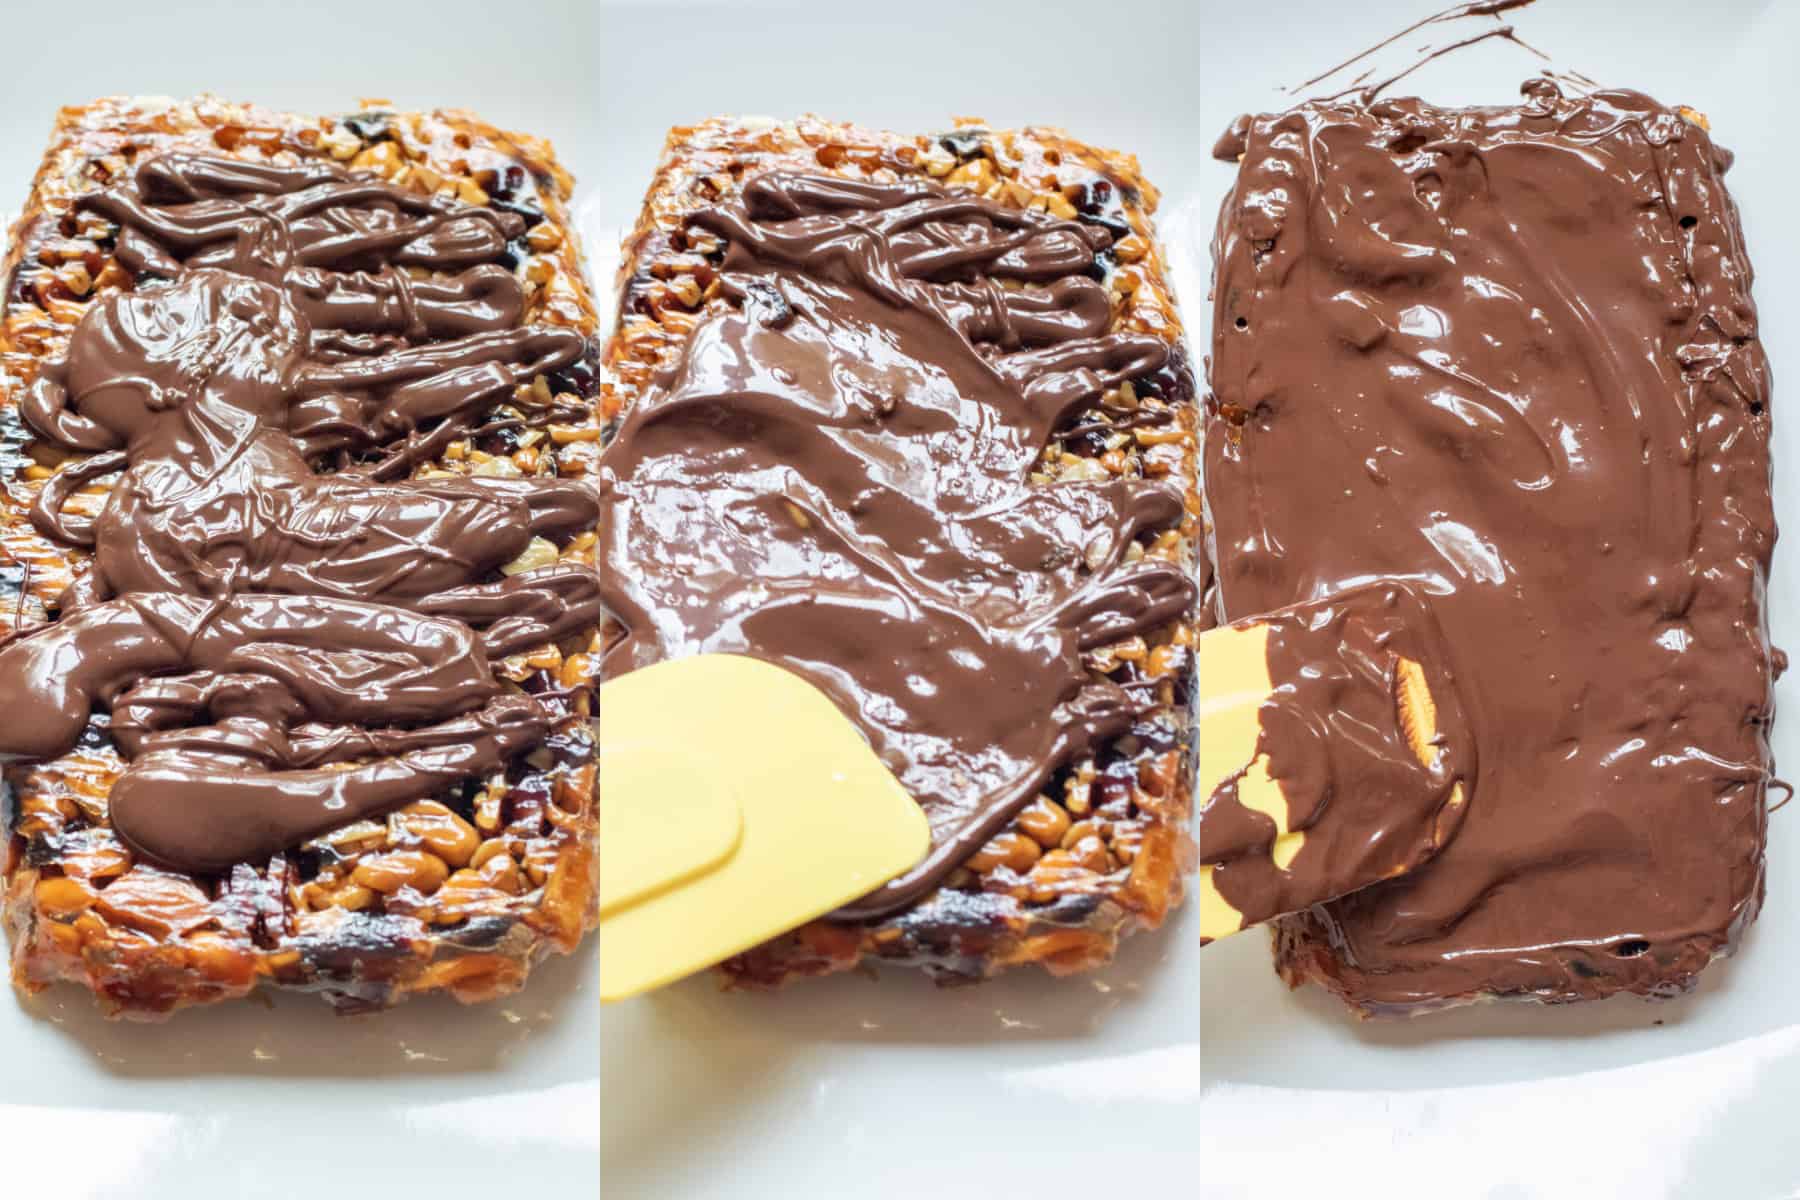
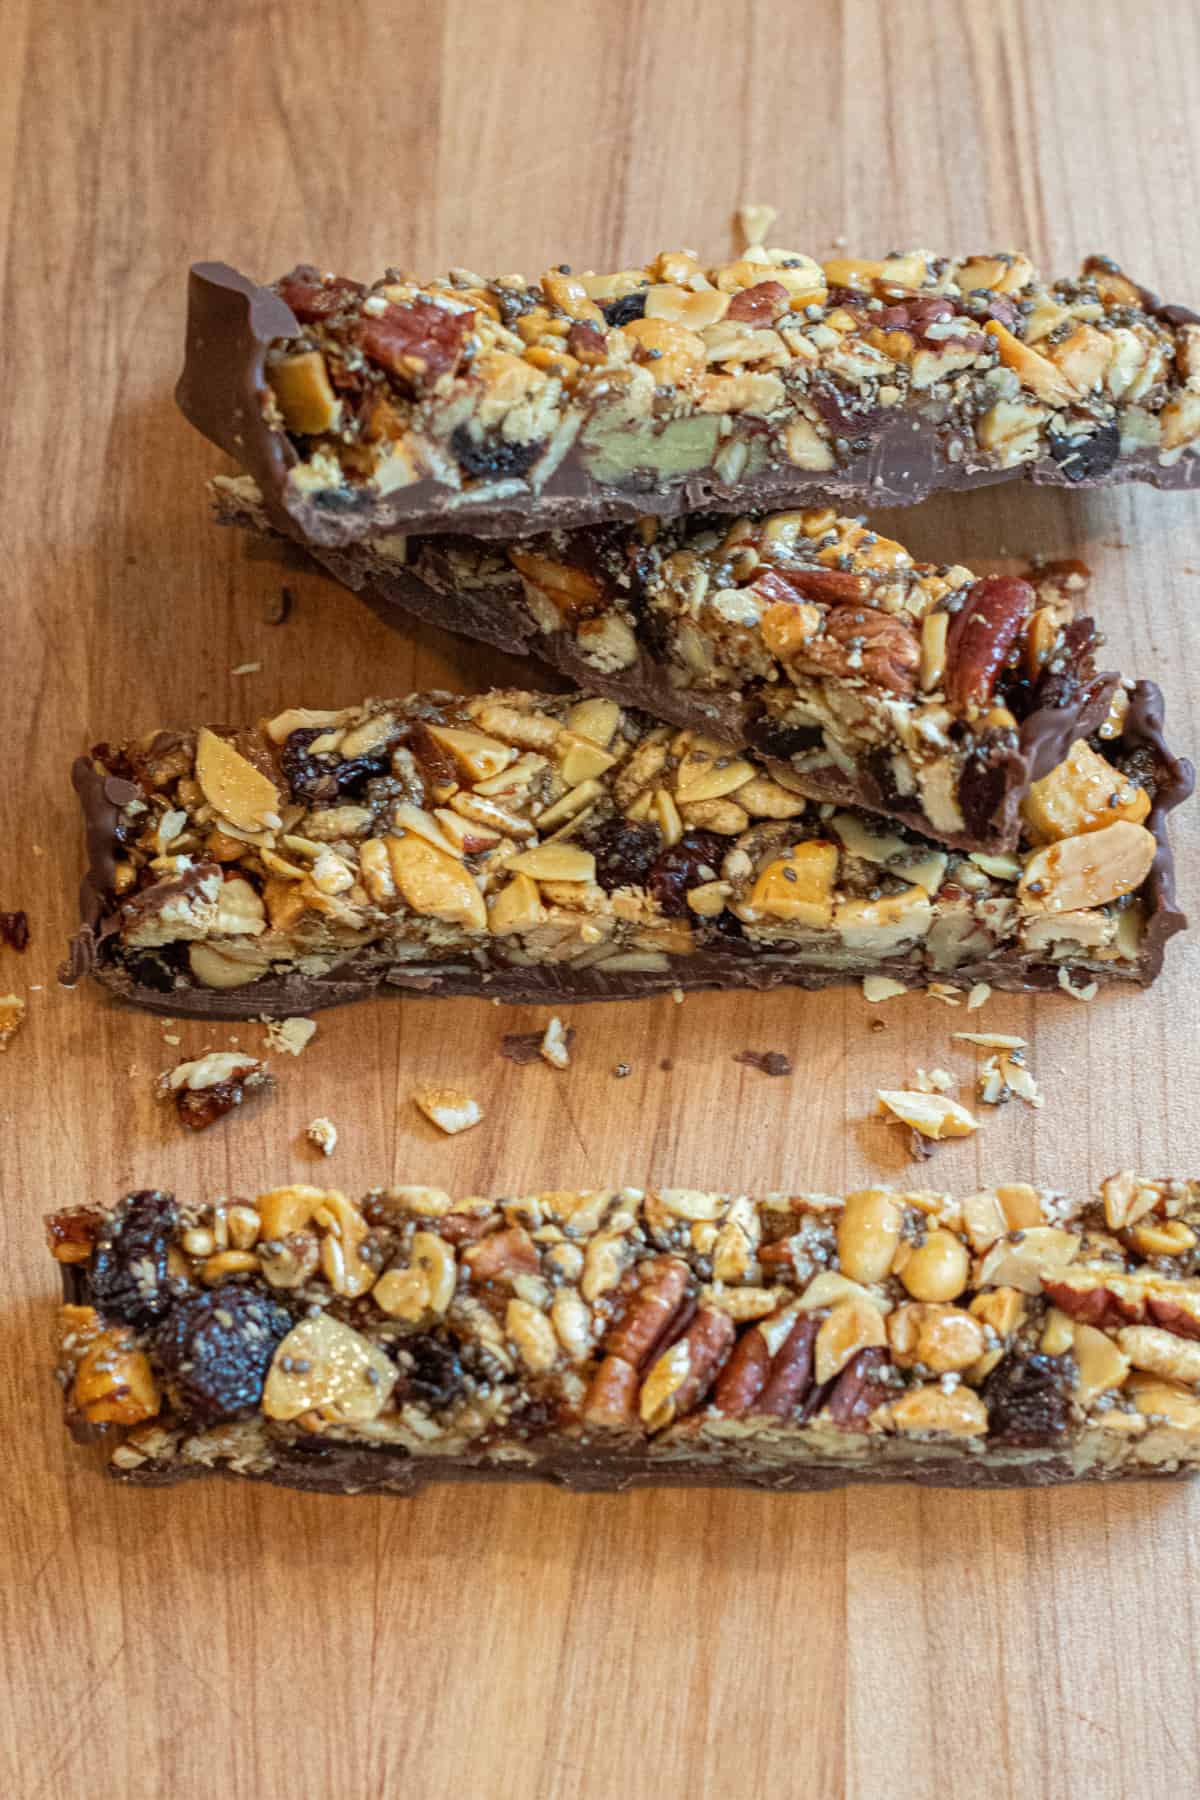
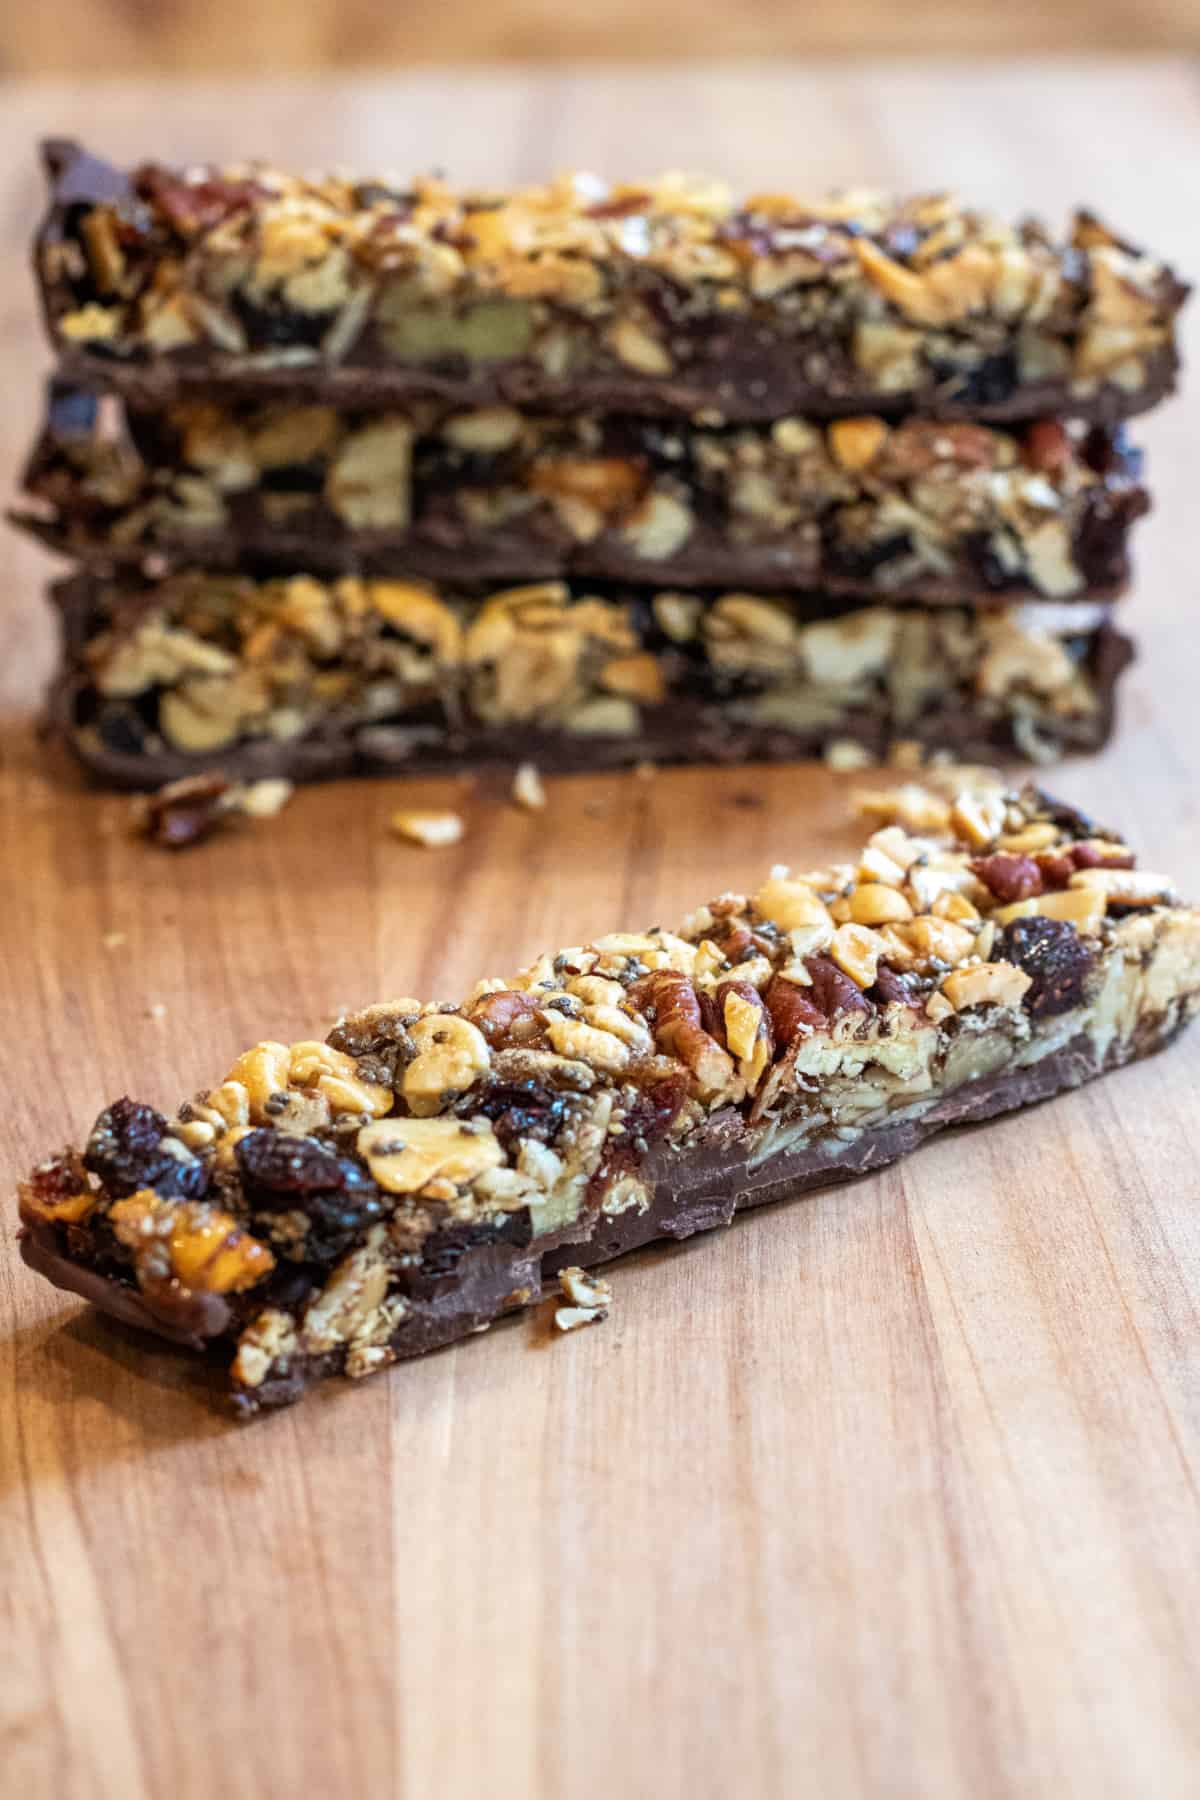
Gently turn the baked bar loaf over and coat what will be the underside of the bars with a nice layer of melted chocolate.
Return it all to the fridge (or freezer) to let that chocolate set before giving it all a slice into Chocolate Trail Mix Bars!
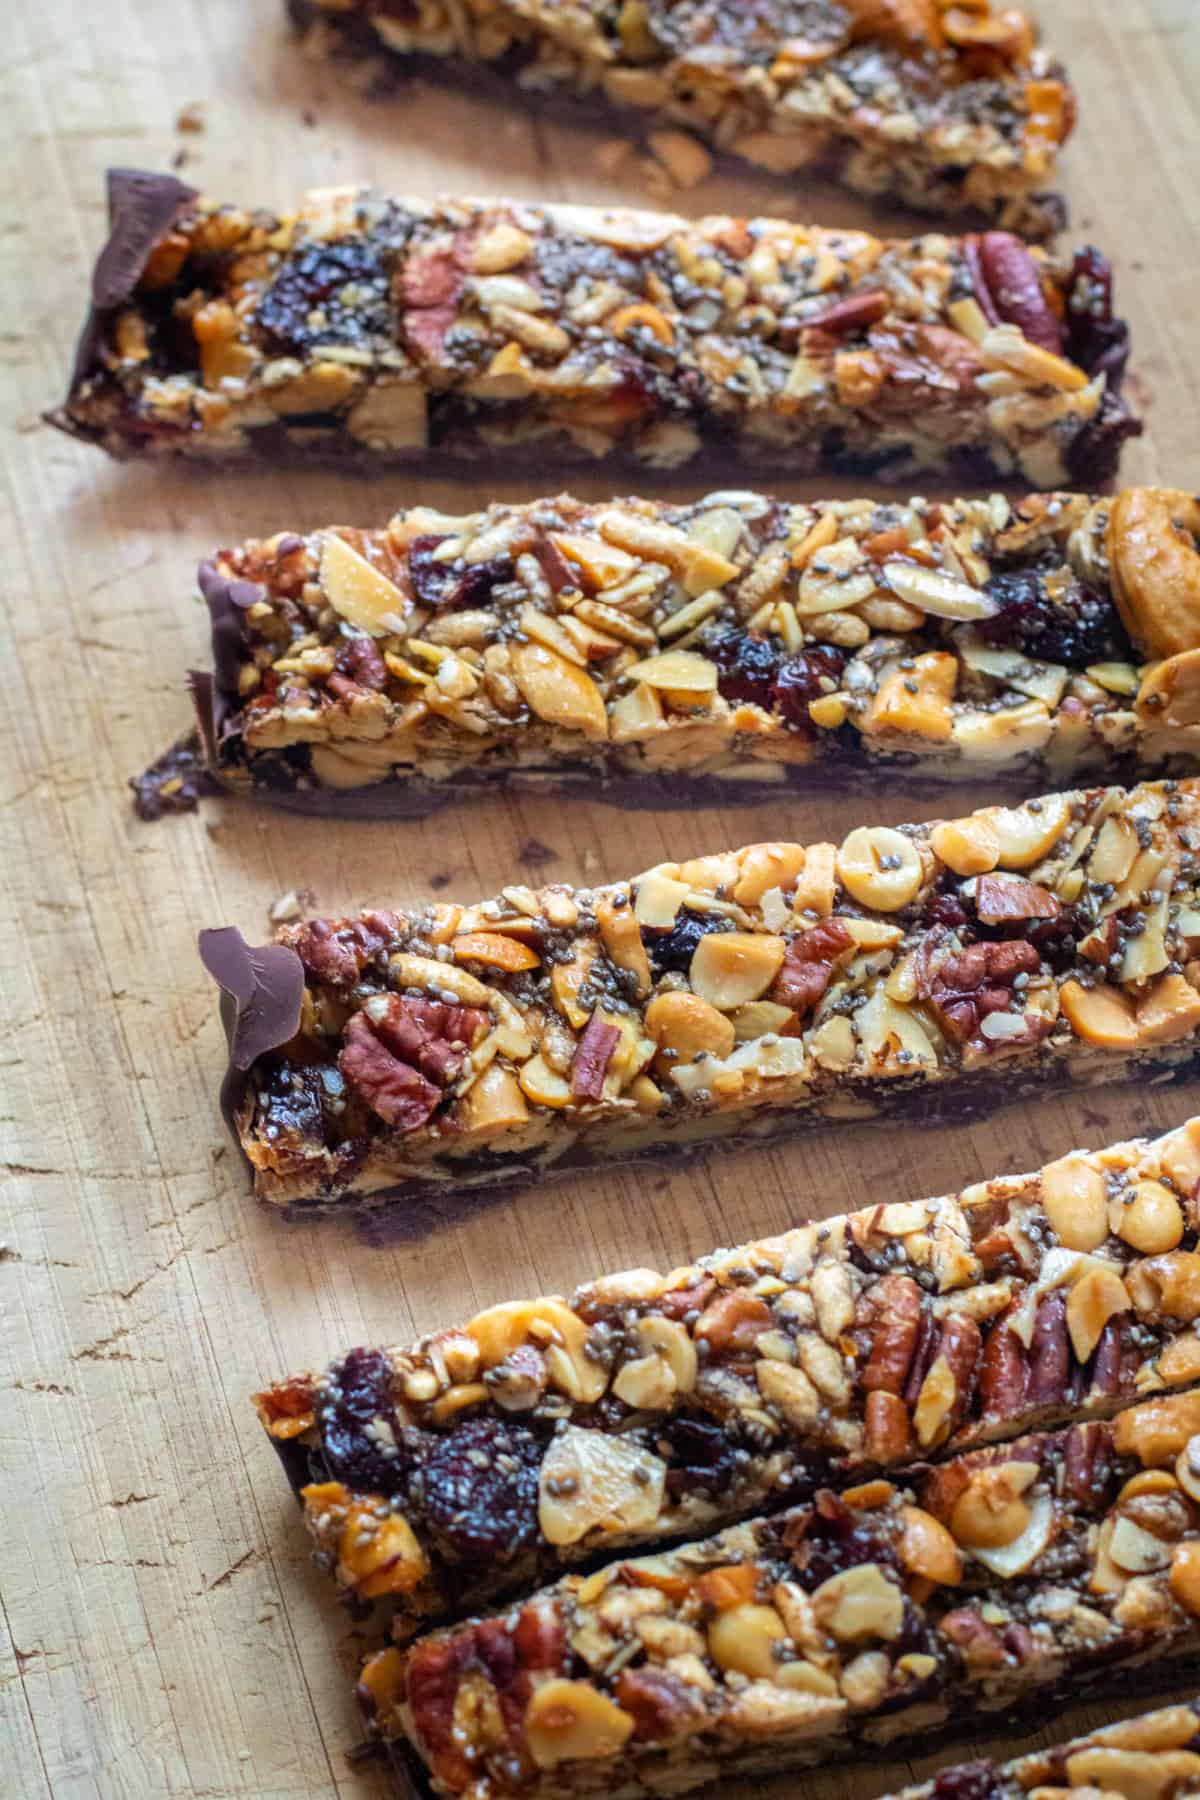
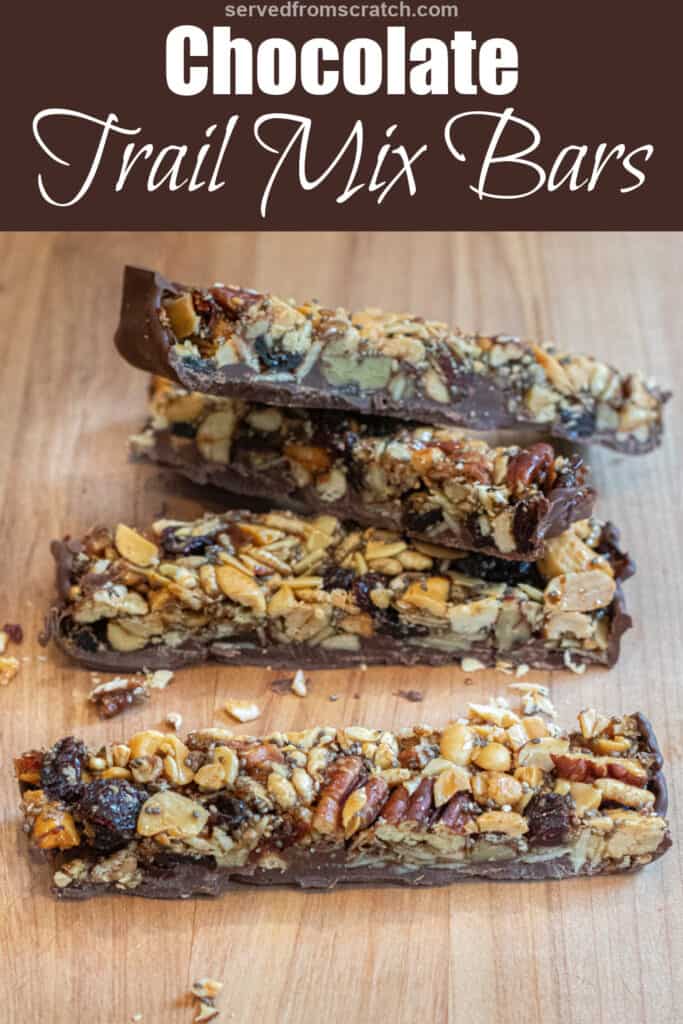
So nutty, crunchy, and (naturally) sweetened with just the right amount of chocolate!
Recipe Tips
Be sure when you’re first mixing everything that all of the nuts, seeds, dried berries, and puffed rice cereal is coated with the maple honey mixture. This will ensure that it all sets well together.
A key step to ensuring that these bars don’t turn into crumbles – let it all cool so that it all can set together.
Giving the nuts a chop will help ensure that the bars stay together, too.
These nut packed bars are so fun because they can be customized in an endless number of ways! Switch out the cranberries for raisins. Add in some walnuts instead of pecans. Add in some shredded coconut instead of the chia seeds. You do you – and what you and your kiddos taste buds prefer!
You can cut these into 6-inch long bars, or smaller 2-inch bites, 3 pieces from one bar. I like to cut them smaller sometimes for just a quick pop-able bite!
Chocolate Trail Mix Bars! Packed full of so much nut protein and nutrition, but with enough chocolatey coating and maple honey sweetness that the kiddos won’t realize it’s a healthy snack!
You Also Might Like
- Peanut Butter Chocolate Chip Granola Bars
- Peanut Butter Chocolate Energy Balls
- Cashew Cacao Bliss Balls
- Homemade Honey Roasted Peanuts
- Healthier Homemade Corn Nuts
- Peanut Butter Pecan Crunch Bars
Enjoy! As always, if you make this recipe or any of my others, I love to hear what you think! Leave a comment below, email me, or you can find me on Facebook, Instagram, and Pinterest!
If you want to see more, be sure to sign up for my 5 Easy Ways to Start Cooking From Scratch!
Chocolate Trail Mix Bars
Equipment
- 9X6 baking dish
Ingredients
- 1/4 cup cashews
- 1/4 cup peanuts
- 1/4 cup almonds
- 1/4 cup pecans
- 1/4 cup dried cranberries
- 1/4 cup puffed rice cereal
- 1 tablespoon chia seeds
- 1/3 cup maple syrup
- 1 tablespoon honey
- 1 tablespoon coconut oil
- 1 cup semi-sweet chocolate chips
Instructions
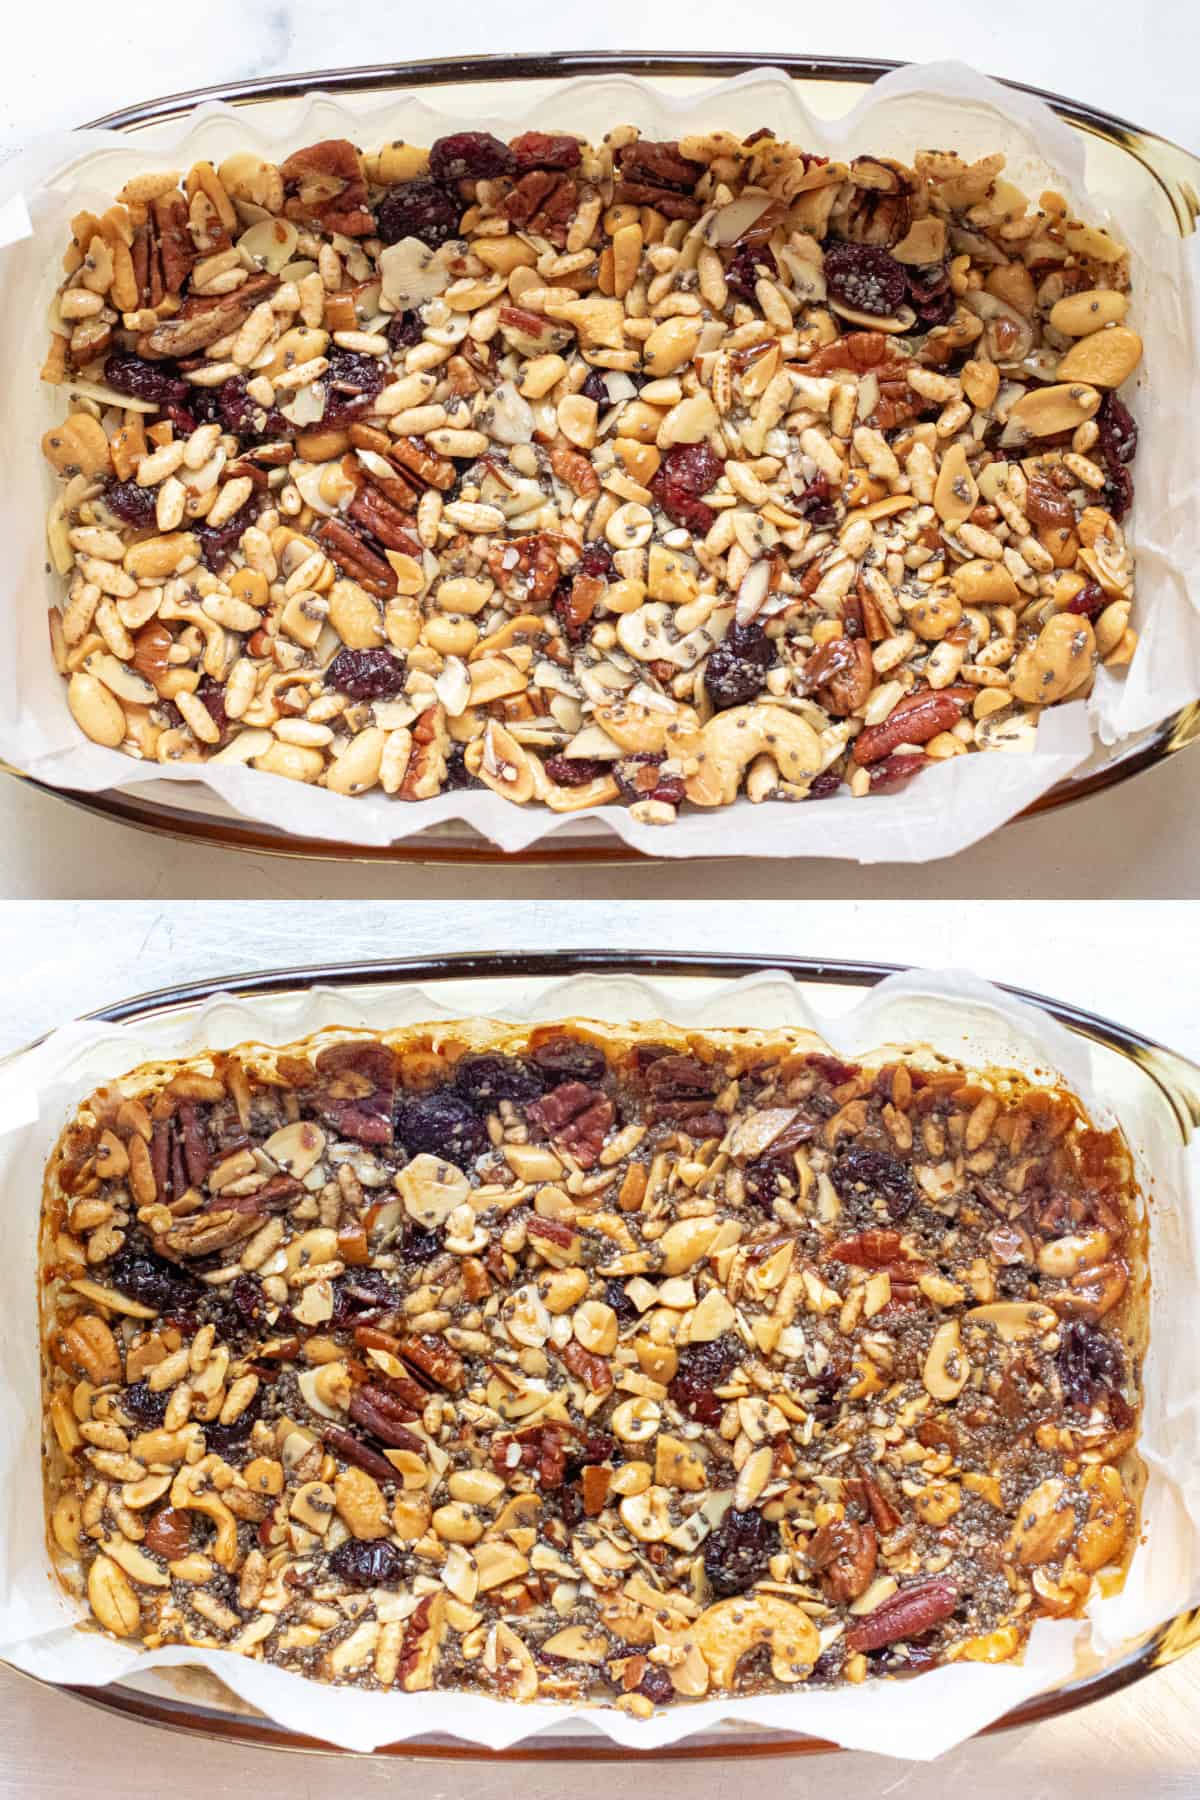
- Pre-heat Oven: Pre-heat oven to 325 degrees F. Line a baking dish with parchment paper and set aside.
- Prep Bars: Give all of the nuts a gentle chop. Add them all to a medium-sized bowl with chia seeds and puffed rice cereal and give a quick mix. Add maple syrup and honey and give a good mix, ensuring that it is all well coated.
- Bake: Add the nut mixture to the parchment paper-lined baking dish. Use a spatula or the back of a measuring cup to flatten the nut mixture into an even layer. Bake for 35 minutes.
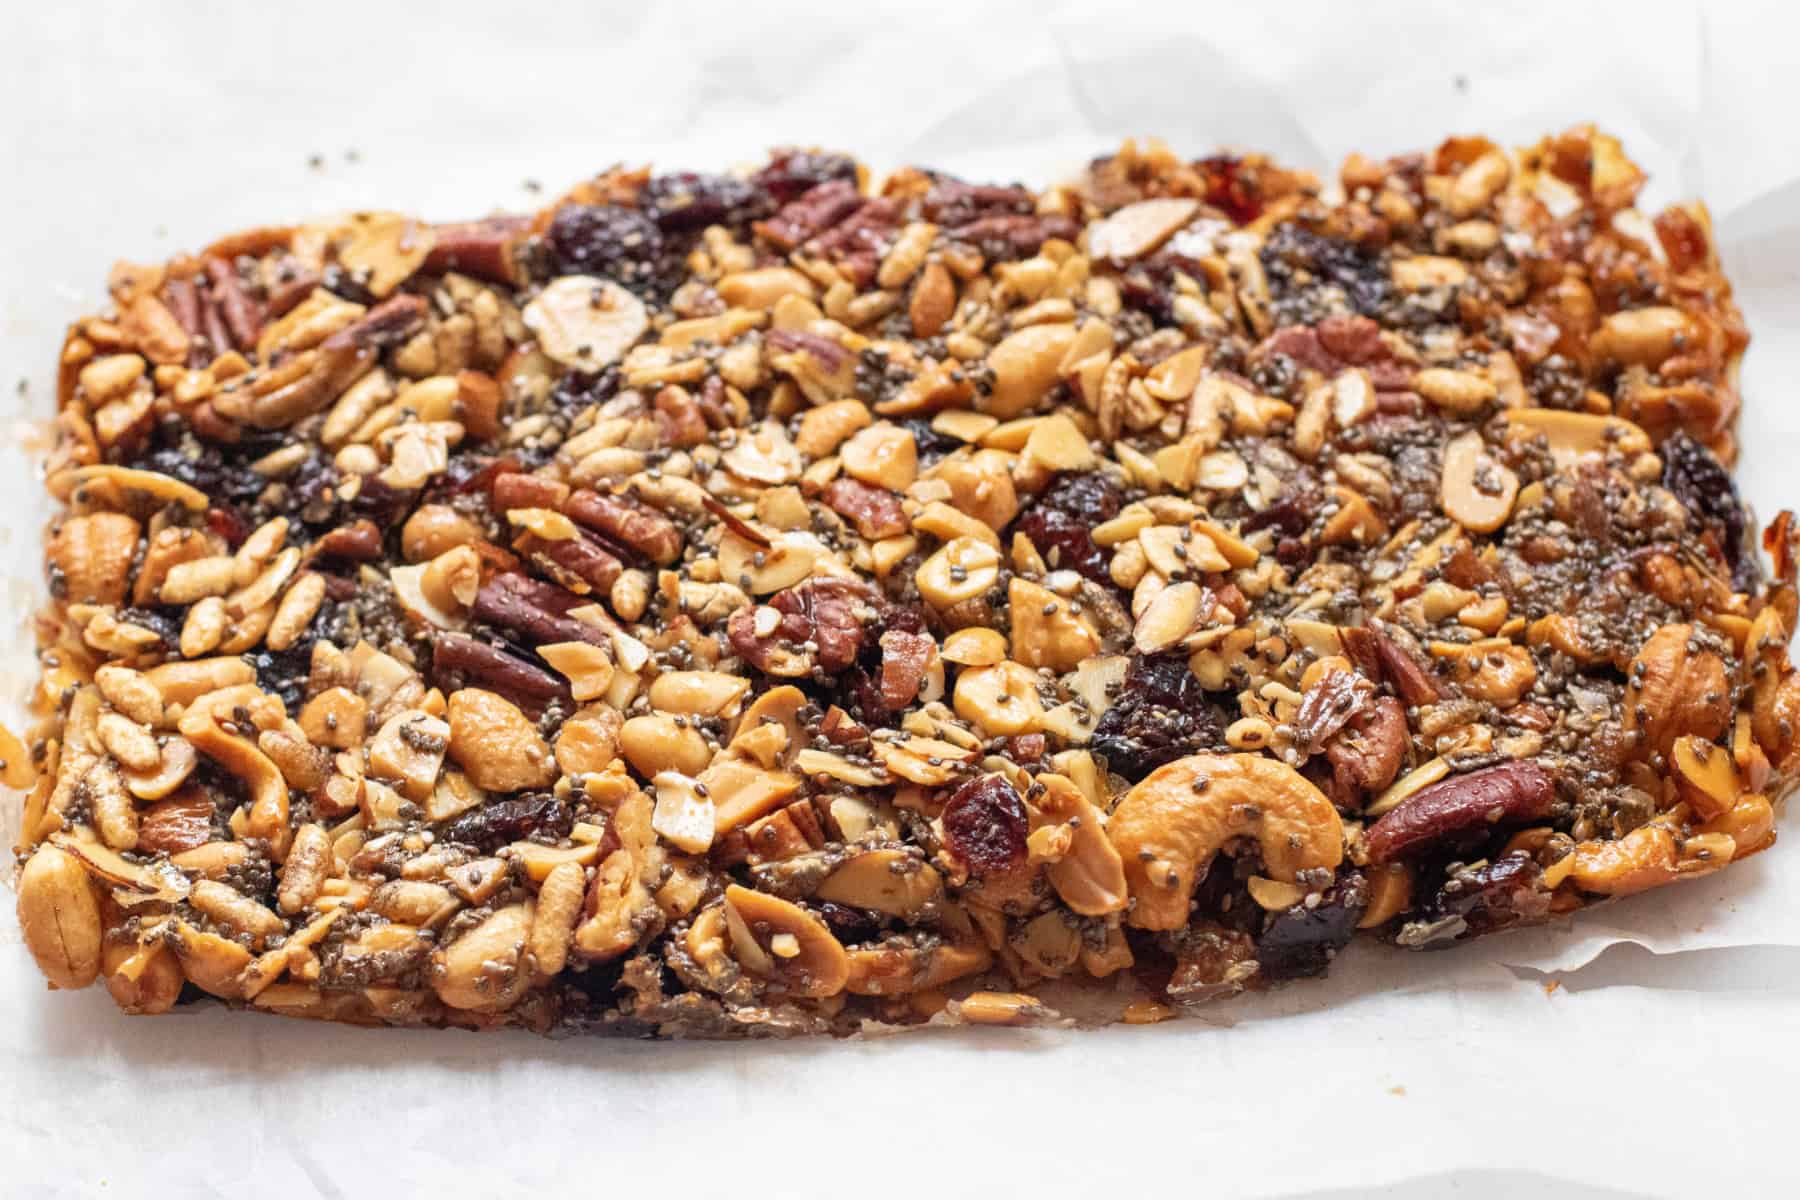
- Cool: Remove the baking dish from the oven and let rest in the dish for 5 minutes. Then remove from the baking dish and let cool for at least 45-50 minutes at room temperature or for 20-30 minutes in the fridge.
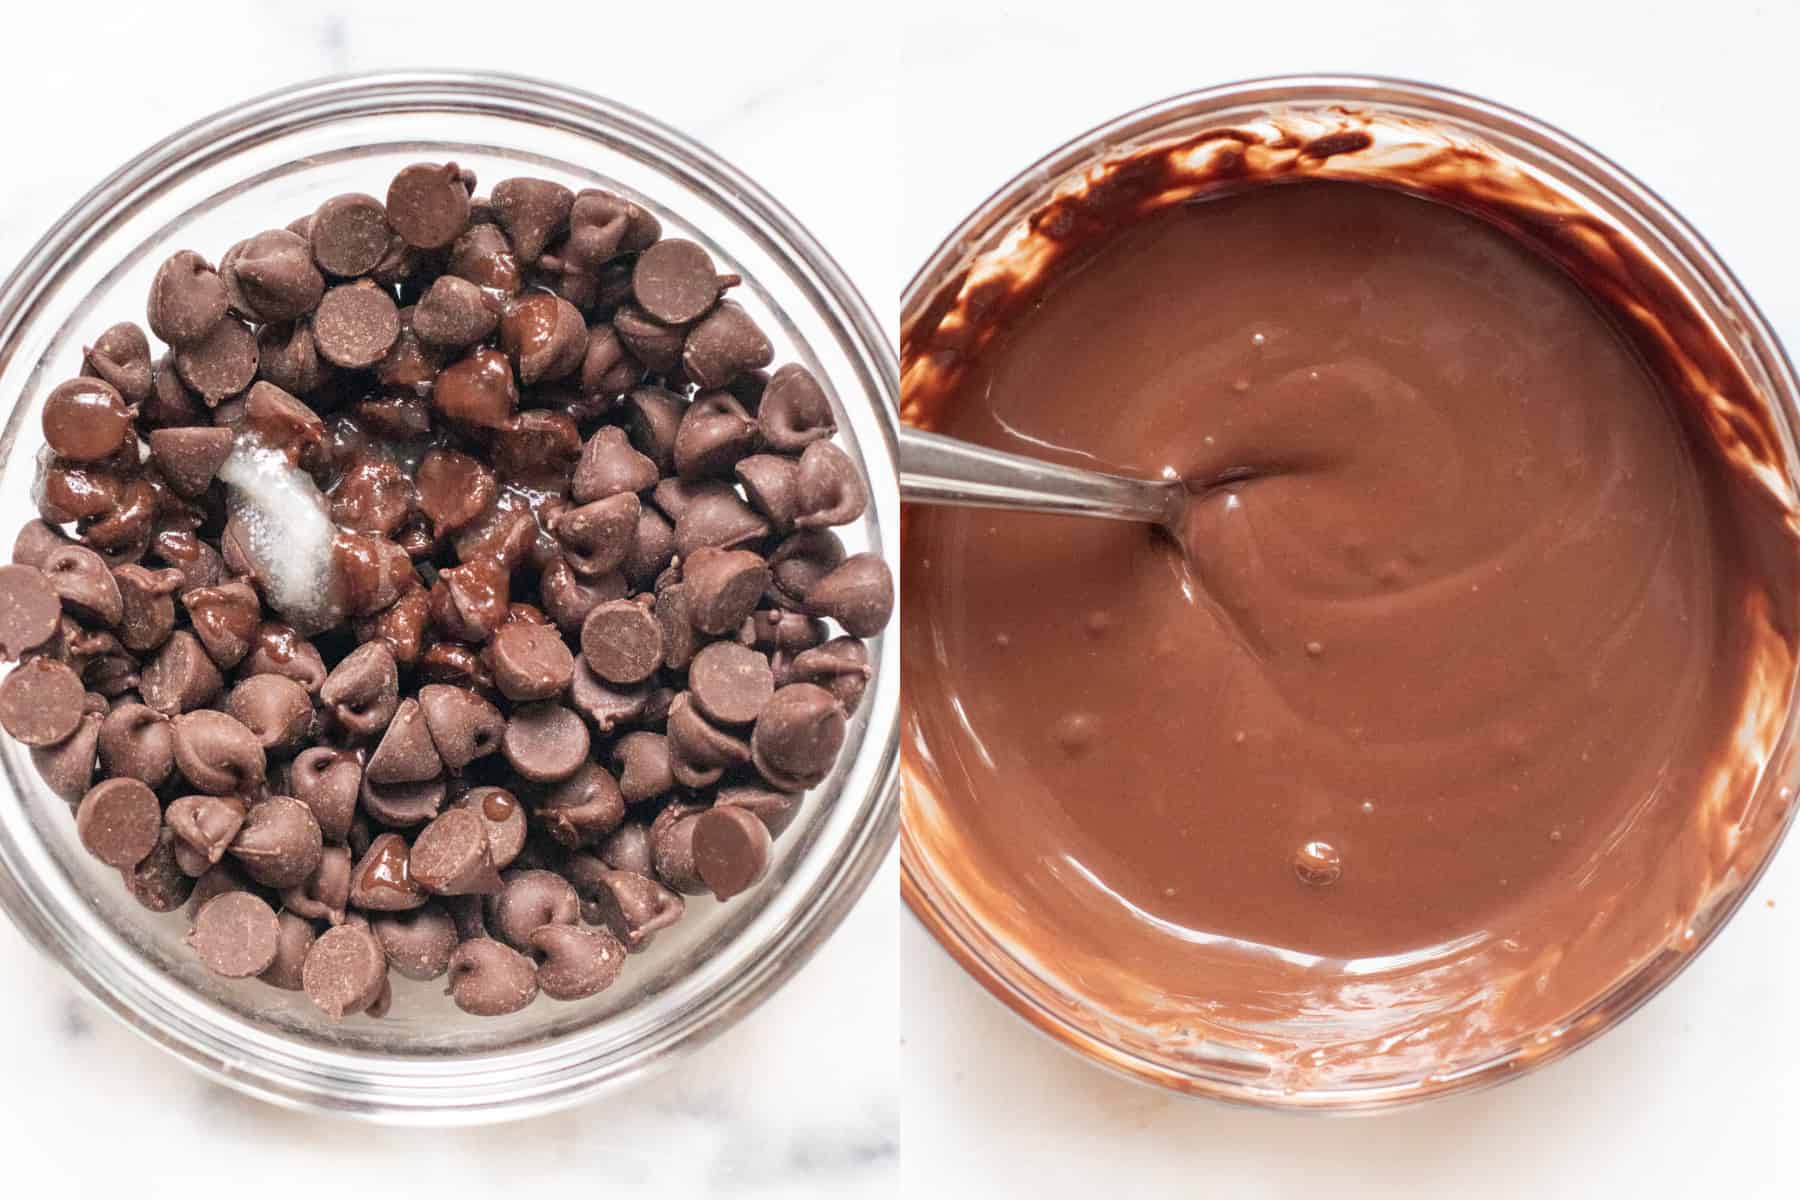
- Melt Chocolate: Add chocolate chips and coconut oil to either a double boiler or a small microwaveable safe dish and melt. If melting in the microwave, microwave for 15 seconds and then mix, and microwave for another 15 seconds and mix until it is completely melted.
- Spread Chocolate: Once completely cooled, remove the baked nut mixture from the fridge (or freezer) and gently turn it over. Spread the melted chocolate in an even layer. Return to fridge for 10-20 minutes (or the freezer) to let the chocolate set.
- Cut Bars: Once the chocolate has set, use a very sharp knife to gently cut it into bars. Store in a cool dry place, or in the fridge.

these are delicious but absolutely 💯 terrible to remove from the wax paper lined 8×8 pan. I won’t make again until I find a better way.
Hi Courtney! I’m so glad you enjoyed them! Parchment paper is the best choice for these and will make it much easier to remove them from the pan. 🙂 You could also give the parchment paper a quick grease with butter or a cooking spray to make it even easier!
How would they change if I use oats instead of the puffed rice? We almost always have oats on hand. Thanks!
Hi Nora! The texture would be just slightly different without having the airy puff, but not by too much at all. Enjoy!
The trail mix bars were perfect for an after school snack for my kids. I will definitely make these again!
Love to hear it Ann! Thanks so much for sharing!
I love how easy and quick make this Chocolate Trail Mix Bars and aside from that they are delicious!
Thanks, Amy!