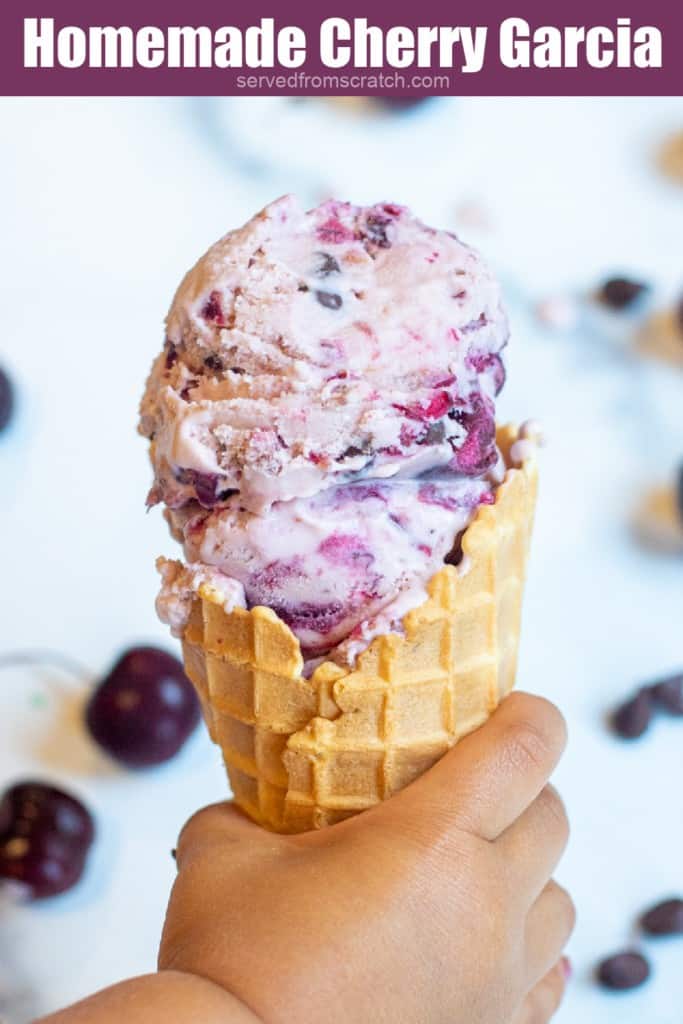
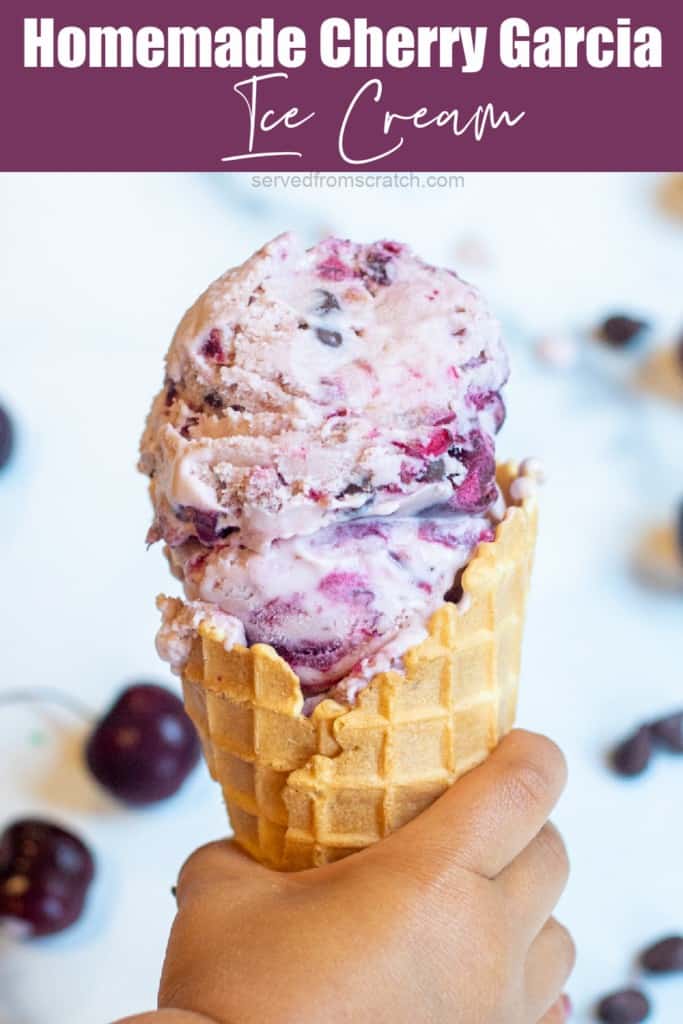
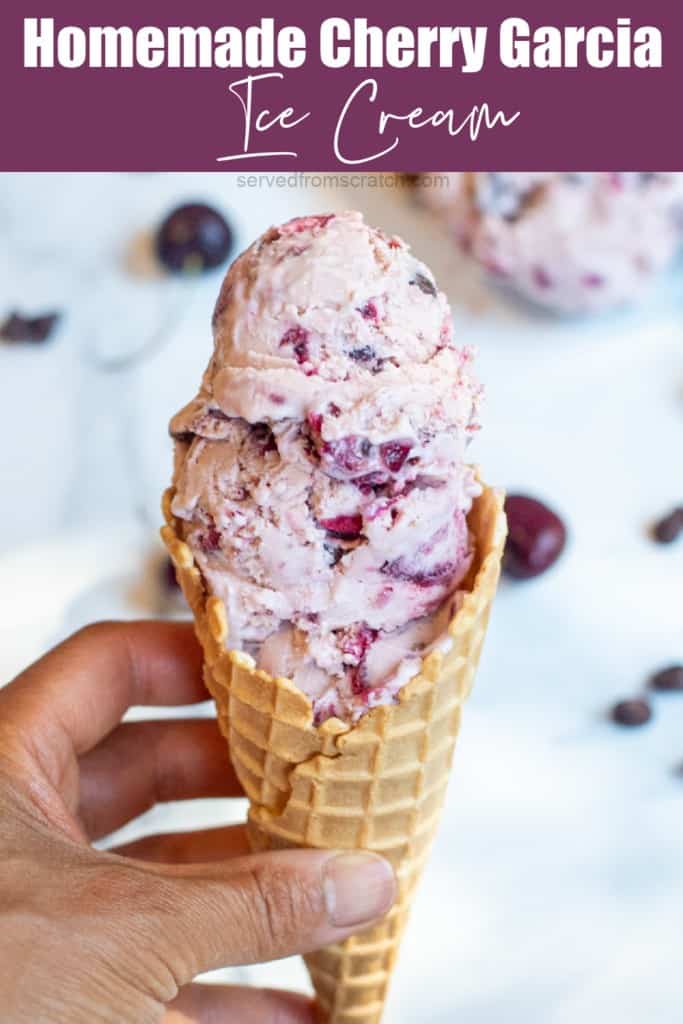
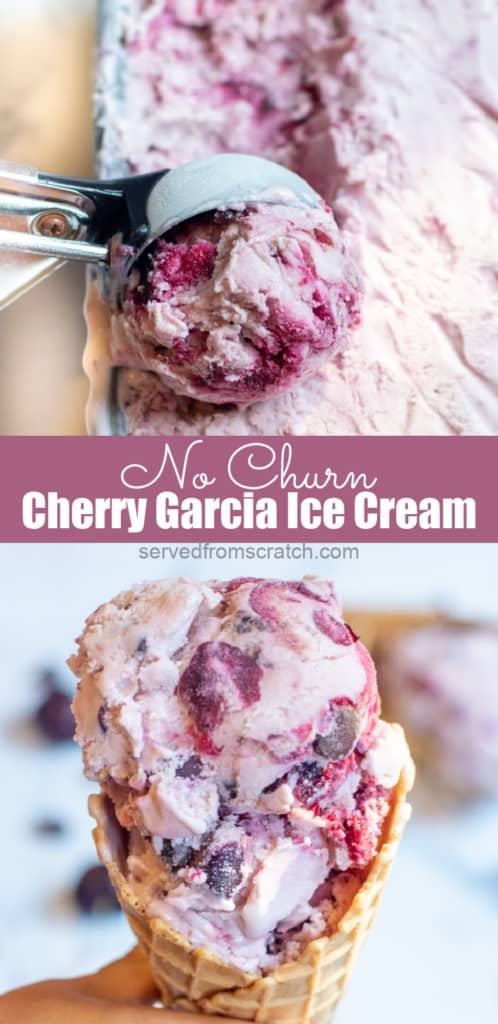
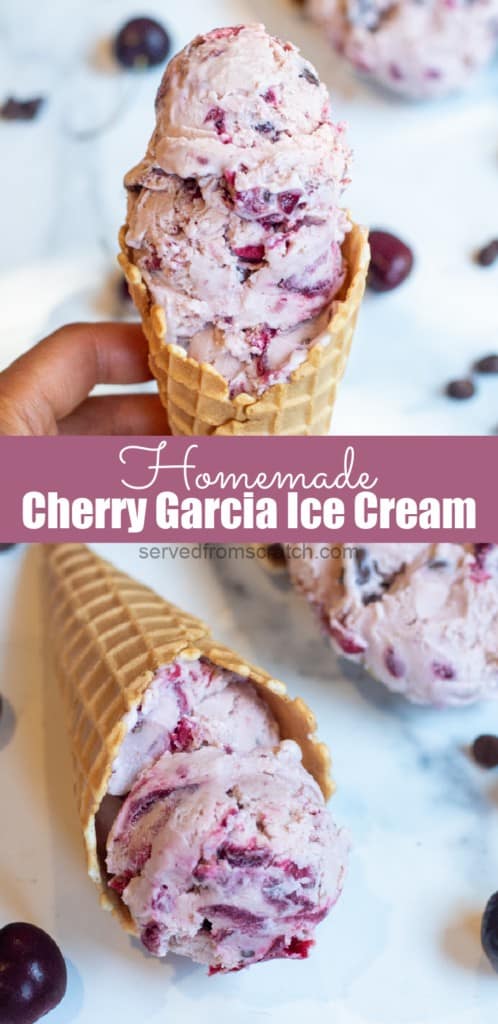
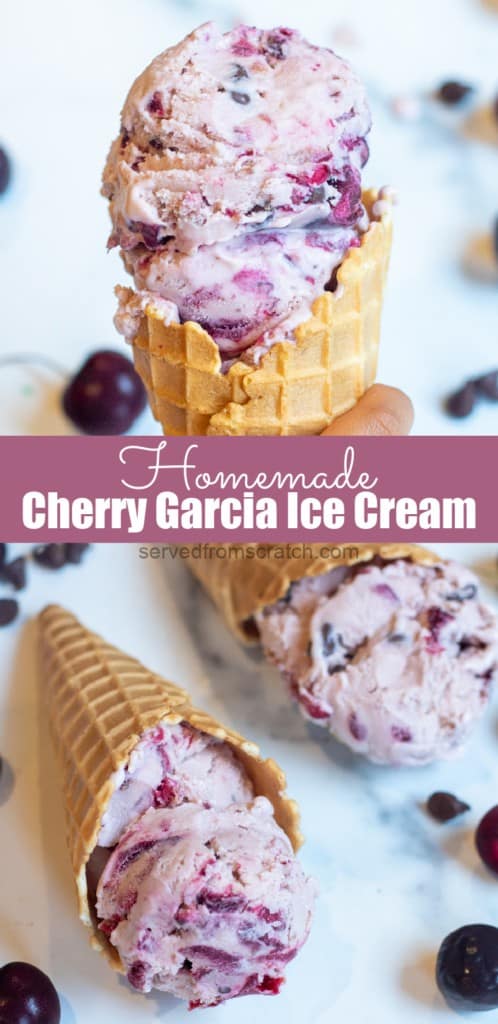
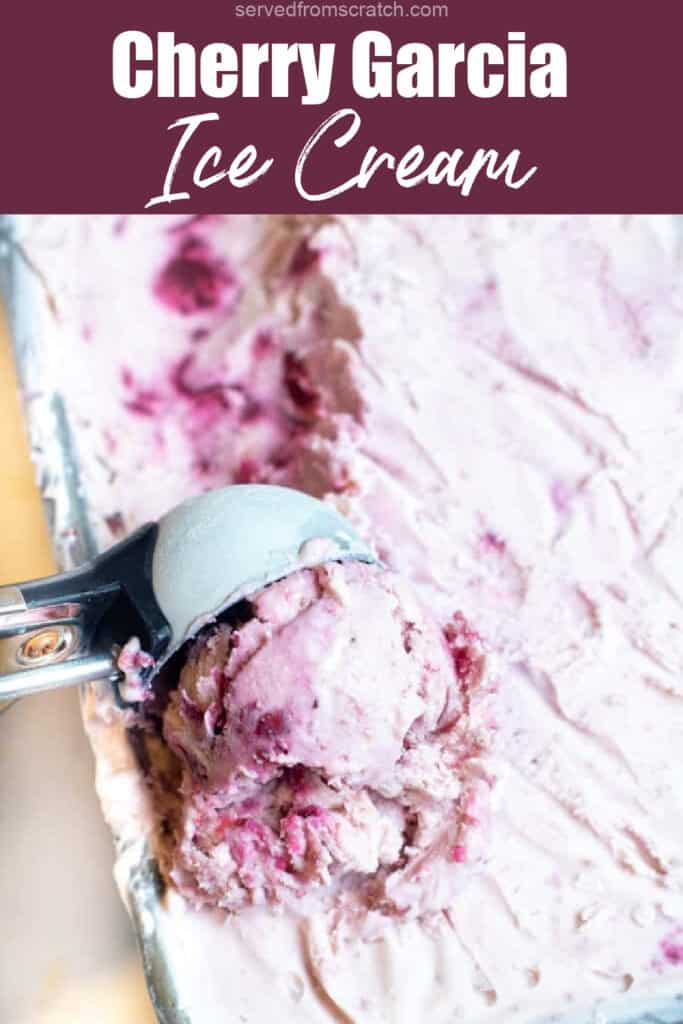
Put those fresh summer cherries to use for this Homemade Cherry Garcia Ice Cream! This recipe has instructions to make it with an ice cream maker or as no churn ice cream, both ways make a creamy dreamy copycat of a classic!
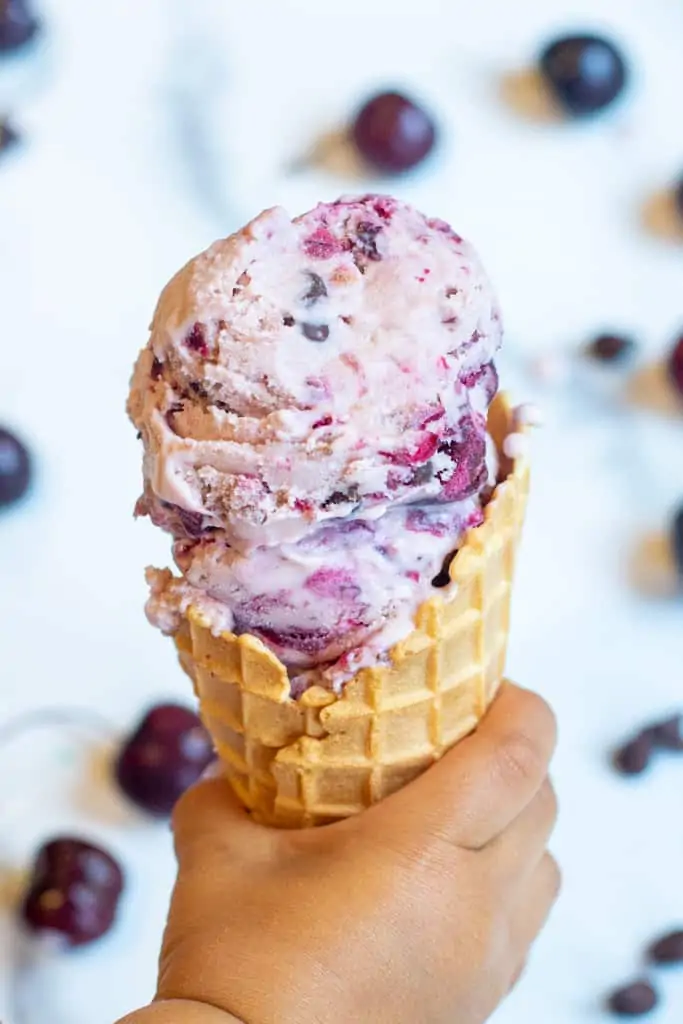
It's the OG Cherry Ice Cream that I know you all know of! I mean who doesn't know the iconic Ben and Jerry's ice cream flavor dedicated to the one and only Jerry Garcia? It's one of my husband's favorites, which is why we knew we had to make some Homemade Cherry Garcia Ice Cream of our own with our fresh-picked summer cherries!
Our favorite way to make this ice cream is with an ice cream maker (this is the one we have and love), but we do provide instructions on how to make this without one, either by doing a little hand churning or even as a no churn ice cream!
Churned vs. No Churn Ice Cream
Churned Ice Cream - The traditional way to make ice cream is by using milk, cream, sugar, and eggs, and then mixing and freezing. The eggs (used to create a custard base) and churning the ice cream is key to creating the silky, luscious, and rich texture and flavor. By churning the homemade ice cream, you're preventing ice crystals from forming, and also incorporating air which will create that smooth, creamy texture. No ice cream maker? No problem - you can still make your own churned ice cream, with just a little more time and attention.
No-Churn Ice Cream - This is a ton easier to make and less technical, but will still produce a creamy, delicious ice cream. In the absence of custard and the churning, you'll instead use sweetened condensed milk and whip the heavy cream to create that creamy texture.
We've made this ice cream both ways, and trust me, both homemade ice creams are delicious and both make an amazing Homemade Cherry Garcia, however, if you have an ice cream maker and the time, there's truly nothing like a traditional churned, custard-based ice cream.
Ingredients Needed
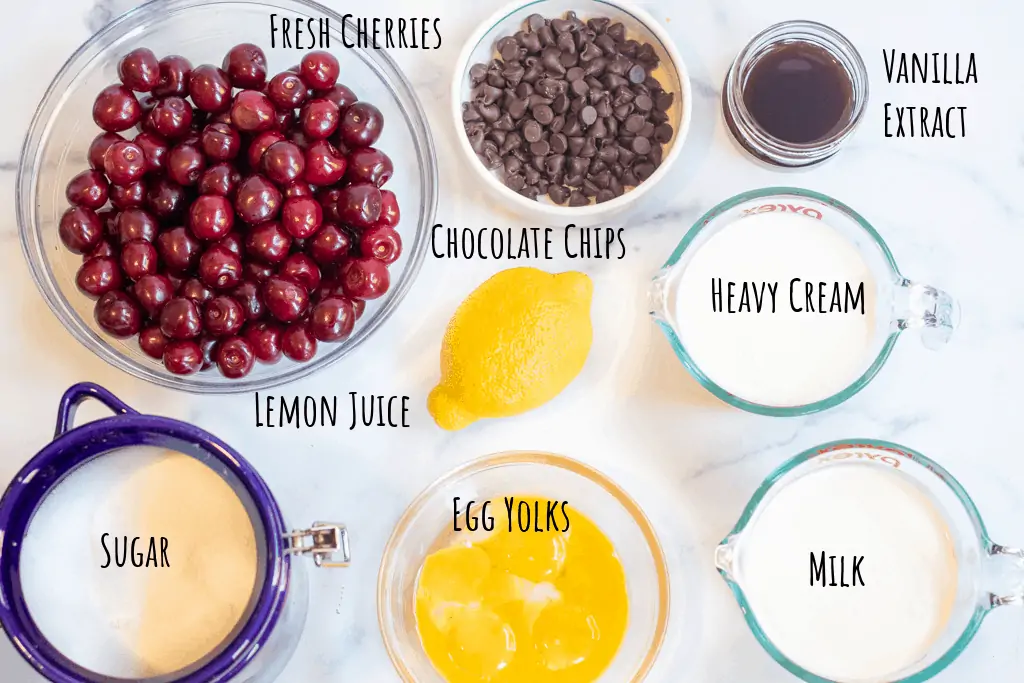
For the Traditional Churned Ice Cream
- Cherries - While it's cherry season this is the absolute perfect way to highlight them! But don't worry, you can get your off season fix by making this with frozen cherries, too!
- Chocolate - Chips, chunks, dark, milk, or semi-sweet, use whatever you have/like!
- Heavy Whipping Cream, Whole Milk, and Sugar - Homemade Ice Cream staples
- Egg Yolks - For the custard. But don't throw out those whites - make yourself some meringue cookies!
- Vanilla Extract
- Lemon Juice - For added acidity to your cherries while they cook down.
For the No Churn Ice Cream, just swap the whole milk and egg yolks for sweetened condensed milk.
How to Make a Churned Ice Cream
1. Make a custard base
What sets a no churn and a churned ice cream apart, is the custard base. This is the base of not only this ice cream but truly any that you can imagine. In my opinion (and after making both), the custard base has a much richer, truer ice CREAM flavor.
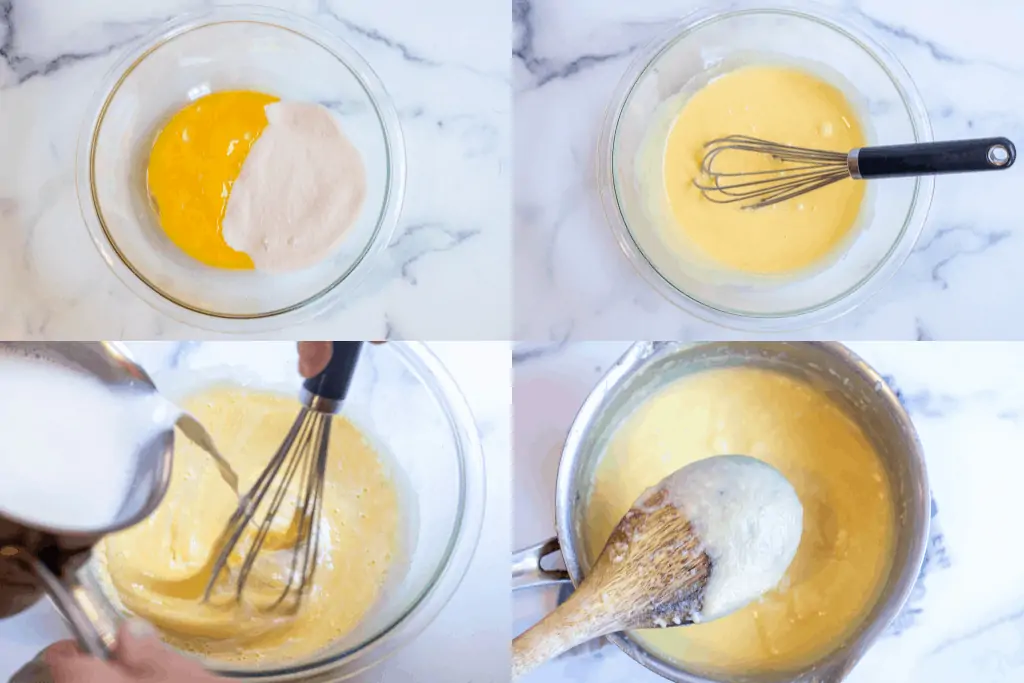
To create the custard you will:
- Heat milk
- Whisk egg yolks with sugar
- Add milk
- Return to heat until thickened
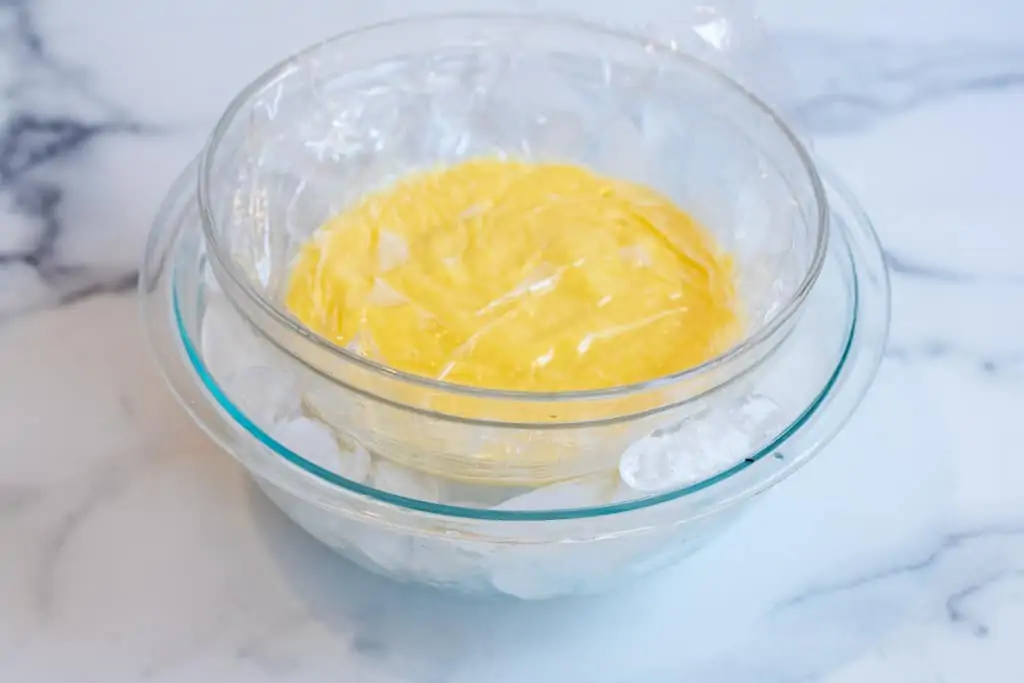
- Cool the custard
This is undoubtedly the most technical, hardest, and downright nerve-wracking part of the process. Things can go sideways a few ways here - you could burn your milk, your could scramble your eggs, or your custard could be lumpy. So here are our tips to getting that custard right:
- Heat your milk slooowwlly, stir it often, and use an instant read thermometer to know when it's reached the right temp.
- Add that milk even slower to the eggs and whisk constantly, to prevent the eggs from scrambling.
- Don't worry if some lumps form, just keep whisking!
2. Prepare the Cherries
When we say Cherry Garcia, we mean cherrrrrrryy.
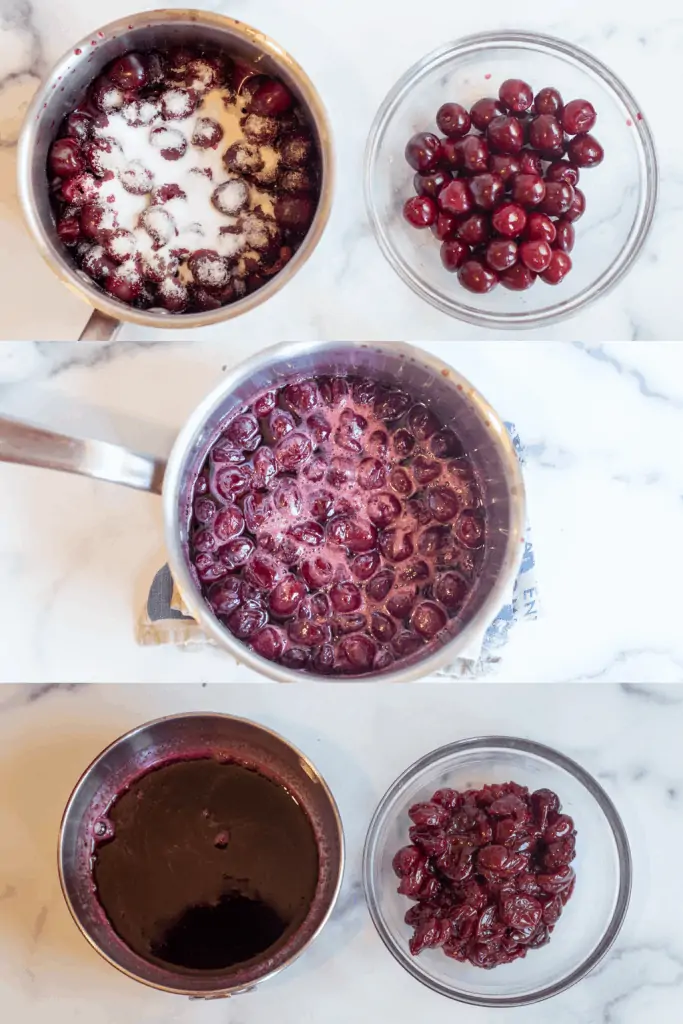
To get the ultimate cherry for the Homemade Cherry Garcia Ice Cream, we add cooked cherries, cherry syrup, and chopped fresh cherries!
- Macerate the cherries.
- Add lemon juice and then cook cherries
- Separate the syrup from the cooked cherries
3. Bring it all Together
Now it's time to add it all to the ice cream machine!
- Add the heavy cream, cherry sauce, vanilla extract, and just a pinch of salt to the custard.
- Mix well and add to your chilled ice cream machine bowl.
- Set the bowl in the machine and let it churn until it's the consistency of soft serve.
Note: This is also (minus the cherry sauce) the base to any ice cream you want! Just mix that custard and heavy whipping cream and vanilla to create your base and then finish it with whatever you want to create endless possibilities of homemade ice cream!
4. Add the Finishing Touches

This is when you add the cherry and chocolate to the Cherry Garcia!
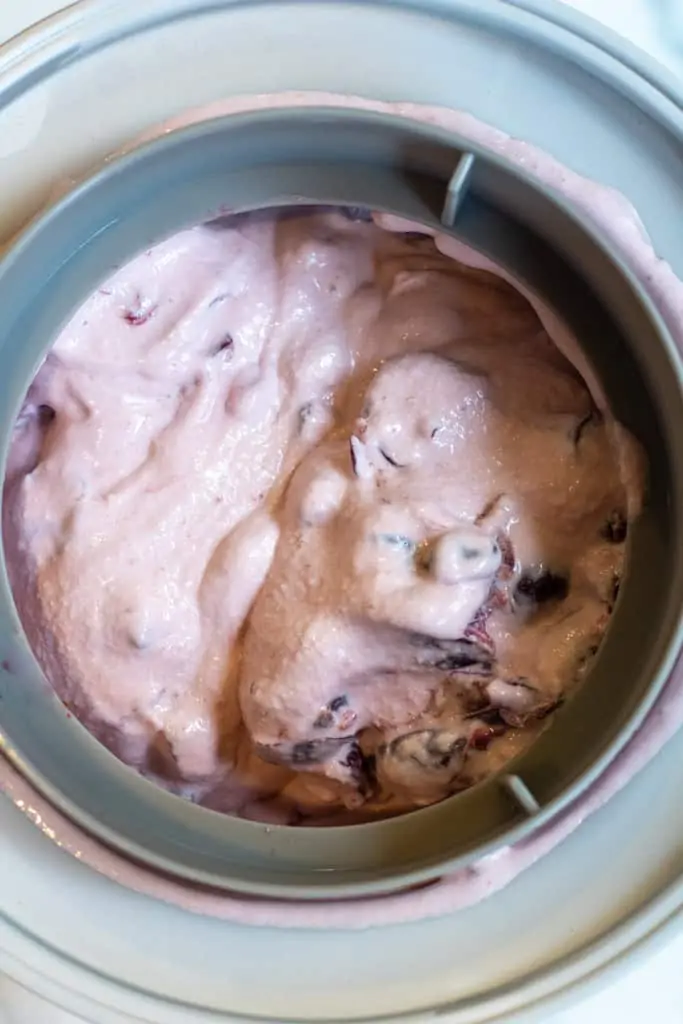
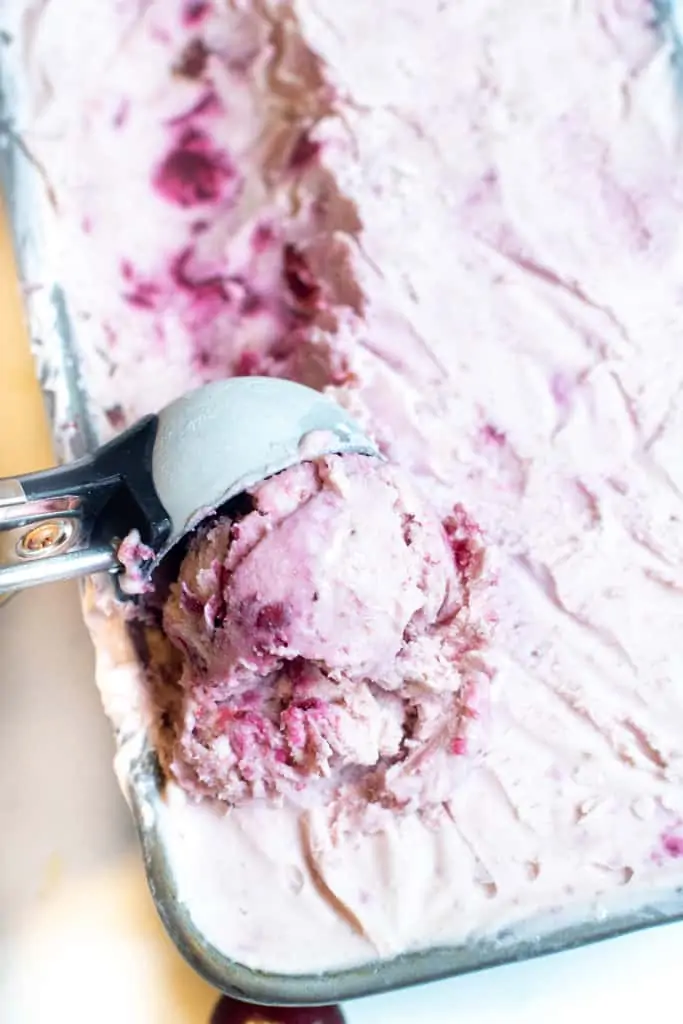
Churn a bit more and then transfer, cover, and add to the freezer to set!
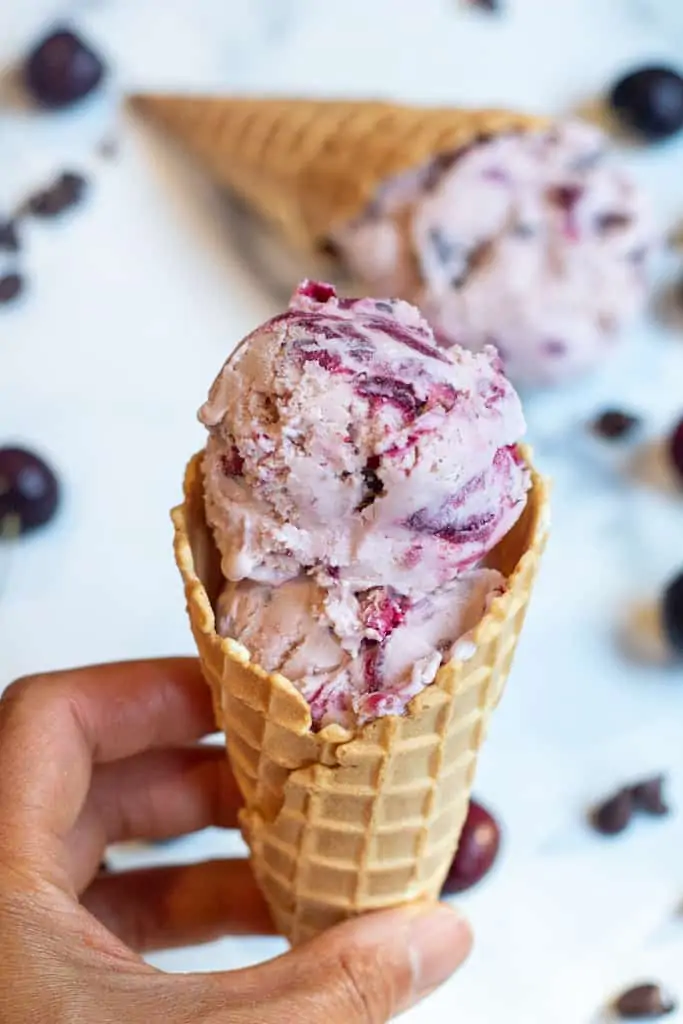
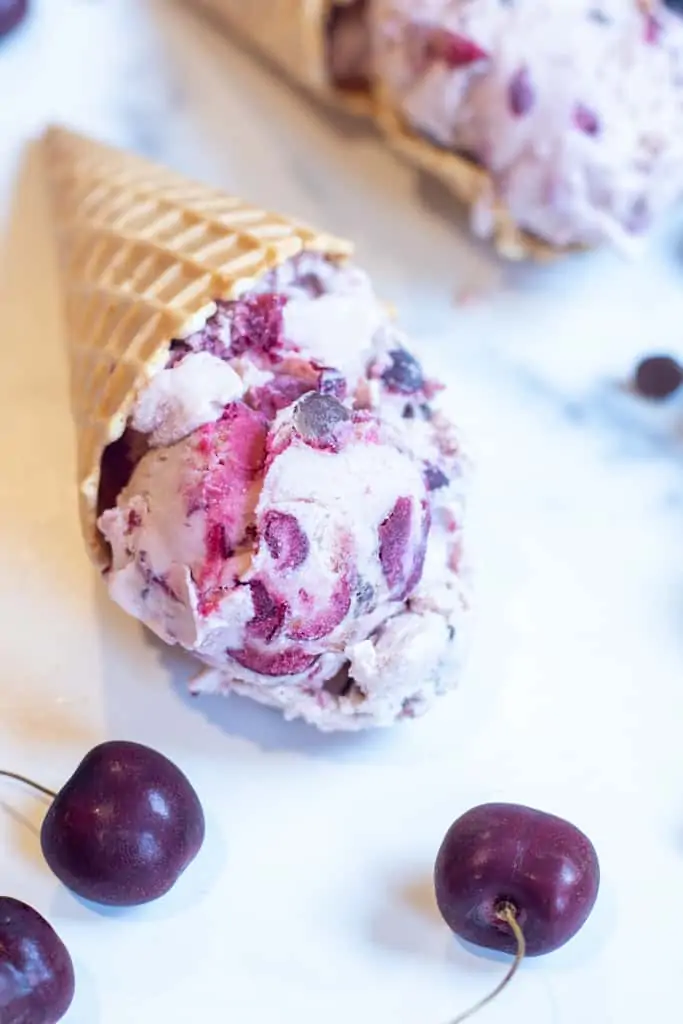
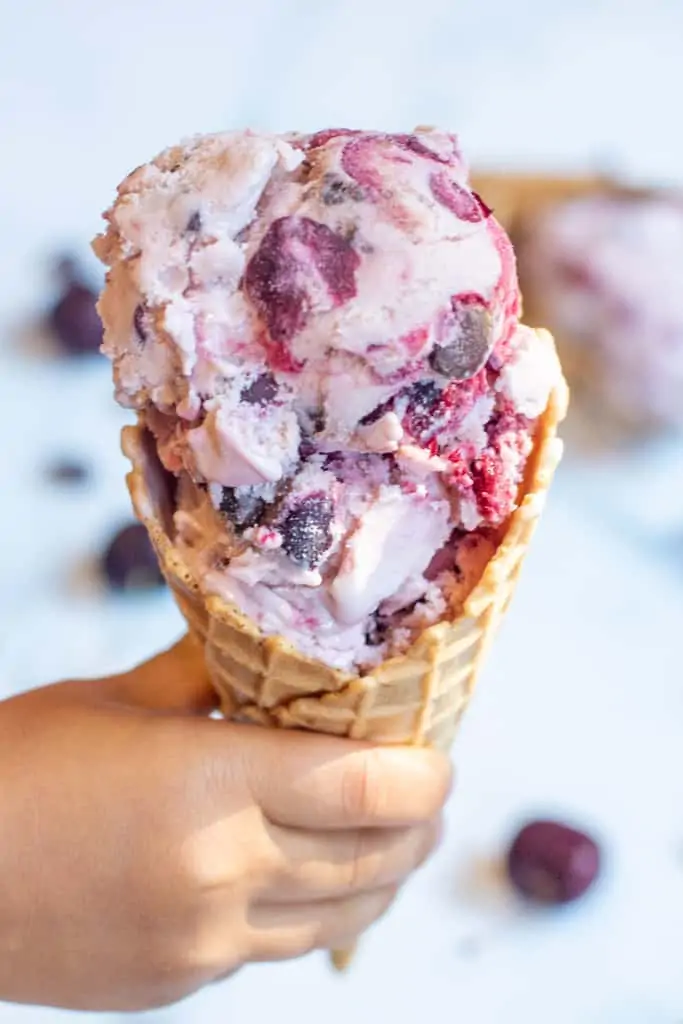
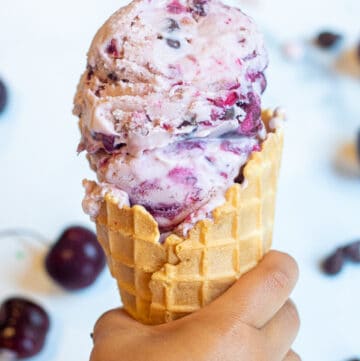
Until you're ready to scoop into your favorite cone! I mean is there any cone better than a waffle cone?
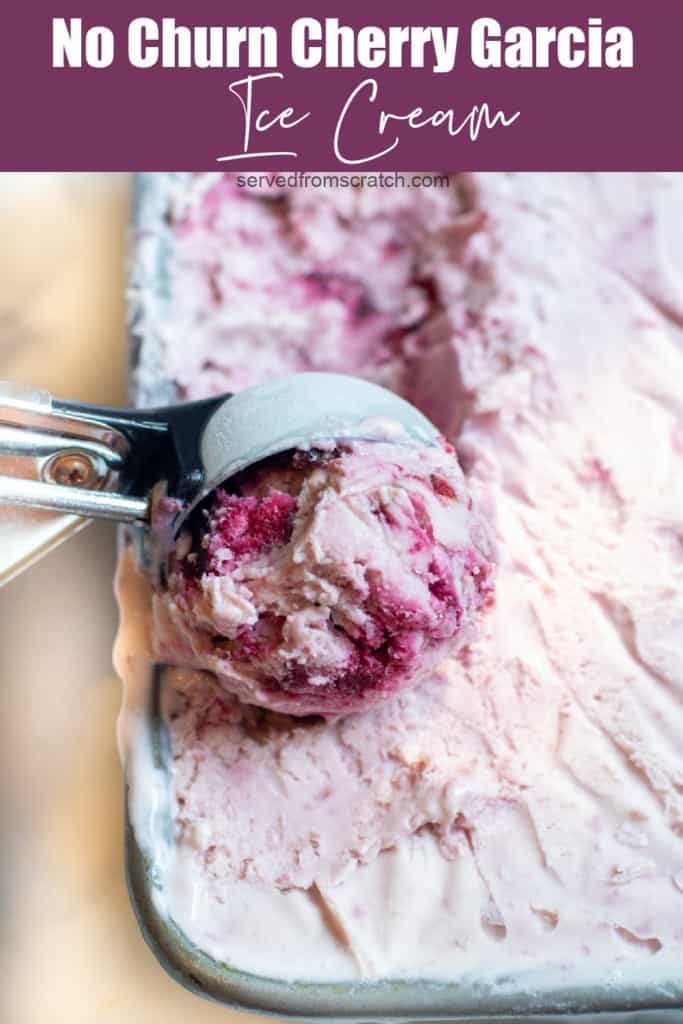
How to Make it No Churn
No time for all of that? No problem, you can also make this delicious Homemade Cherry Garcia with much less work!
- Prepare the cherries / sauce.
- Whip heavy whipping cream until soft peaks form.
- Fold in sweetened condensed milk and cherry sauce.
- Fold in the rest of the cooked cherries, whole cherries, and chocolate chips.
- Add to a loaf pan to freeze.
- Done!
Easier and still delicious!
My girls are obsessed - with both versions!
While the churned ice cream maker version definitely had a richer flavor (from the custard), the no churn also had a sweeter, slightly different texture (from the sweetened condensed milk).
Whatever version you make, you will not regret it! Serve it on cones, serve it in bowls, add it to milkshakes, or just do it like Ben and Jerry's is meant to be eaten - out of the container with a spoon.
FAQs
It depends on how bad it is. If it's a whole bowl full, you'll need to start over. If it is just a few bits, no problem. Just strain those out before you chill the custard.
Just keep whisking - vigorously! Or use a blender - here are some great tips.
Yes! See recipe notes.
You can, whole milk will just provide a richer flavor. 2% milk also runs a higher risk of crystallization when freezing.
Enjoy! As always, if you make this recipe or any of my others, I love to hear what you think! Leave a comment below, email me, or you can find me on Facebook, Instagram, and Pinterest!
If you want to see more, be sure to sign up for my 5 Easy Ways to Start Cooking From Scratch!
Homemade Cherry Garcia Ice Cream
Equipment
- or Stand Mixer / Hand Mixer and Loaf Pan
Ingredients
- 1 1/2 lbs cherries
- 1 1/2 cups whole milk
- 2 cups heavy whipping cream
- 6 large egg yolks
- 1 1/4 cups granulated sugar
- 1 teaspoon lemon juice
- 1 teaspoon vanilla extract
- 3/4 cup chocolate chips or chunks
- pinch salt
Instructions
- Add the churn of ice cream maker to the freezer to chill.
Prep Cherries
- Pit your cherries. Divide 1 lb and 1/2 lb.
- Add 1 lb of pitted cherries to a small sauce pan and add 1/4 cup of the sugar. Let sit for 30 minutes to macerate (or release it's liquids).
- 1/2 lb of cherries, roughly chop and set aside.
Create the Custard Base
- Prepare a custard ice bath by adding ice to a large bowl with a medium sized bowl placed on the ice. Set aside.
- Add milk to a 3 quart pot and heat on medium low, stirring reguarily to prevent scorching.
- Meanwhile, whisk egg yolks with 1 cup sugar.
- When milk is heated to 195° F, slowly add it to the whisked eggs and sugar.
- Transfer this mixture back to the pan and continue to cook over a medium heat and whisk constantly until it is thickened. If it gets lumpy, just keep whisking. If you don't whisk constantly you may scramble your eggs.
- Strain custard into the medium sized bowl in the ice bath. Cover with plastic and cool in fridge for 2 hrs.
Create Cherry Sauce
- After 30 minutes, add lemon juice to cherries and cook pan over medium heat, until a syrup begins to form from the cherry juice. Approximately 30 minutes.
- Pour cherries into a sieve over a bowl to separate cooked cherries from cherry sauce and set both aside.
Create Ice Cream
- Once custard has cooled, add heavy whipping cream, cherry sauce, vanilla extract, and pinch of salt to it. Whisk well until it's all incorporated and a smooth consistency.
- Add to chilled ice cream churn and set the machine to churn for 20 minutes until it has a soft serve consistency.
- Add chopped cherries, cooked cherries, and chocolate chips to churn. Return to ice cream maker and churn for another 15 minutes.
- Transfer to a freezer safe bowl or container, cover with plastic wrap, and add to freezer to freeze for 3-4 hours.
- Enjoy!


I already made two batches of this delicious ice cream! I love the flavors and it's a perfect treat for the Summer!
How good is this ice cream. Creamy delicious and in my freezer 🤣
This was a perfect tutorial for my favorite ice cream flavor. Your detailed steps ensured my success. I hate it when recipe writer's leave out key instructions and leave me trying to figure out what to do. My cherry garcia ice cream was spot on thanks to you.
I'm so excited to make this ice cream! I just got a ton of cherries at the farmers market yesterday and this is definitely going on the list of recipes to make with them!
Say YES to cherry season. The perfect ice cream for summer. I know this will be a hit with the family. So much better than store-bought.
Too many steps and too complicated for a custard base. I have an electric compressor Cuisinart ice cream machine that makes my life easier. This is just too many steps and too many dirty dishes.
Your opinion is noted! For those of us that don't have a compressor ice cream maker, and accept steps and dirty dishes with recipes, then this recipe is for them. 🙂
The Cherry prep instructions say to add 1 lb of cherries to a small sauce pan and “add sugar” but it doesn’t say how much sugar to add in this step. The ingredients list says 1 1/4 cups sugar and the custard instructions say to “whisk egg yolks with 1 cup sugar”. So does this mean that the remaining 1/4 cup should be used in the Cherry prep stage?
Yes! Thank you so much for pointing that out, Xavier, I've updated the recipe. Enjoy!
Seriously, I saw a sign for homemade cherry ice cream at our local fruit stand so I am glad you posted this recipe for a classic ice cream.
This ice cream looks and sounds delicious! I cant wait to make it!
This has my mouth watering! I will be adding this for our camping trip this coming weekend!
Thanks, Liz! Enjoy!!