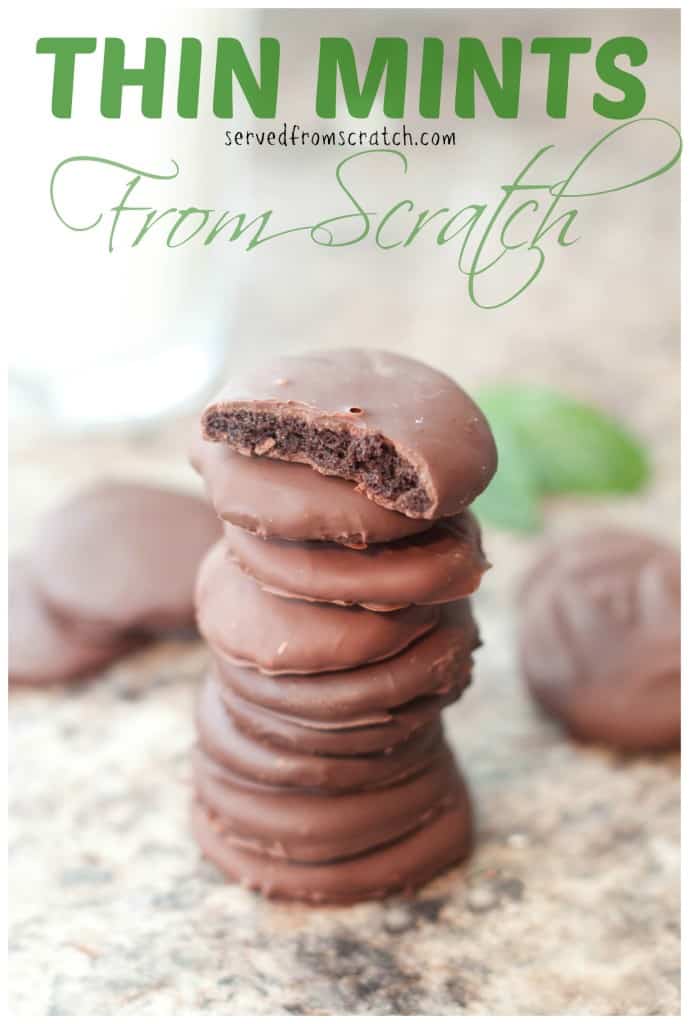
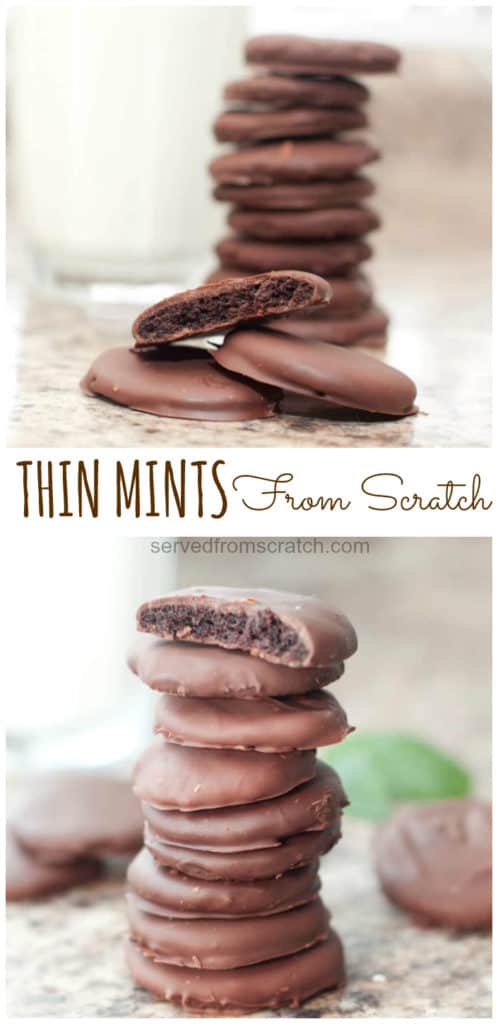
No need to wait, this copycat Girl Scout Cookie recipe means you can have your favorite chocolate mint cookie at home any time of the year. You'll be surprised to see how easy it is to make your own Thin Mints From Scratch!

I don't know about you all, but the one time of the year that Girl Scout cookies are sold, it's just not enough. And no matter how I try to prepare for the many months in between that oh so delicious time each year (by prepare I mean fill my freezer with cookies to ration), there will inevitably be a time when I'm craving a Thin Mint but I've already run out. That's why we're bringing you this copycat Girl Scout cookie recipe, our Thin Mints From Scratch!
Ingredients Needed
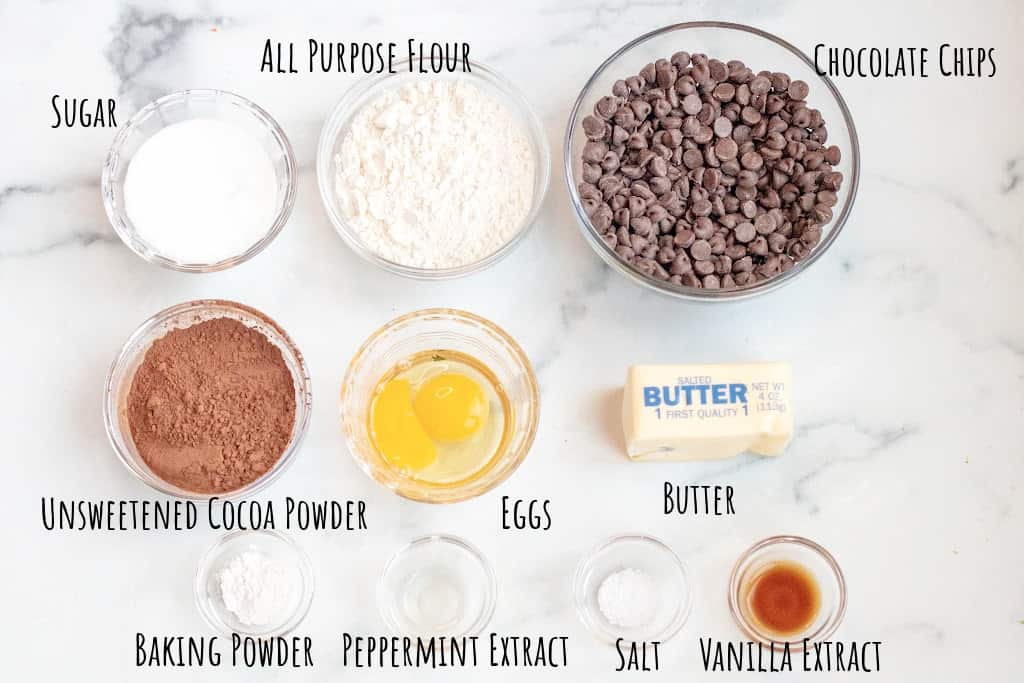
Even better, these guys are actually pretty simple, and way more affordable! The delicious minty inside is just a simple cookie made of:
- Flour - All-purpose flour is great, or even a 1:1 gluten-free flour would work as well.
- Cocoa - Unprocessed and unsweetened.
- Sugar - Just enough for the cookie, which is not super sweet. These cookies get most of their sweetness from the chocolate coating.
- Eggs - 1 full egg and one yolk.
- Baking Powder - Just the right amount of leavening
- Vanilla extract (by the way, have you made your own yet?!)
- Peppermint extract - For that signature mint flavor!
- Butter - Salted or unsalted. We use salted most of the time because that's what we have on hand, but of course you can use unsalted too and just add a pinch more salt.
- Chocolate Chips - Or your favorite sweet chocolate melts. This is for the chocolate coating!
Simple, right? Do you already have everything in your pantry?
Step-by-Step Instructions
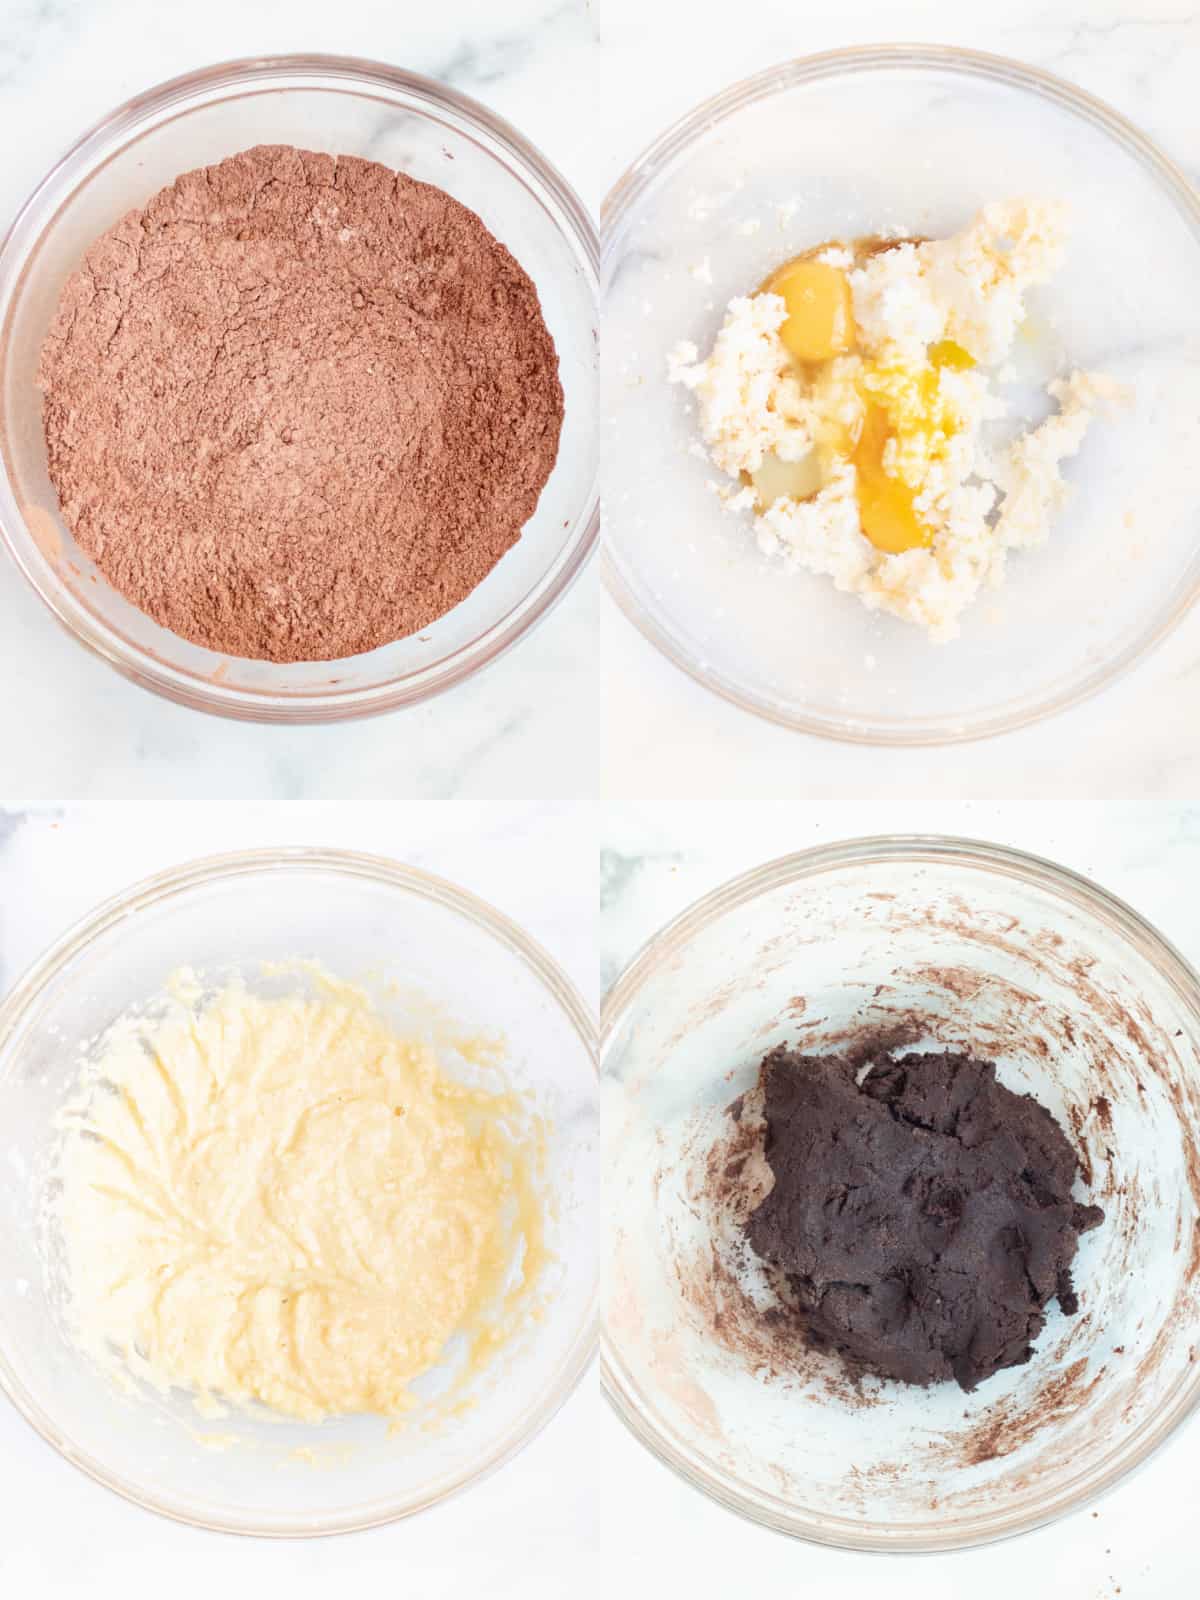
- Step 1: Whisk together the flour, baking soda, salt, and cocoa powder.
- Step 2: Cream butter and sugar, this is our favorite hand mixer.
- Step 3: Add eggs to butter and sugar and mix with a mixer.
- Step 4: Slowly add the flour and cocoa mixture and mix together until a nice sticky dough forms.
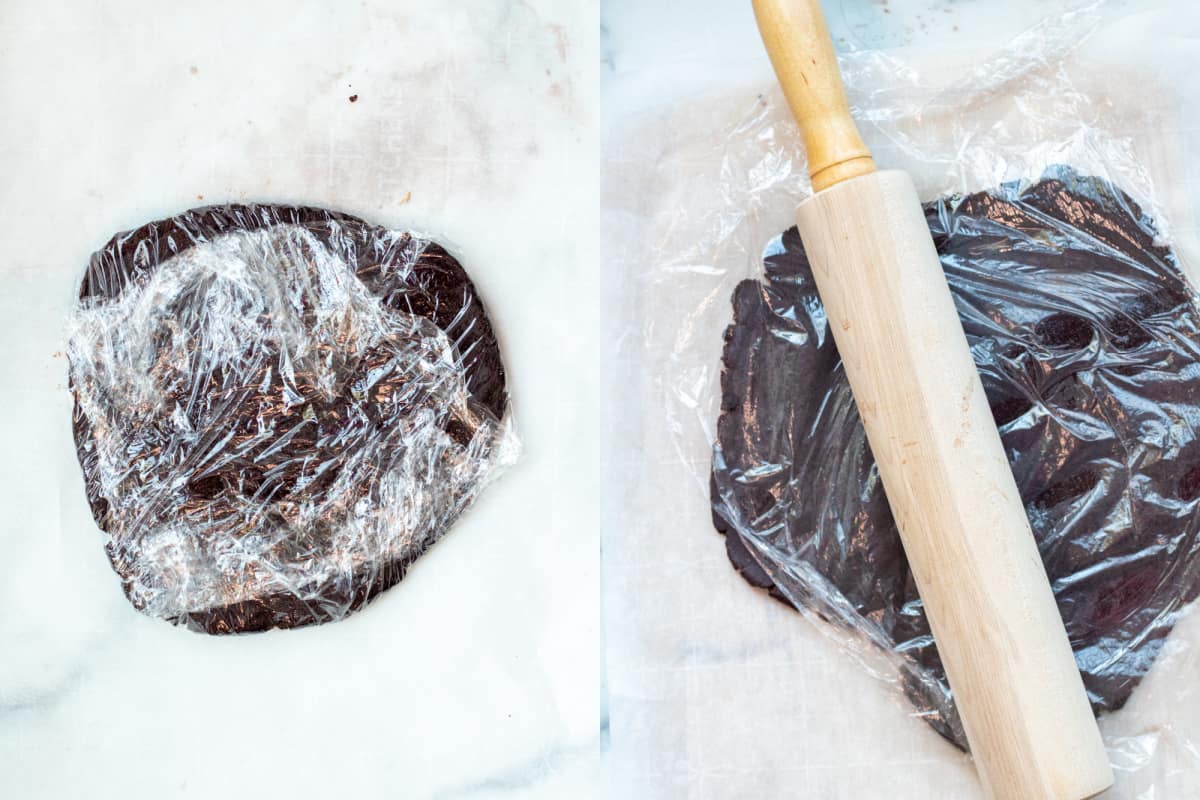
Chill The Dough and Roll it Out
Flatten that dough into a disc and wrap it in plastic wrap to cool in the fridge. This will make it much easier to work with a rollout.
Then when it's chilled, reuse that plastic wrap to put it on top of the dough to work as a barrier between your rolling pin and the sticky dough.

Cutout Circles
Once you've rolled your dough out into a thin disc, about 1/8 inch thick, now it's time to cut out little circles about 2 inches in diameter. We love these circle cutouts because you'll have a cutout for any sized circle you need/want!
This is a great part to let the little hands in the kitchen help!
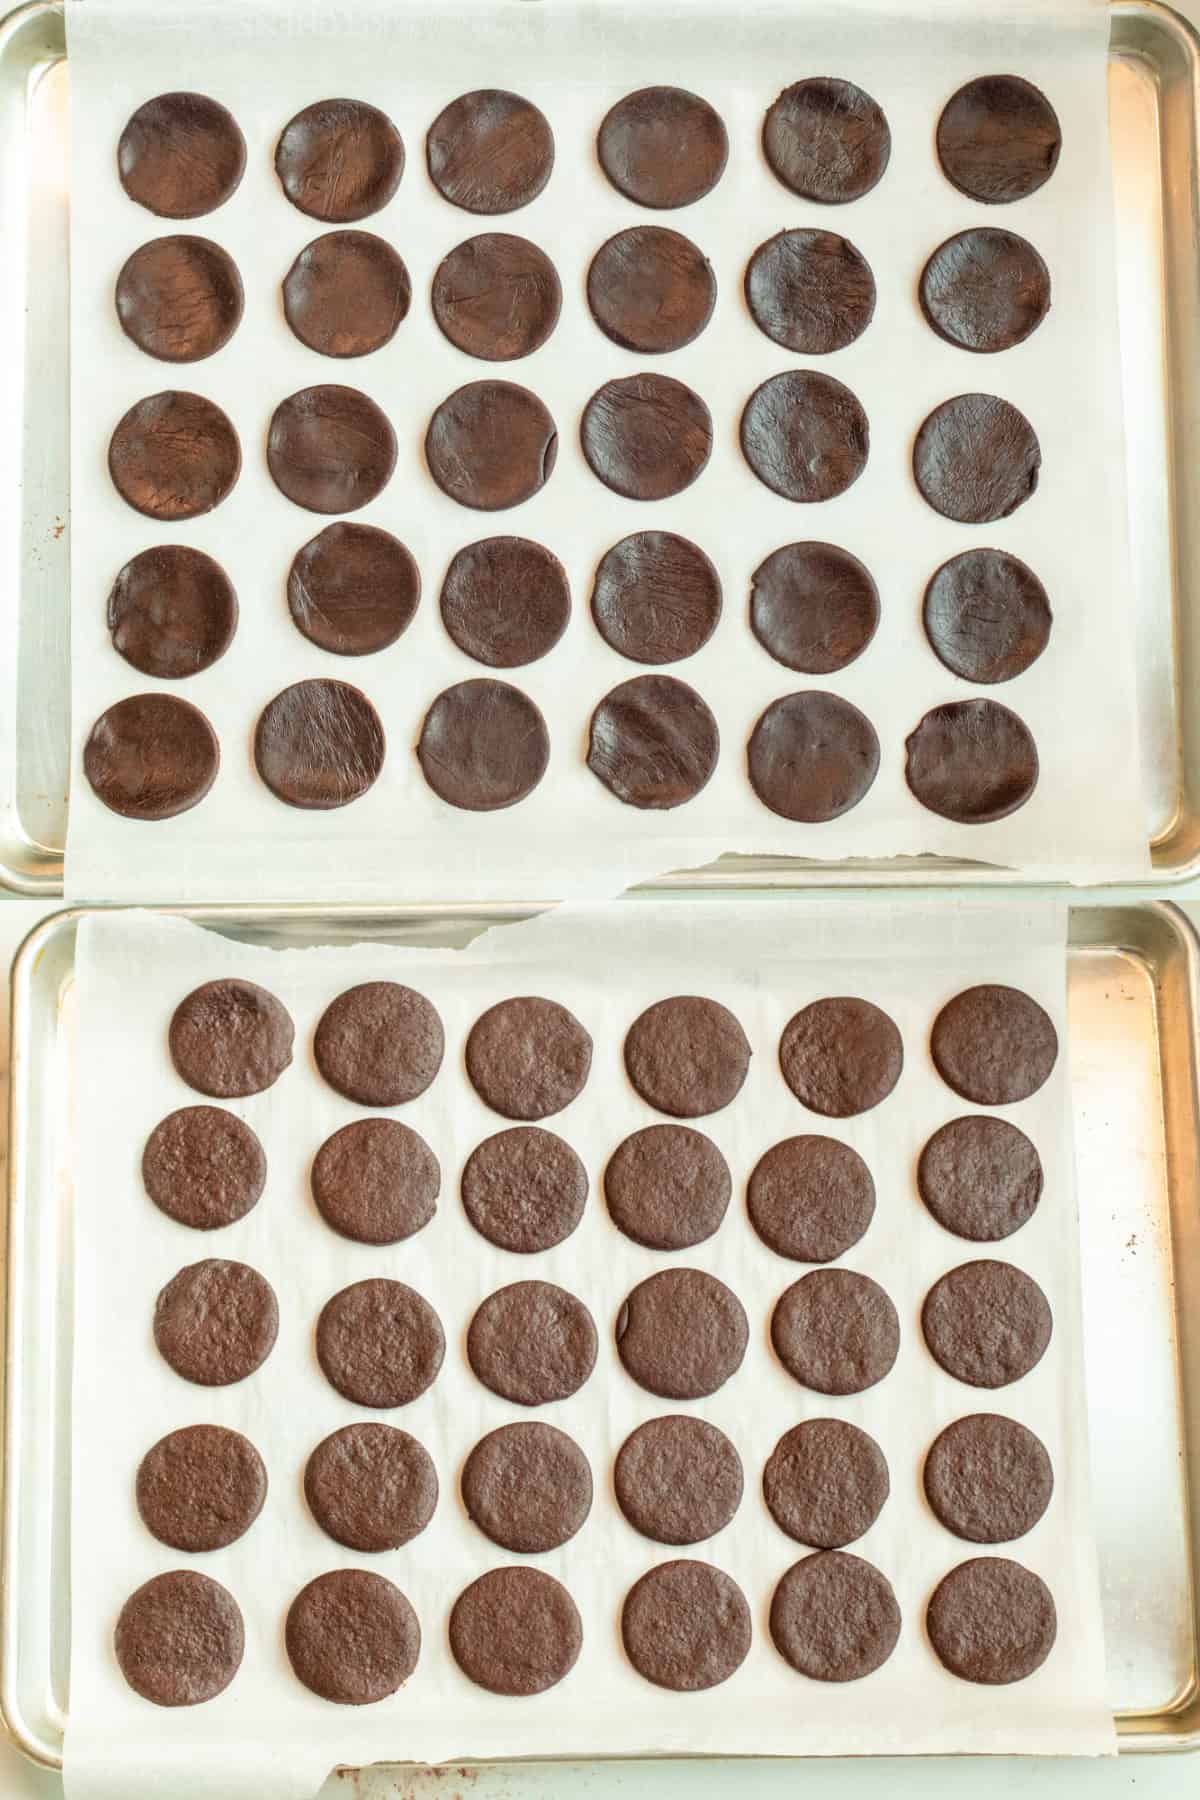
Bake!
Bake into thin crispy peppermint spiked cookies!
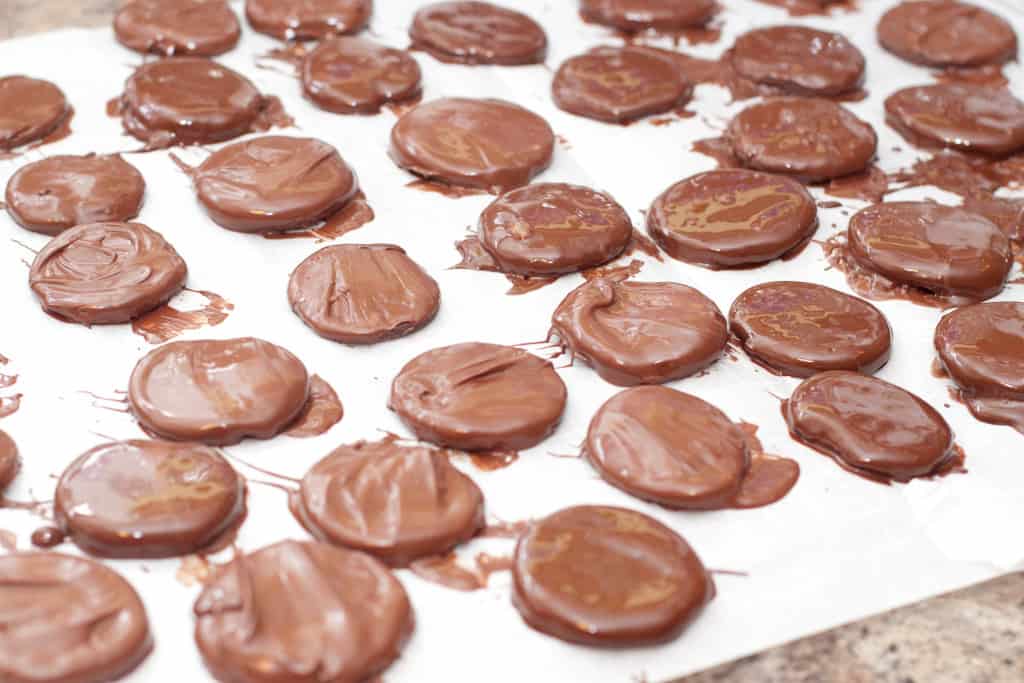
Coat in Chocolate!
Now for the best part, melt the chocolate chips in a double boiler and then coat the crispy thin cookies!

Let the chocolate set and you're done! Crispy minty chocolate cookie on the inside with a chocolate coating on the outside. Mmmm Thin Mints From Scratch success!!
Recipe Tips
You can make this dough and store it in the fridge up to 24 hours in advance, or you can even store it in the freezer for up to 3 months!
This dough is definitely sticky, but there are a couple of ways you can prevent it from sticking to your hands and rolling pin. For your hands, run them under cold water, and shake off the excess water. Then when you shape your dough into the disc, it'll help stop it from sticking to your hands.
When rolling the dough out with a rolling pin, roll it out on parchment paper and use plastic wrap to separate the dough and the rolling pin.
This recipe has a nice subtle mint flavor. But do you absolutely LOVE mint? Add even more to the cookie dough and chocolate coating to fulfill all of your chocolate-mint dreams!
Be sure to roll out your cookie dough disc to about 1/8 in thin as that way they'll cook fast and then be nice and crispy!
If you decide to go a little thicker, no problem. Just make sure they're all the same thickness so they cook evenly.
You don't, but I think a mixer is the best to cream the butter and sugar. You can also use a stand mixer or use a fork to mash the butter and then using a wooden spoon to stir the sugar and butter until they're fluffy.

We seriously love these copycat Girl Scout Cookies. Better yet, a batch of them will make more than you get in that green box!
Some of our other favorite Cookies
- Chai Spiced Snickerdoodles
- Homemade Mint Milano Cookies
- Lemon Ricotta Cookies
- Eggless Peanut Butter Cookies
- Classic Butter Balls
- Pecan Sandies
- Andes Stuffed Sugar Cookies

Enjoy! As always, if you make this recipe or any of my others, I love to hear what you think! Leave a comment below, email me, or you can find me on Facebook, Instagram, and Pinterest!
If you want to see more, be sure to sign up for my 5 Easy Ways to Start Cooking From Scratch!

Thin Mint Cookies From Scratch
Equipment
- kitchen scale optional
- parchment paper
- plastic wrap
Ingredients
- 1 cup all-purpose flour 135 g
- 1/2 cup unsweetened cocoa powder 50 g
- 3/4 cup granulated sugar 134 g
- 1 teaspoon baking powder
- 1/4 teaspoon salt
- 5 tablespoons butter softened at room temp
- 1 large egg plus 1 large egg yolk at room temperature
- 1 teaspoon vanilla extract
- 1 1/2 teaspoon peppermint extract divided
- 2 1/2 cups semisweet chocolate chips about 15 oz
Instructions
- In a medium sized bowl, whisk together the flour, cocoa powder, salt, and baking powder. Set aside.
- In a large bowl, with a hand mixer on medium, beat together butter and sugar with a hand mixer on medium speed until creamy and it's all well combined. This will take about 1- 2 minutes. Turn the speed down to medium-low and add eggs and beat until well combined. Add vanilla extract and 1 teaspoon peppermint extract and beat again.
- Slowly add the flour and continue to mix until a super sticky dough forms. You may want to use a spoon or spatula for the final mixing.
- Line a clean workspace with parchment paper and take out a large piece of plastic wrap and set it aside. Run your hands under cold water and shake them dry. Use your hands to add the sticky dough onto the parchment paper and shape it into a round disc. Wrap it in plastic wrap and chill in the fridge for 30 minutes.
- Add (2 different pieces) parchment paper to two baking sheets.
- Remove the dough from the fridge and place it on the reserved parchment paper. Reuse the plastic wrap and place it over the dough disc to prevent sticking to the rolling pin while your roll. Use the rolling pin to roll out a disc to about 1/8 inch thick.
- Pre-heat oven to 350 degrees and place rack in the middle.
- Use a 2-inch round cutter or glass to cut out cookies from the dough and place them 1/2 inch apart on the prepared baking sheets. Gather and re-roll any scraps to cut out more cookies. If the dough sticks to your hands, run under cold water again and shake off the water.
- Add trays, one at a time to the center rack. Bake for 4 minutes and then rotate the baking sheet and bake for another 4 minutes. If cookies are thicker than 1/8 inch, then you will need to increase the cooking time. For cookies that are closer to 1/4 inch thick, bake for 5 minutes and then rotate and bake another 5 minutes.
- Let the cookies cool for 1 minute on the baking sheet and then transfer them to wire racks to cool completely. Remove parchment paper from cookie sheets and set aside.
- Meanwhile, melt the chocolate chips and 1/2 teaspoon of peppermint extract in a double boiler. Once the chocolate is melted, dip a cookie into the melted chocolate and turn to coat. Shake off any excess using a fork and place it on the parchment paper. Repeat for all of the cookies.
- Add cookies to the freezer to set for at least 15 minutes.
- Enjoy!


Yum yum yum!!! Love the texture and taste of these, spot on. My only question, anything special you do to make the chocolate go on easier? Do you dip your fingers into the chocolate? Thanks!!
Great to hear, Miranda! I used a fork to dip the cookie into the chocolate and then would use a spoon to kind of spread it on, too. 🙂
These are my favorite Girl Scout cookies, and I love the fact that you can make them from scratch to have any time of the year! Cookies and milk here I come!