Cream Cheese From Scratch


Thinking about making your own cheese? This is a great one to start with! It only takes a few ingredients and some little time to can make your very own homemade Cream Cheese From Scratch! – Newly updated with a smaller, easier-to-make amount!

What’s at the heart of from-scratch cooking? Cheese, of course! One of the easiest cheeses you can make yourself is homemade Cream Cheese From Scratch! It takes just a few ingredients and you can have the creamy dreamy perfect bagel pairing rich cheese.
Ingredients Needed:
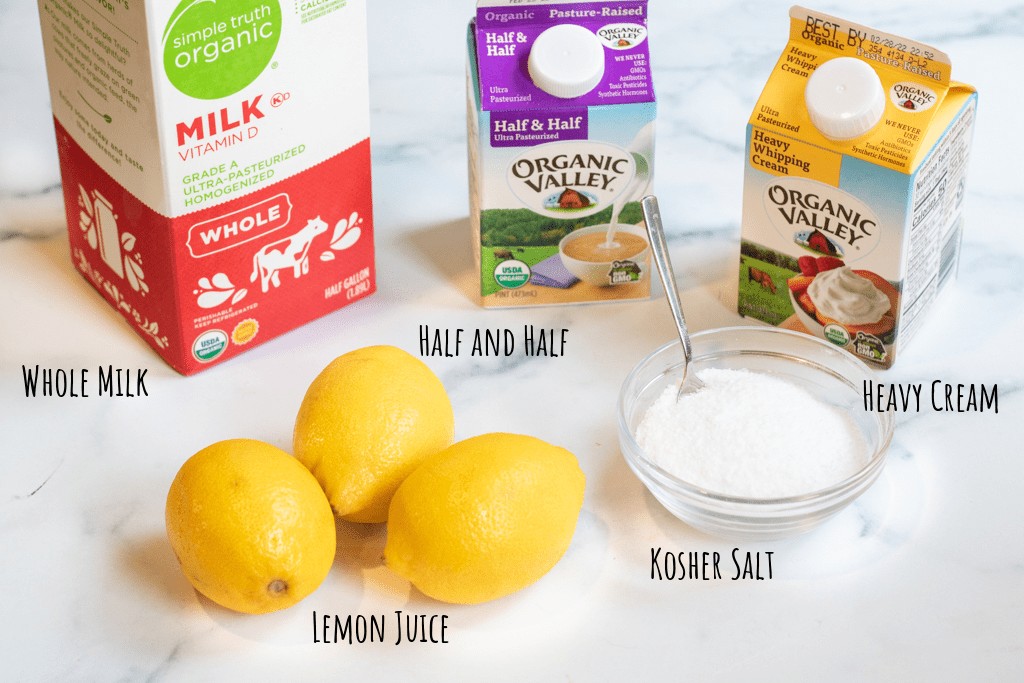
- Whole Milk – For this, you really want “regular” milk from your favorite grocer. Farm fresh (straight from the cow) don’t quite work for this recipe.
- Half and Half and Heavy Whipping Cream – This is what adds the “cream” to the cream cheese.
- Lemon juice – Fresh is what we always use, but a bottled juice is totally fine, too!
- Salt – Kosher is always our preferred for cheese making because it is the purest form of salt.
Ok, so I know that ingredient list is expensive. You can totally just use all whole milk, too but that will make really more of a Ricotta Cheese. What separates Ricotta from Cream Cheese? Cream. By using the heavy cream and half and half, you will get a much richer tasting, creamier cheese.
Equipment Needed:
- Cheese Cloth
- Sieve or colander
- Large Pot
- Thermometer
Step-by-Step Instructions
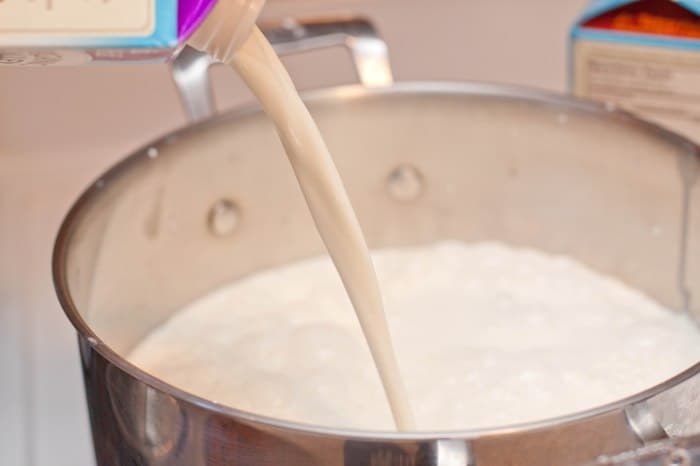
- Add milk, cream, and salt to pot and slowly heat
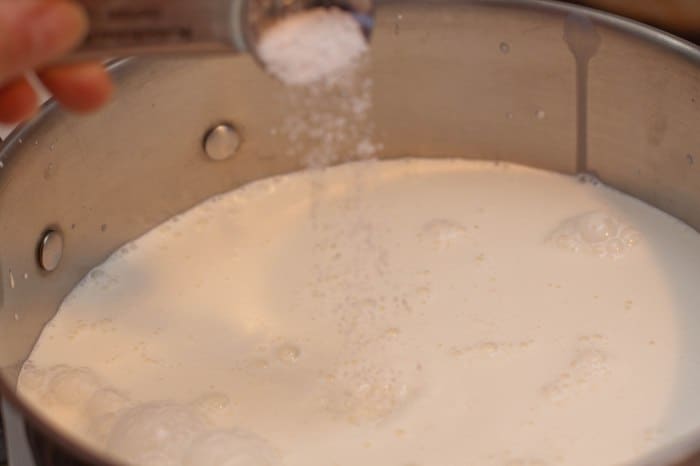
- Heat to about 165 – 170 degrees.
- Add lemon juice and give a stir.
- Continue to heat for a couple of minutes then remove.
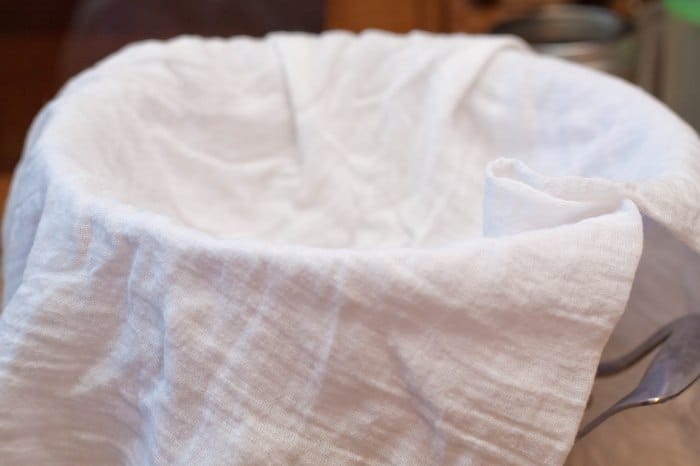
- Line a colander with a cheese cloth
Tip: Definitely make sure you have a big cheesecloth that it covers the sieve or colander fully and will give you enough to gather all of the edges.
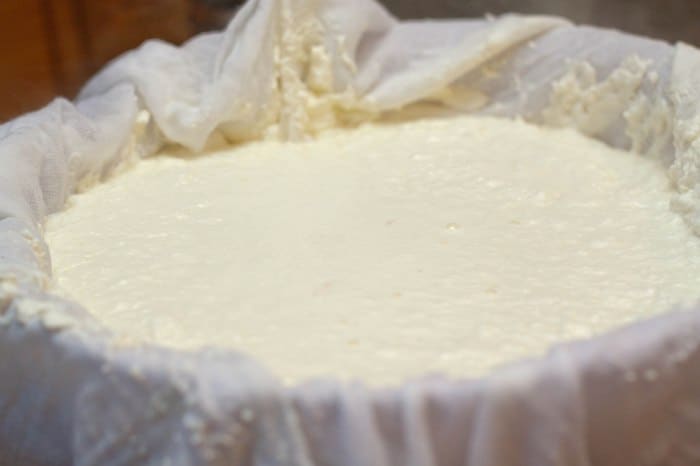
- Scoop / Pour curds into the the cheese cloth.
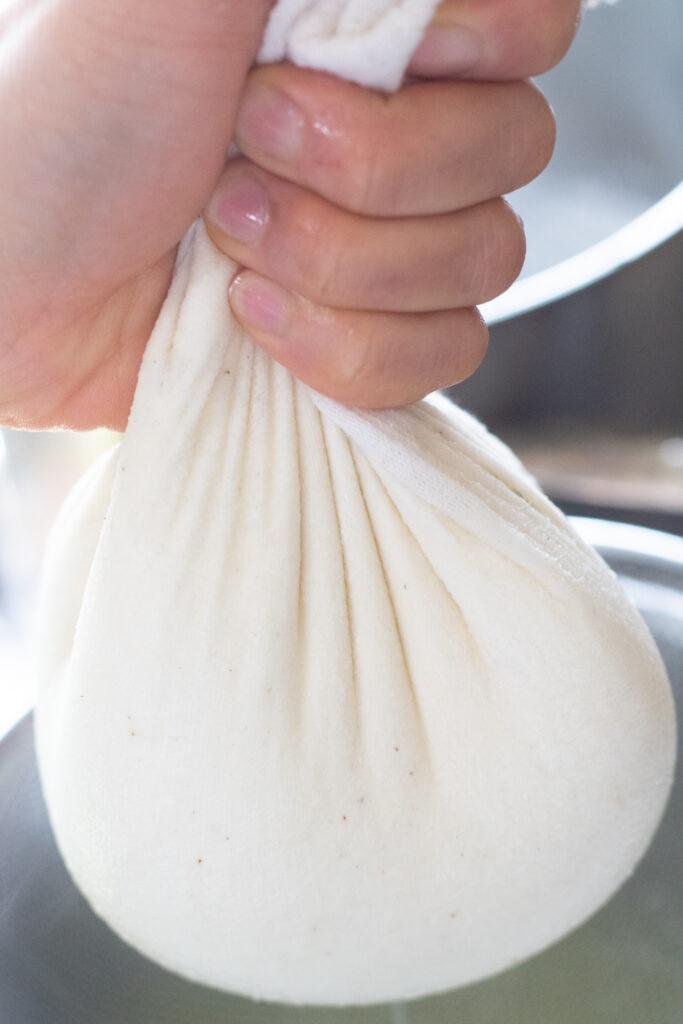
- Gather ends of the cheese cloth and let drain.

And done!
Tip: We’ve let this drain as little as 1-2 hrs and as much as 24. If leaving it out to drain more than 3-4 hrs, let it drain in your fridge or in a very cool place.
Once it’s drained, you have a super creamy, delicious cream cheese from scratch! Who known homemade Cream Cheese From Scratch was so easy!
Tips for Making Cream Cheese:
- Keep the ratios of milk to cream and half and half. You can use just milk, but if you want to use cream and half and half, keep to these ratios.
- Rinse your pot with cold water, first. This will help with the clean up after!
- Use a Thermometer. This will help ensure that you’re not overheating your milk and help prevent you from burning it.
- Make sure you have a good cheese cloth. Be sure that it’s one that’s wide so when you line your sieve or colander so that you have enough room to gather it all to hang to drain.
- Hang it for faster draining. You can just let it drain while in the sieve/colander, but gathering the edges of the cheese cloth and suspending it will help it all drain faster. Plus, doing this will allow you to gently squeeze the cloth a bit to release liquid faster.

Now that you have this Cream Cheese, you can make this amazing Cream Cheese Frosting From Scratch!
FAQs
If you overheat your milk, you’ll end up with a kind of gritty cheese. It’ll be smooth but it will have a grainy texture because the protein is denatured.
Totally. I think that it’s a little less creamy and will make a cheese that’s more like ricotta, but just using milk is still delicious!
No problem, use a mixture of half and half and heavy cream that you have, as long as the two are the majority (and ideally 2x the milk).
The separation of the curds and whey for this recipe won’t be as distinct as another cheese like mozzarella. Often, they’re very soft and cloud-like with not a lot of distinct whey and curd separation. Even if it seems like distinct curds have not formed, continue with draining.
We find the best results with 2-4 hrs. but if you want a looser, wetter cheese, then drainer for a shorter period.
It’s best to use this cheese within a week of making it.
Yes, you can. However, it will change the texture. So it won’t be great for spreading on bagels, but it’ll be great for baked goods. Just be sure to wrap it in foil and store in the freezer for up to 2 months.
As always, if you do please let me know!! I love to hear about it on Facebook, Instagram, and Pinterest!

Cream Cheese From Scratch
Equipment
- large spoon
Ingredients
- 1 cup whole milk
- 1 cup half and half
- 2 cups heavy cream
- 5 tablespoons lemon juice
- 1/2 teaspoon salt
Instructions
- Line a large sieve or colander a large cheesecloth and position over the sink or over a large bowl or pot if you plan to use the whey later. Be sure that your cheese cloth hangs quite a bit over the edges of the sieve – plenty for gathering when you drain.
- Rinse a large pot with cold water. Add milk, half and half, and creams and salt to the pot and heat over medium heat. Heat to approximately 165°-170° F, approximately 5-6 minutes.
- Stir in the lemon juice and continue for a minute or two. Curds will begin to form and float to the top and the milk/cream will begin to simmer a bit and a gentle foam will start to form. Soft curds will start to form, but they won't be as firm as curds from mozzarella, they'll be much softer and cloud-ike. Once you start to see them form, turn off heat and let it sit for another minute and then remove from heat.
- Let sit for 2 minutes and then use a large spoon to gently scoop curds into the cheesecloth, and then slowly and gently pour the rest of the curds/whey into the cheesecloth. Note: The curds will often seem very soft and cloud-like and it may seem like they're not scoopable. If that's the case, just gently pour into the cheesecloth and allow to drain.
- Gather edges of the cheesecloth and suspend over kitchen faucet or just let drain in the cheesecloth lined sieve/colander. You can give the wrapped cheesecloth a gentle squeeze or release some of the whey. See recipe notes.
- Let drain for at least an hour and up to four.
- Gently open cheese cloth and turn cheese into a large bowl. If it seems a little loose still, that's ok it will thicken a little more in the fridge as it chills.
- Cover bowl with plastic wrap or add to an air tight container and let cool for at least 2-4 hrs, this will help it thicken.
- Store in fridge for about a week or in freezer for up to 2 months.


Can you make cheesecake with it?
Absolutely!
We are going to try this next time we make cheese cake Thinking it will be great Thank you.
How critical is the salt, as I am on a sodium restriction because of heart issues. I am ball parking this at about 150 mgs per oz, but that is assuming all the sodium stays in the cheese and none goes into the whey. I know this isn’t so, but I have no way of knowing how much stays in the cheese. I am thinking cutting the salt in half might be a place for me to start. Any thoughts on this?
Hi Peter! Great question. Because this is a soft cheese, the salt is not required for the process, it’s mainly for flavor. When you get into hard cheeses that’s when salt is required but you can cut it in half or eliminate it for this recipe and it’ll be fine! Let me know how it comes out!
Hi there, I’m wondering if it is possible to use all cream and omit the milk. And as such would it yield more cheese this way?
Hi Christine! You definitely can use all cream and no milk – it’ll make a richer tasting cheese because of the higher fat content. Whether it’ll make more cheese though, I doubt it. Maybe a little, but not much is my guess. Let me know if it does, though!
This is such a great recipe! I’ve never made Cream Cheese from scratch but I could only imagine how delicious it tastes!
Thanks, Shanika! It’s sooo delish – I hope you try it!
I am a cheese lover and would never skip from learning to make homemade cream cheese. Looks easy and perfect too.
I hope you try it, Veena!
Such a genius idea!!! Looks soooo smooth and creamy!
I love that you’ve made your own bagels and cream cheese. That is fantastic! (and who cares about holes). Making things from scratch is really satisying and you do find it tastes so good.
Hahaa thanks, Helen!
I love cream cheese but never tried making homemade. I’m definitely going to put this on my to do list.
How much cheese does this recipe render
Hi Xeb – it makes about a 1 1/4 lb cream cheese, a little more if you like a looser cream cheese and drain it for less time, which may be good in certain dips / recipes. But for the consistency for bagel spreading, about a 1 1/4 lbs.