No Knead Rosemary Garlic Bread
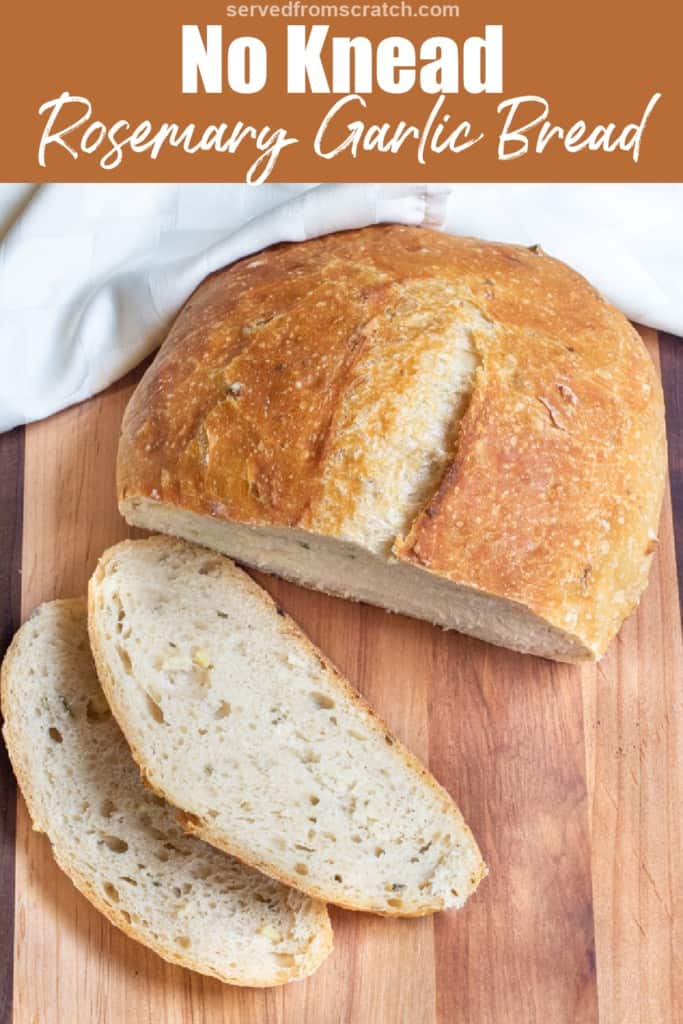
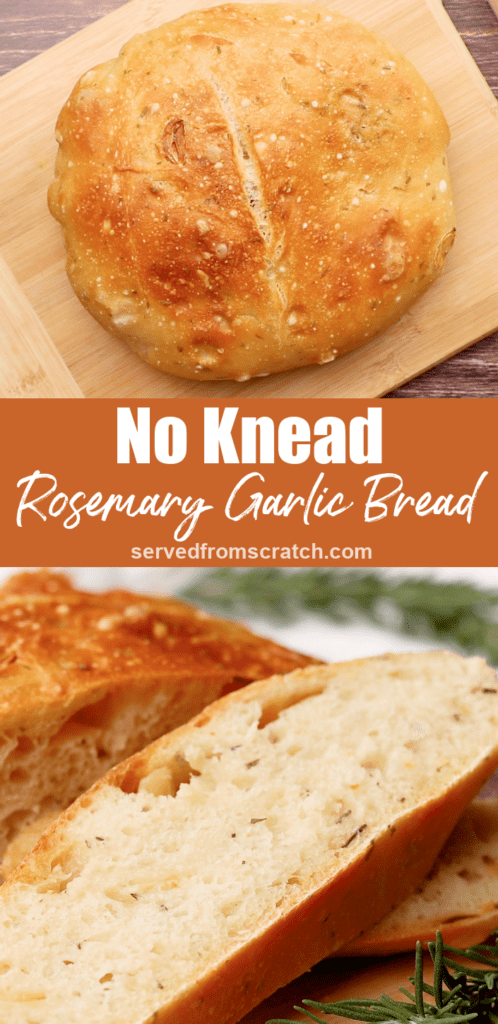
Ready to start making your own bread? Then our No Knead Rosemary Garlic Bread is the perfect, easy, no-fuss (or kneading!) bread to start with!
Is there anything more comforting than the smell of freshly baked bread? It has to be one of those satisfying things to make from scratch, and if you’ve been wanting to get into bread baking at home, or if you’re a seasoned baker but want something incredibly easy and mostly (literally) hands-off, then our No Knead Rosemary Garlic Bread is the bread recipe for you!
Ingredients Needed
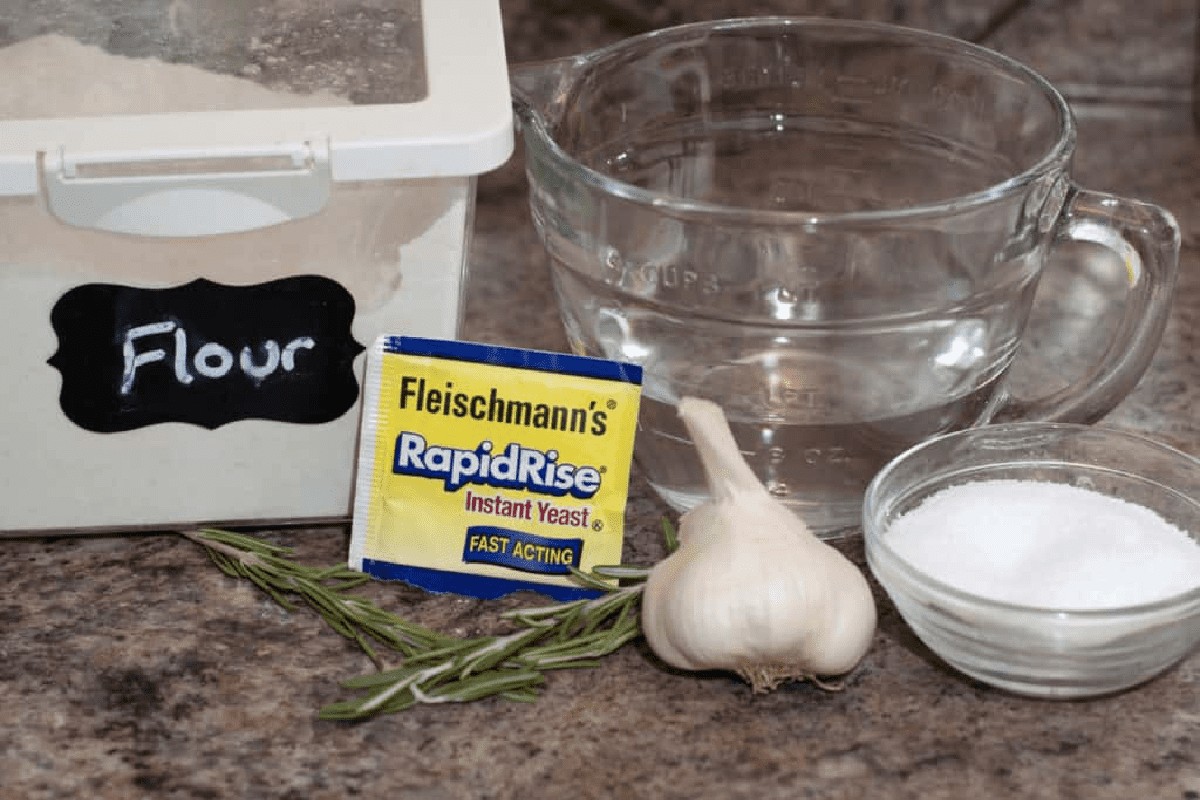
Even better, you only need a few simple ingredients!
- Flour – All-purpose flour is best for this recipe. Bread flour will work, but it has more gluten-forming protein, which makes a thicker crust and won’t create the same open-holed crumb that the all purpose does.
- Yeast – You can also use just regular active yeast but you will want to activate it first. We prefer instant yeast to truly keep it as simple as possible!
- Garlic – Fresh, of course! You can leave it whole, mince it, or our favorite is thinly sliced.
- Rosemary – Fresh again is best. But you can totally use dried, see recipe notes.
- Salt – A fine salt, like table salt, is best because it will incorporate the best within the dough. You could use a fancy salt like a pink Himalayan, too. Just as long as it’s fine-ground.
- Water – Warm. At least a little bit and definitely not cold. Remember, yeast is alive! It needs a little warmth to activate, but don’t burn it! The best is 90 – 105 degrees; if you have an instant read thermometer it’ll take all the guesswork out. But basically, if it’s lukewarm, that’s all you need.
Weigh Ingredients
For the best and most consistent results, it’s best to weigh the flour. This is true for all bread baking because there are many different factors that can make 1 cup of measured flour different than another. That’s why a kitchen scale is one of the best kitchen tools you can invest in.
Recipe Video
So Easy to Make!
Seriously, this is why it is the perfect introduction to bread-making recipes. It is SO incredibly easy.
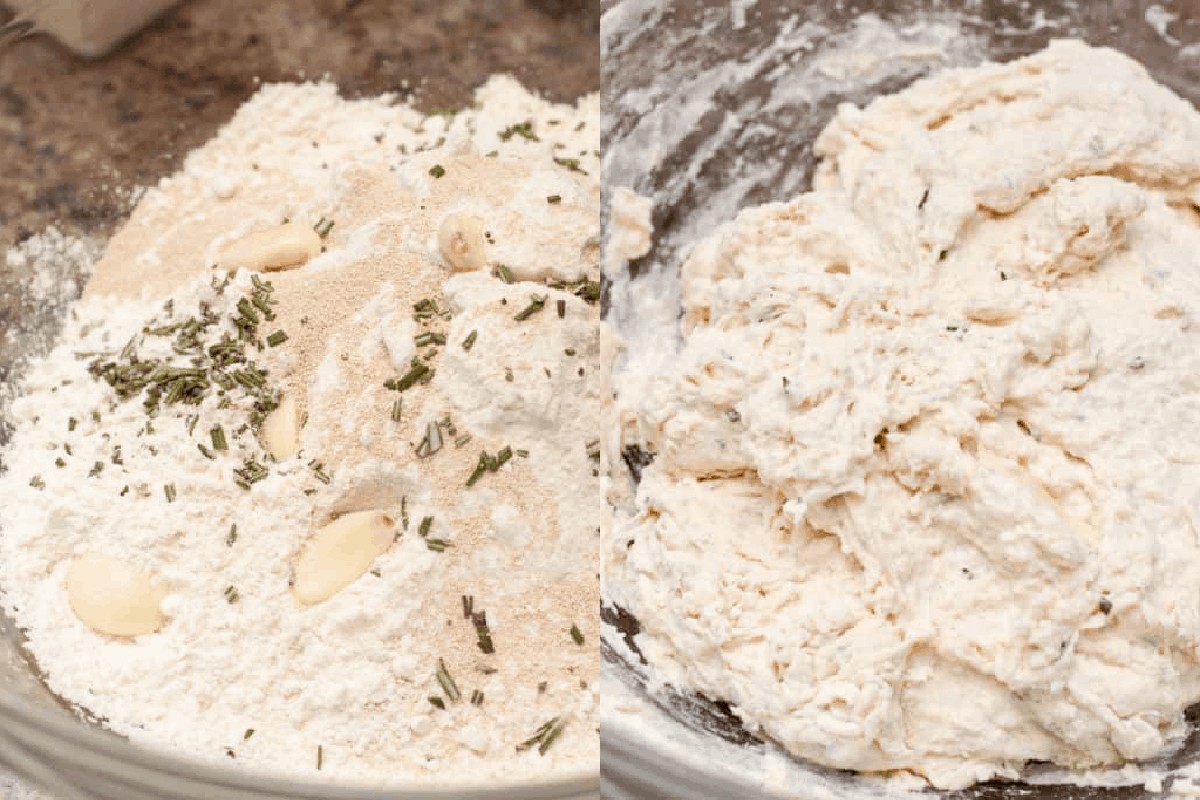
Step 1: Mix everything except water in a large bowl.
Step 2: Add water and mix until you have a very sticky, rough dough.
Don’t Overmix!
Simple is key with this recipe! You just need to mix it all until everything is combined into a very sticky dough.
Step 3: Give it a long rise. Cover it with plastic wrap and then let it sit for at least 6 and up to 12 hrs. This is where the magic happens!
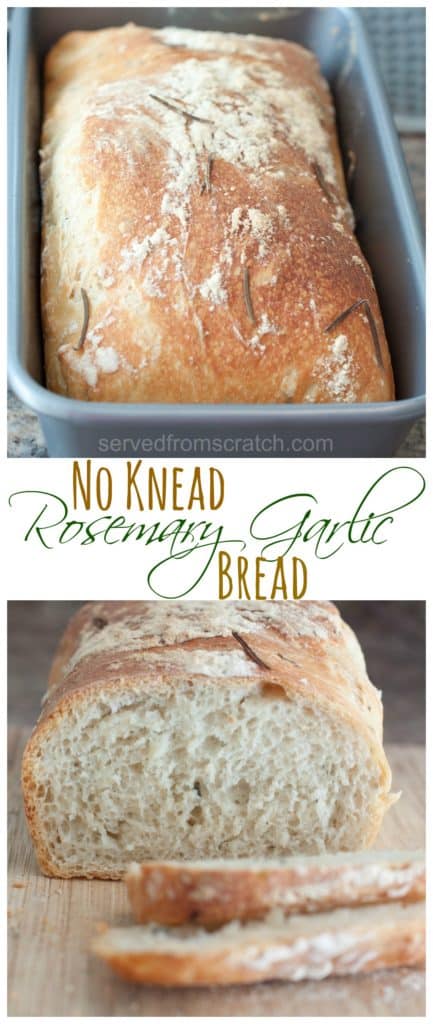
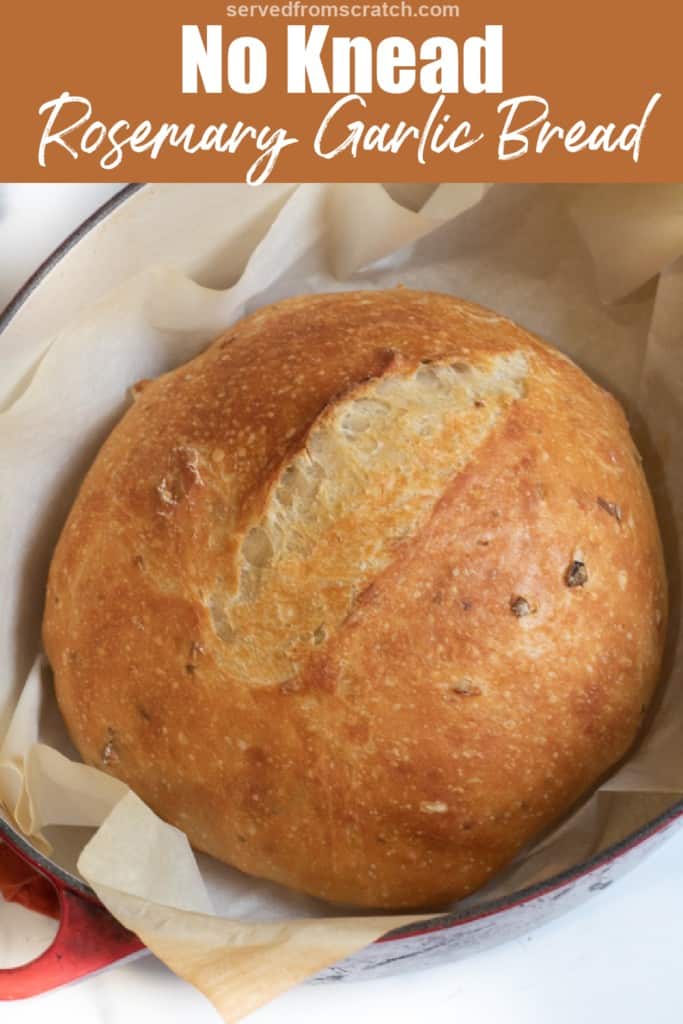
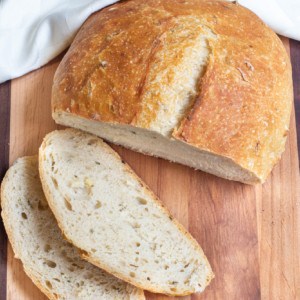
Bake in a boule or sandwich loaf
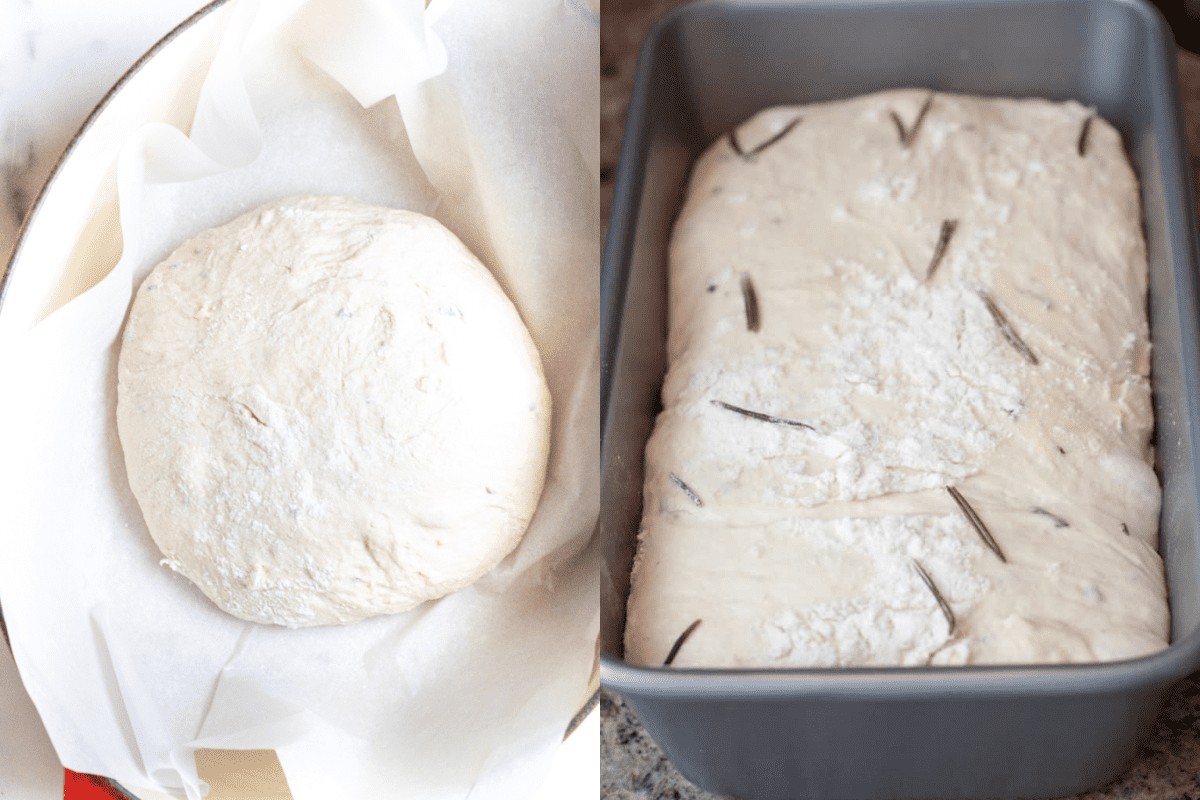
Step 4: Add that dough to either a (greased) loaf pan or a parchment paper-lined Dutch oven to rise again.
Tip: Sprinkle the edges of this wet dough with some flour. This will help you pull it out of the bowl and shape it.
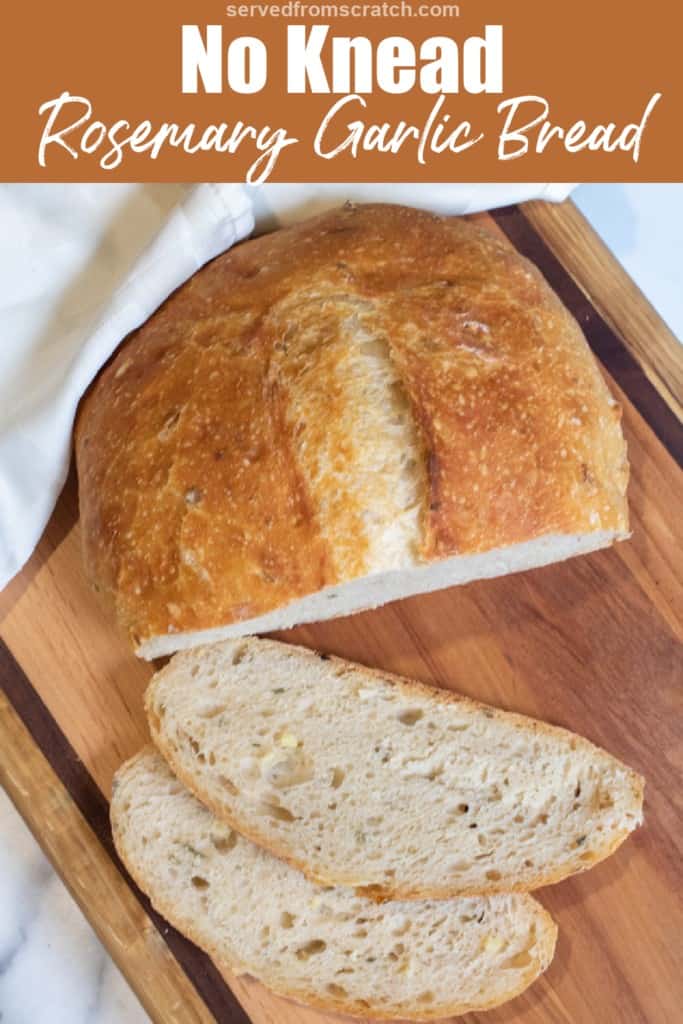
Step 5: Let rise again and add a little more fresh rosemary (if you’d like) on top of your bread, and then score it with a bread lame or super sharp knife.
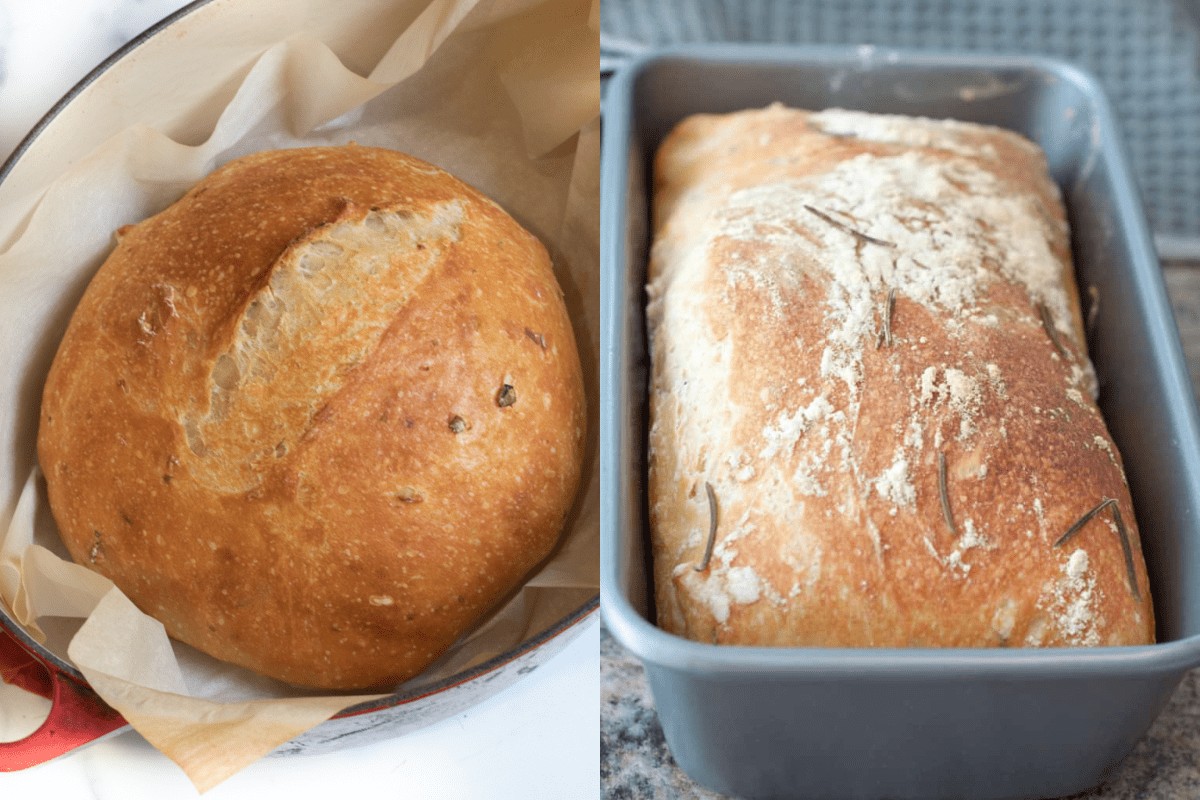
Step 6: Bake!
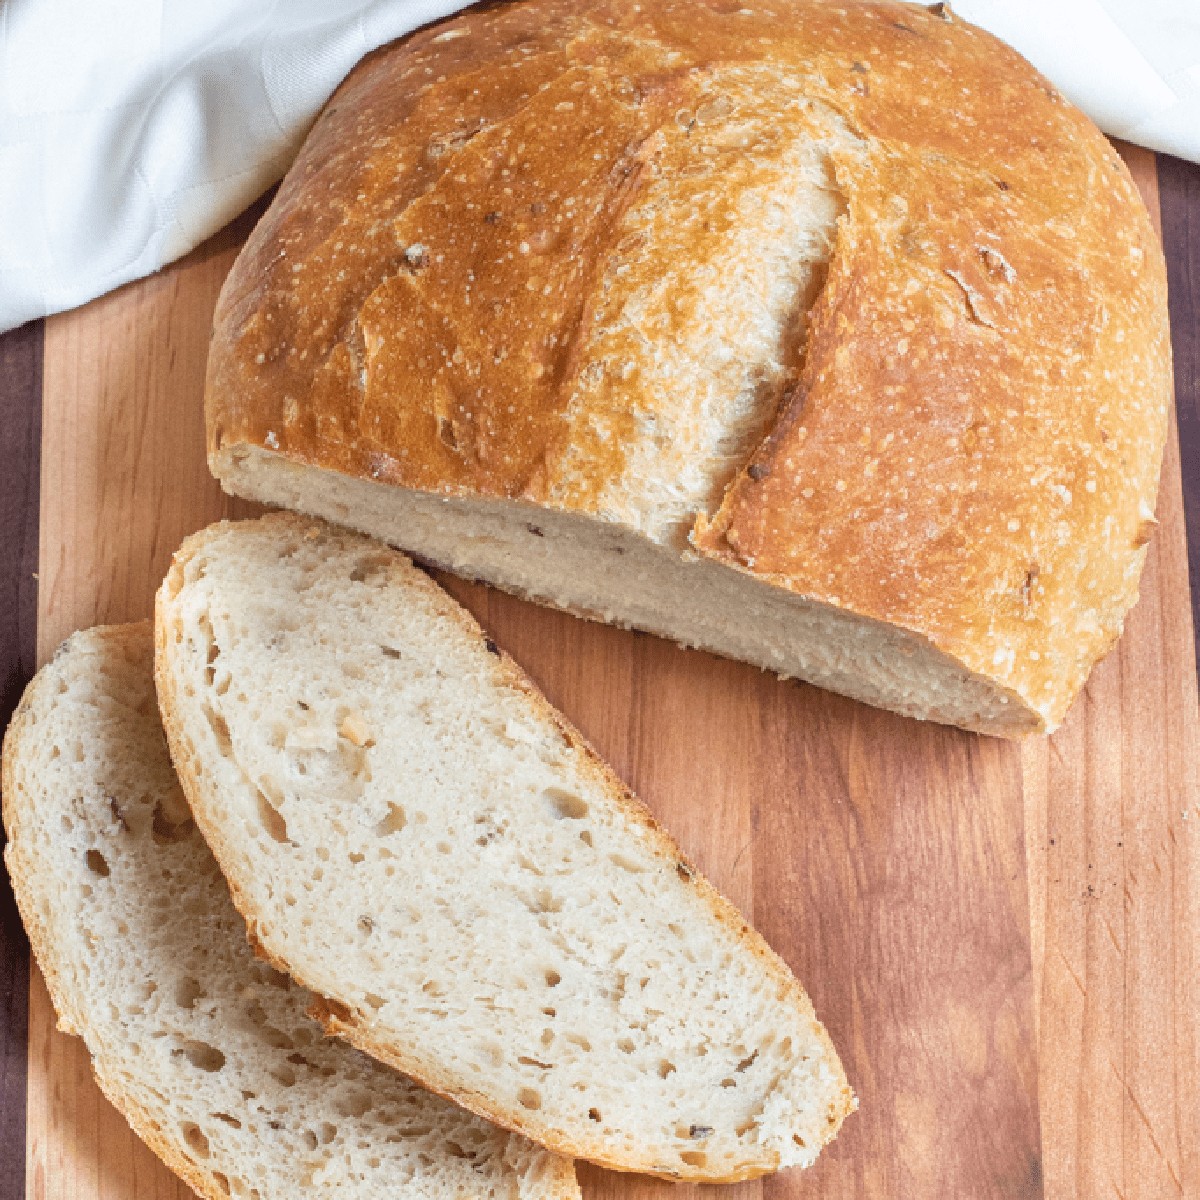
Who doesn’t love a good Dutch Oven bread? When you want bread that looks artisan, pull out that Dutch oven!
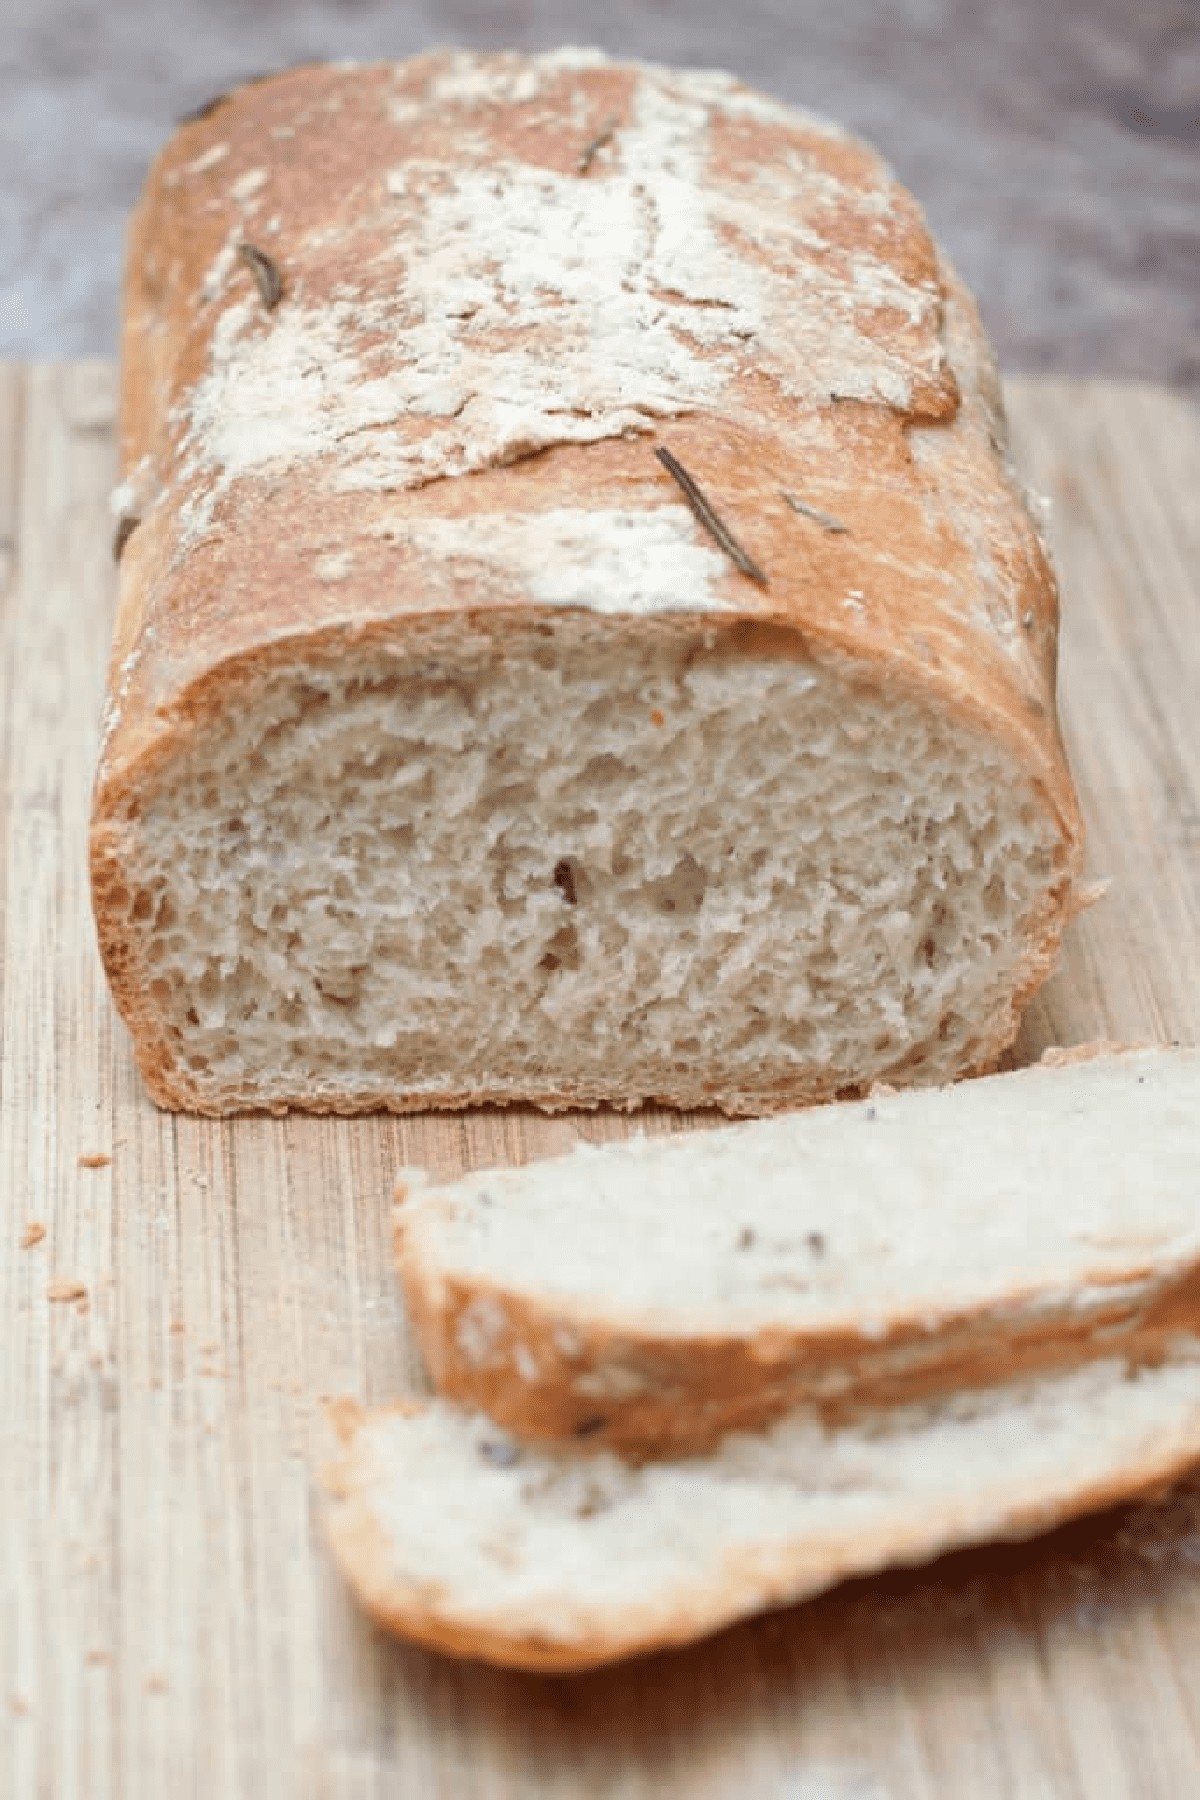
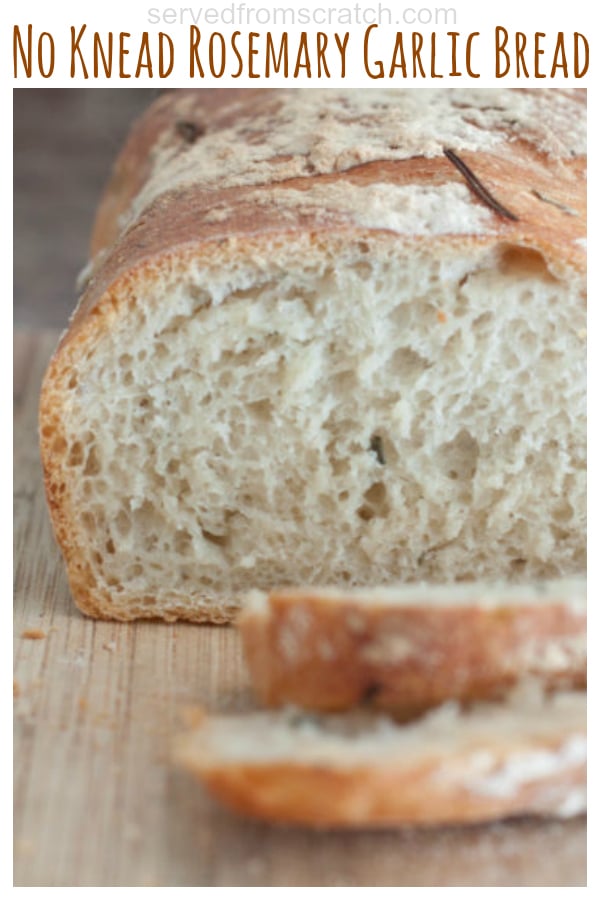
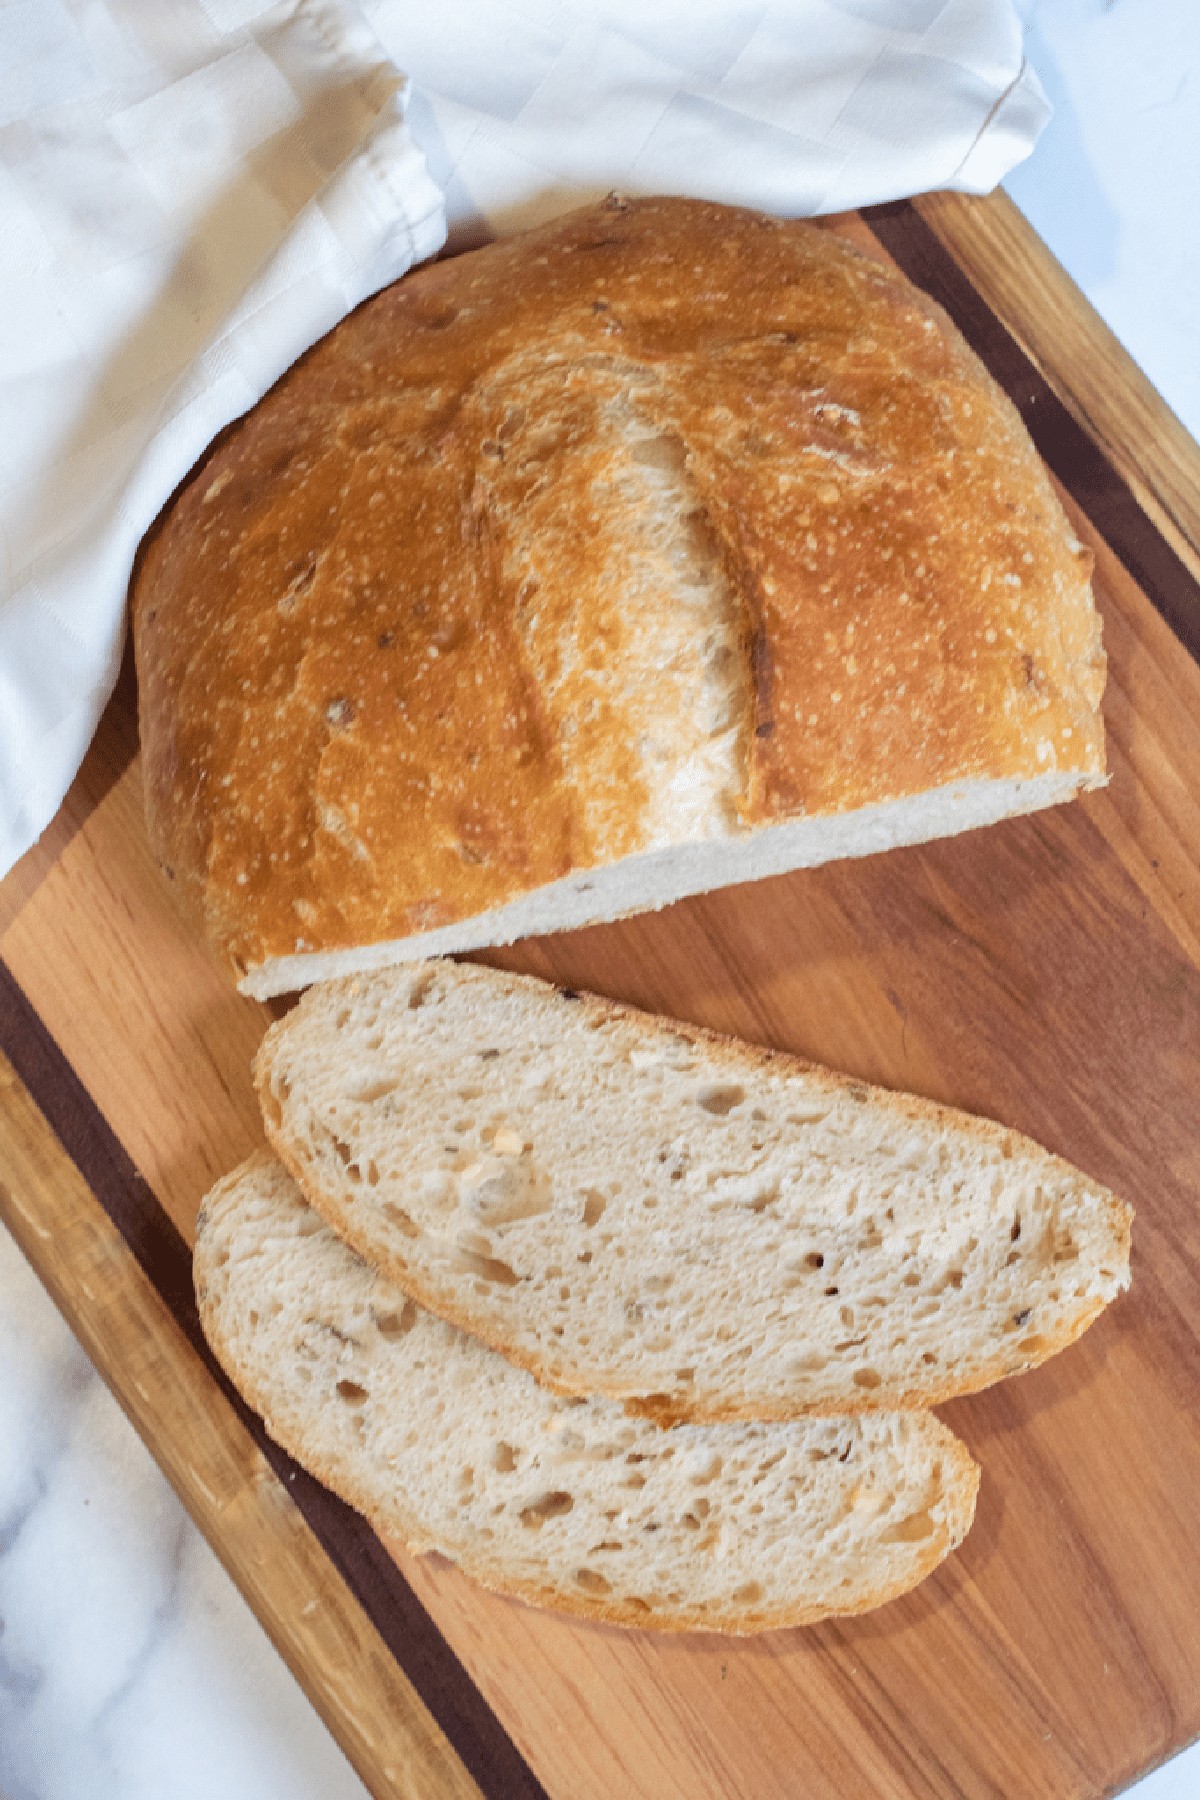
My favorite thing about this bread is how wonderfully crispy the crust is while the center is perfectly soft and chewy. Then,, of course,, the rosemary and garlic flavors? Amazing.
We make this bread All. Of. The. Time. It is our go-to. The hardest part of it? Just remembering to prep it! Which makes this bread absolutely the perfect “gateway” homemade bread!
You Also Might Like
- Dan’s Como Bread
- Homemade Hawaiian Sandwich Bread
- English Muffins From Scratch
- Copycat Dave’s Killer Bread
- Homemade Brioche Buns
- Easy White Sandwich Bread
- Easy Dinner Rolls From Scratch
- Easy Crusty French Baguette
- Homemade Irish Soda Bread
Enjoy! As always, if you make this recipe or any of my others, I love to hear what you think! Leave a comment below, email me, or you can find me on Facebook, Instagram, and Pinterest!
If you want to see more, be sure to sign up for my 5 Easy Ways to Start Cooking From Scratch!
No Knead Rosemary Garlic Bread
Equipment
Ingredients
- 3 1/2 cups all purpose flour 487 grams
- 1 1/3 cups warm water 307 grams
- 2 1/4 teaspoon instant yeast 12 grams
- 1 1/2 teaspoon kosher salt 10 grams
- 2 teaspoons fresh rosemary minced
- 5-6 garlic cloves whole, sliced, or minced
Instructions
- Mix Dry Ingredients: In a large bowl, add the flour, garlic, rosemary, and salt and mix well.
- Create Dough: Then add water and mix until everything is incorporated. Just enough until all of the flour is incorporated, but don't overmix.
- Let Rise: Cover with plastic wrap and let rest/rise for at least 6 hrs and up to 12-14 hrs.
- 2nd Rise: Once the dough has doubled, generously grease a loaf pan. Lightly flour the edges of the bowl, and then turn the dough onto a floured surface and shape into a loaf shape and add to the loaf pan, or just "pour" into the pan. Add additional fresh rosemary on top, if desired. Cover with a linen towel and let rise for at least another 2 hrs.If using a Dutch oven, line a Dutch oven with parchment paper. Turn the dough onto a floured surface and shape it into a boule or ball shape. Cover and let rise for another 2 hrs.
- Preheat Oven: pre-heat oven to 450 degrees.
- Score Bread: After 2 hours and loaf has risen again, use a super sharp knife or bread lame and score the top of the bread with three slashes, or however you'd like.
- Bake: Loaf Pan: Bake for 35-40 minutes until edges are browned and bread sounds hollow to a tap to the bottom. Dutch Oven: Bake covered for 40 minutes. Remove the lid and then bake for another 15 minutes.
- Cool: Let cool for at least 1 hour. Slice and enjoy! If sliced too early, it can cause a gummy center.
- Enjoy!


I just added this web site to my feed reader, great stuff. Can not get enough!
I made this last night for company and everyone loved it! It was great – simple and flavourful. I deal with a lot of food sensitivities – sugar being one of them, so I used coconut sugar. Thank you!
Regards Hannah Flack
I don’t see when you’re supposed to add the garlic and the Rosemary do you add it after it sits overnight. Are you added at the very end before cooking it.
Hi Teri! I’m sorry it’s not more clear in the recipe! It’s in the beginning with the flour before you add the water. I’ll update the recipe now so it’s more clear, thank you for pointing that out!
Is it 1 1/2 cups of water or 1/2 cup water?
1.5 cups! 😀
If I only have active dry yeast, not the instant stuff, should I proof it before adding it to the mix? Or does this only work with instant yeast? Thank you!
That will be fine! ☺️
The recipe should clearly state type of yeast. For those of us who “jump to recipe”, the pic of rapid rise yeast is not seen.
Oh thank you SO much, Sharon. Changing that now!
I can leave this overnight but have to go to work at 5 a.m. would it be ok to sit until about 3 the next day before cooking?
Hi Linda! Overnight isn’t necessary, it’s mostly about the time. You want to let it rest at least 12. So if you leave at 5 am, by 5 pm you’ll be ready to start the next step!
I followed the recipe to the letter but it didn’t rise. Is 1/4 tsp yeast enough? I just bought the yeast so it’s fresh.
Hi Barb, I’m so sorry to hear that! Are you using instant yeast?
I’m really wanting to make this, but would I be able to do make this using a bread machine? Also, could I substitute 1:1 flour with Gluten Free flour?
No sugar or honey in the recipe?
Nope!
Oh wow, this is amazing, love that it is no knead! And that rosemary adds such a great flavor, this recipe will be on repeat for a while around here!