Homemade Soft Pretzels


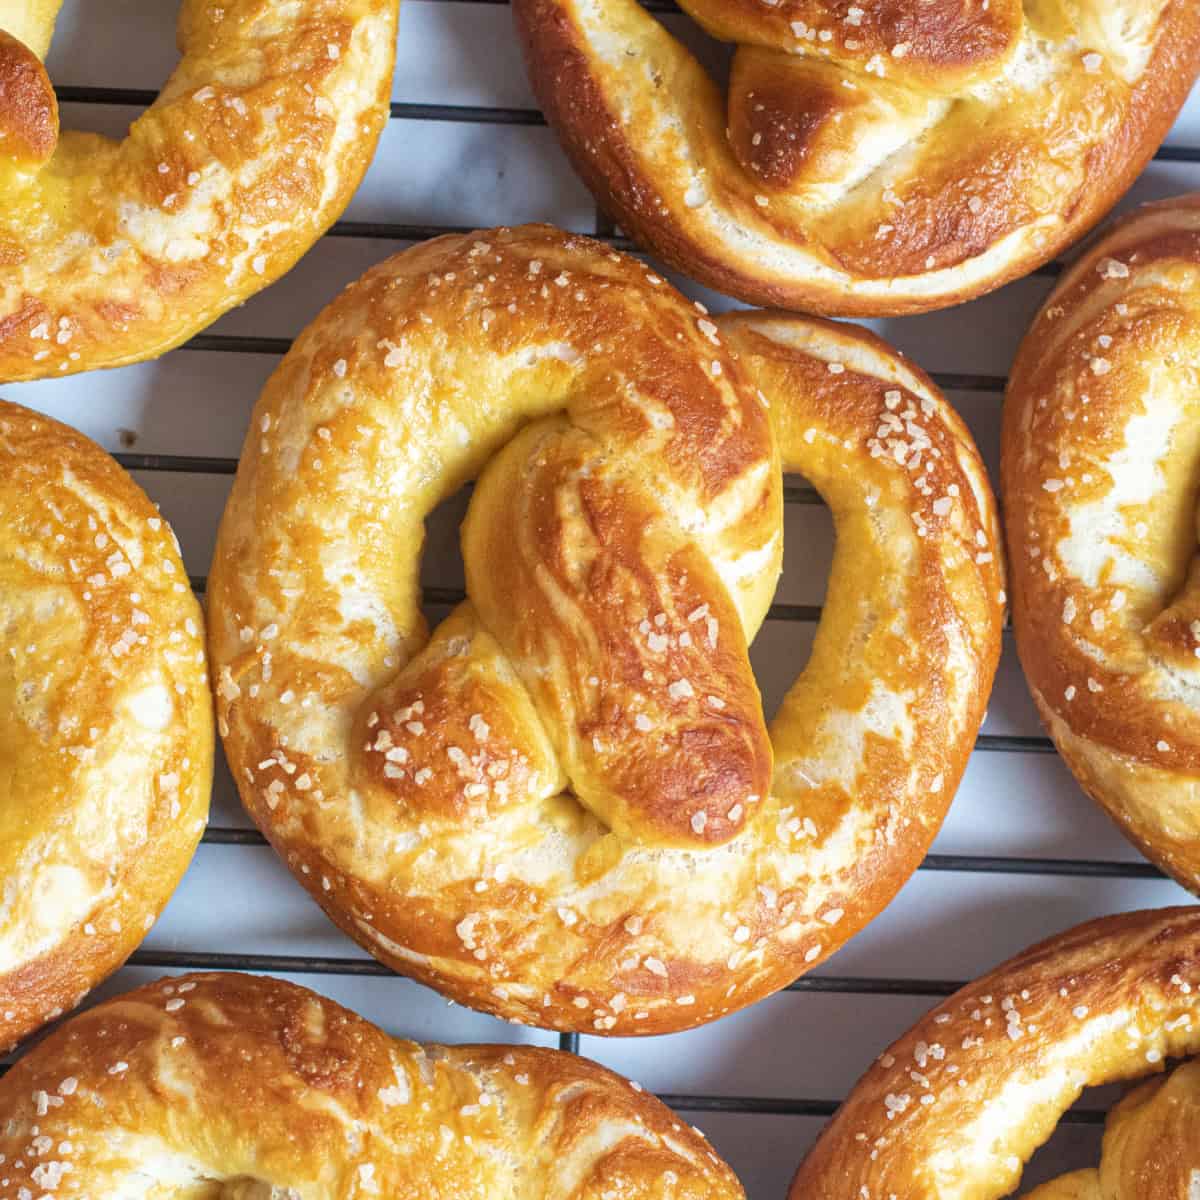
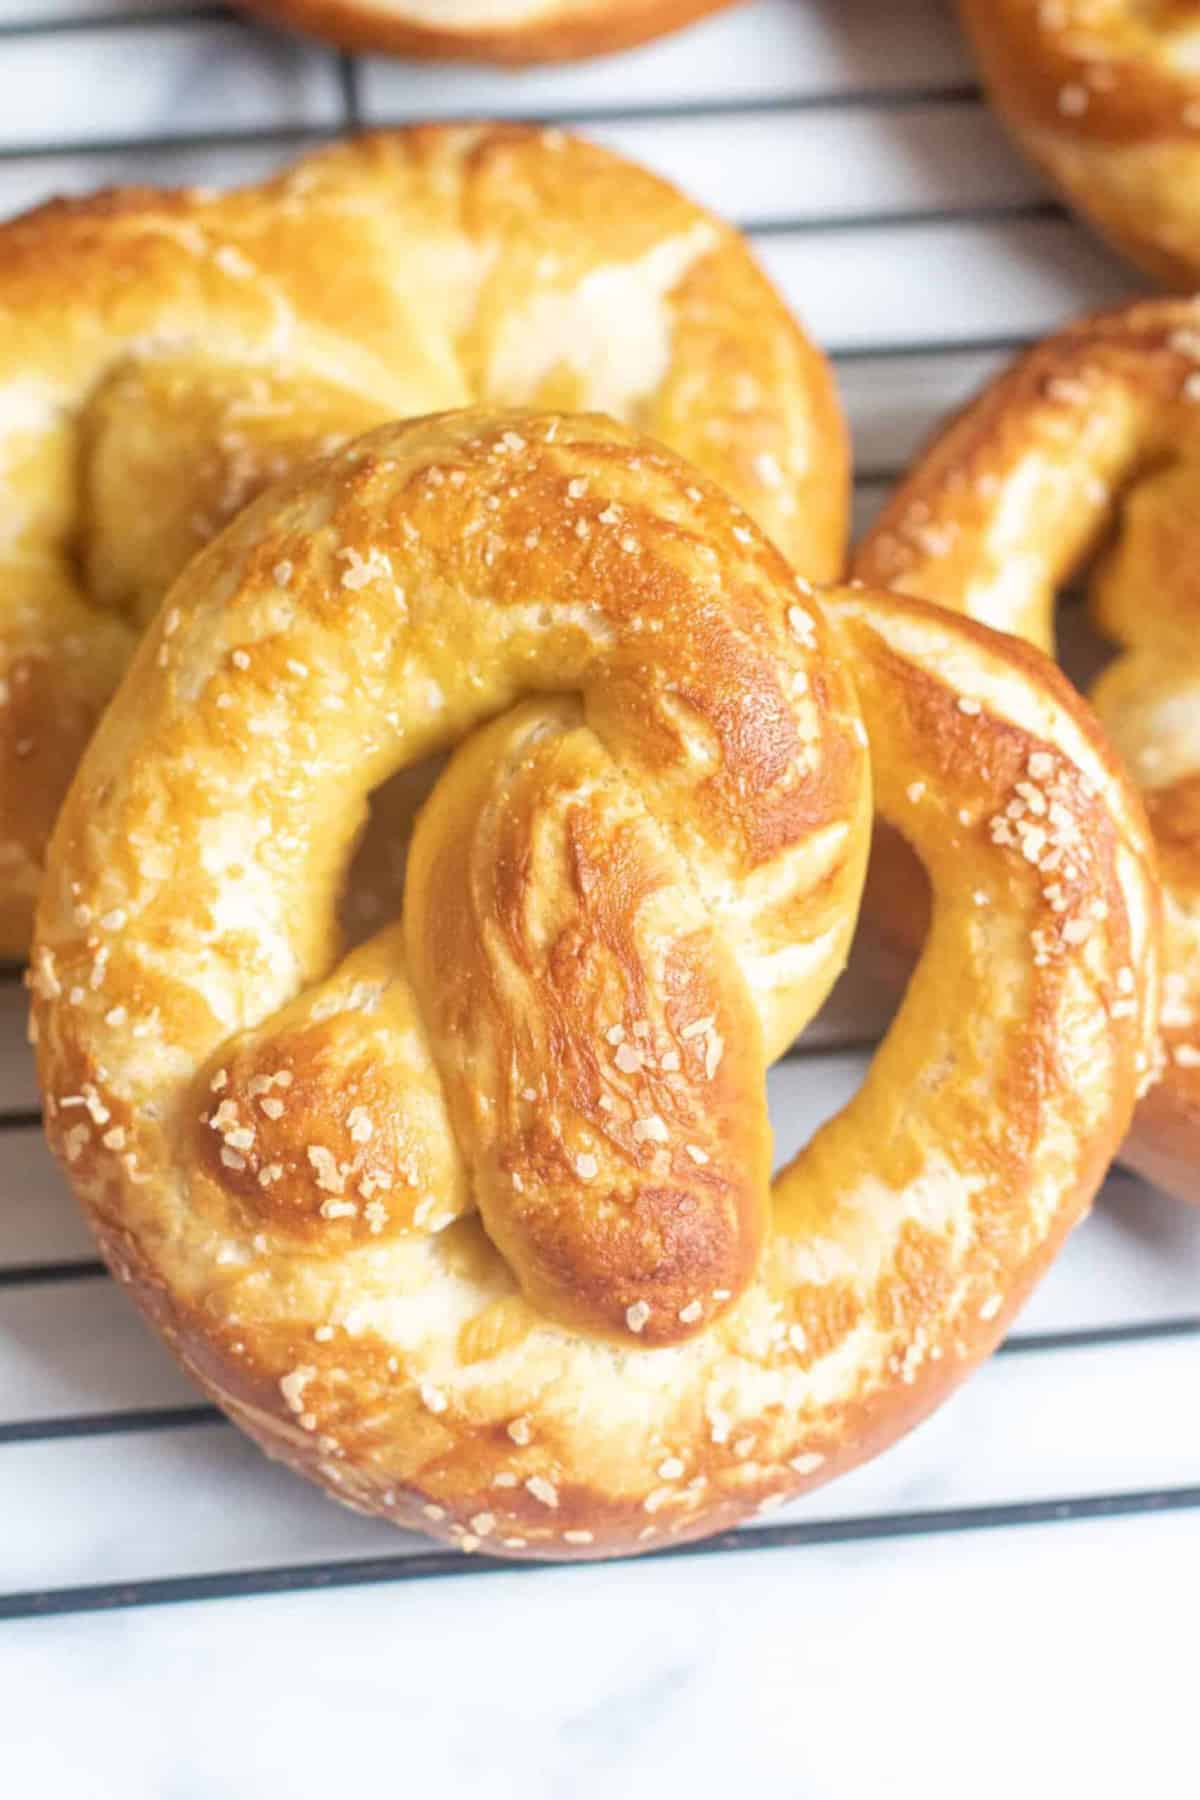
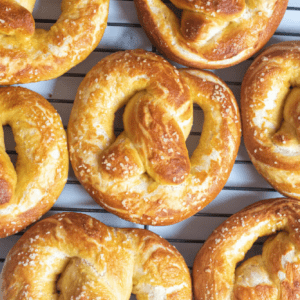
Our Homemade Soft Pretzels are big, soft, chewy, and salty. It’s an easy soft pretzel recipe that is simple to make and totally fulfills that favorite mall snack craving!
Next, try our Easy Homemade Garlic Knots!
As my girls will quickly share with you (because they love to share everything), I will easily pass up a piece of chocolate or sweet treat any day for something salty, crunchy, or chewy and gluten-packed. On the top of that list for me, are those big, soft chewy pretzels we’d always get when we took a trip to the mall when I was a kid. So naturally, we had to make our own Homemade Soft Pretzels!
Our first time making these big soft, pillowy snacks that took me back to mall trips when I was a teen was actually in 2014 during a big snowstorm in Portland. We’ve been making them since and have finally dialed in this easy soft pretzel recipe to (dare I say) near pretzel perfection!
Ingredients Needed
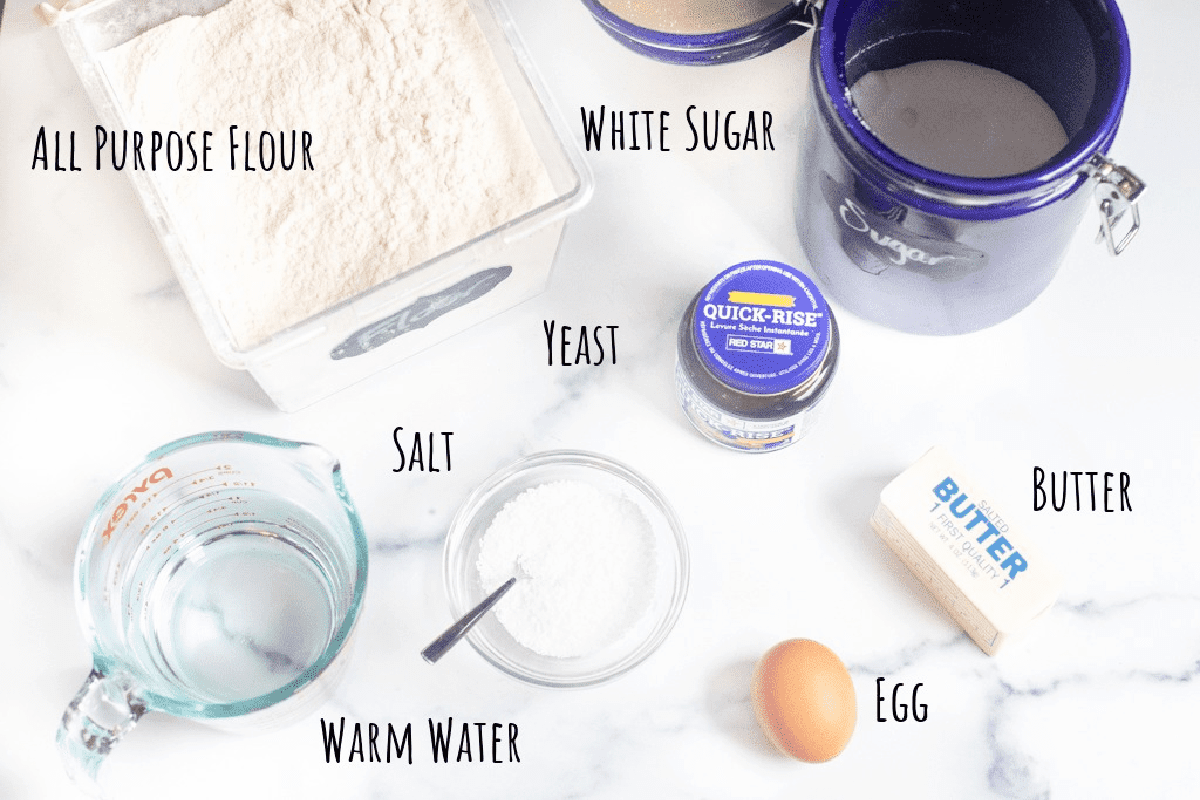
What’s even better is that I’m pretty sure that you already have everything you need in your pantry for this easy homemade pretzel recipe!
- Flour – We use all purpose flour but you can also use bread flour. All purpose makes a softer, fluffier pretzel, while bread dough has more protein and will make a slightly denser, chewier pretzel.
- Yeast – Instant is our choice for this best just because there’s no activation time, but you could absolutely use regular active dry yeast, you will just need to let it fully activate which will add about 10 minutes prep time.
- Butter – Unsalted or salted (just adjust your salt accordingly) and just a touch for added flavor.
- Warm Water – This will also help activate the yeast. 90 degrees to 100 degrees, or just warm to the touch, but if you have an instant-read thermometer (that we love) also helpful.
- Salt – You’ll want a granulated table or iodized salt for the dough but then a nice coarse salt to top them with! Either a coarse kosher or even better, a pretzel salt! This one is our favorite!
- Sugar – White granulated is what we prefer, but if you only have brown sugar, that will also work well!
- Baking Soda – Not pictured as it’s not part of the dough, but instead a part of a baking soda “bath” that is absolutely key to getting that true pretzel flavor!
Step-by-Step Instructions
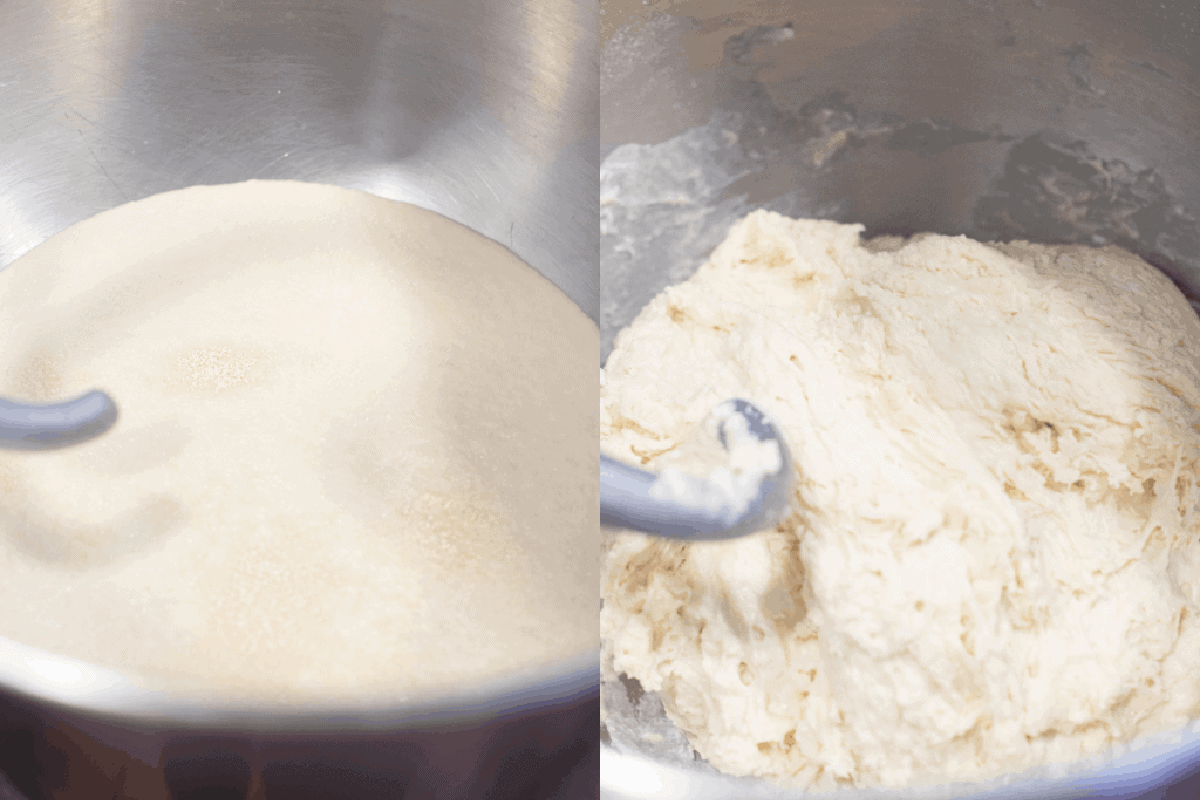
Step 1: Create the dough.
This comes together so fast after a quick mix of sugar, water, and yeast and then adding the butter and slowly adding the flour and salt to a stand mixer until a dough is formed.
You’ll know the dough is ready when it pulls away from the side of the mixer and the dough bounces back after you poke it with your finger.
No stand mixer? No problem. A wooden spoon and a little elbow grease will work fine, too!
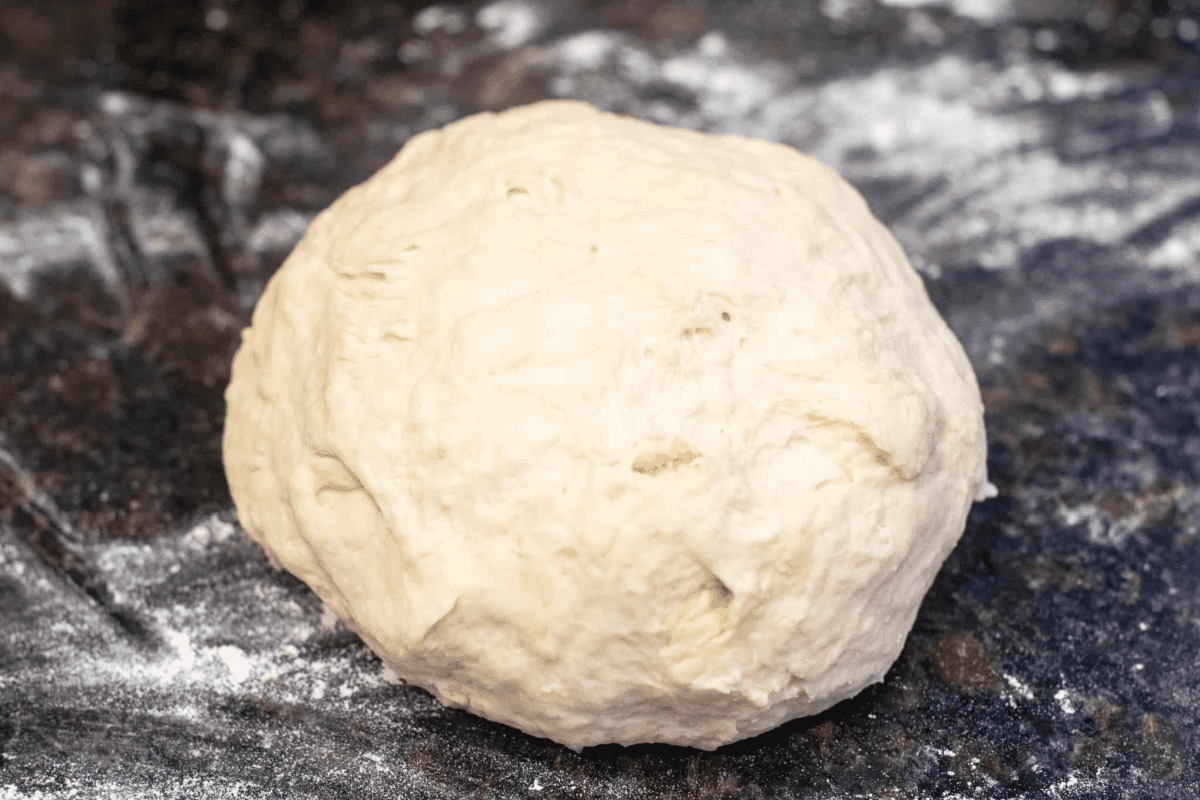
Step 2: Knead the dough and then let it rest.
Gently flour a clean surface and then gently knead your dough for 3-5 minutes. Just enough so that it’s soft.
Cover it loosely with a linen towel and let it rest for just 10 minutes. This is when you can get your baking soda bath ready.
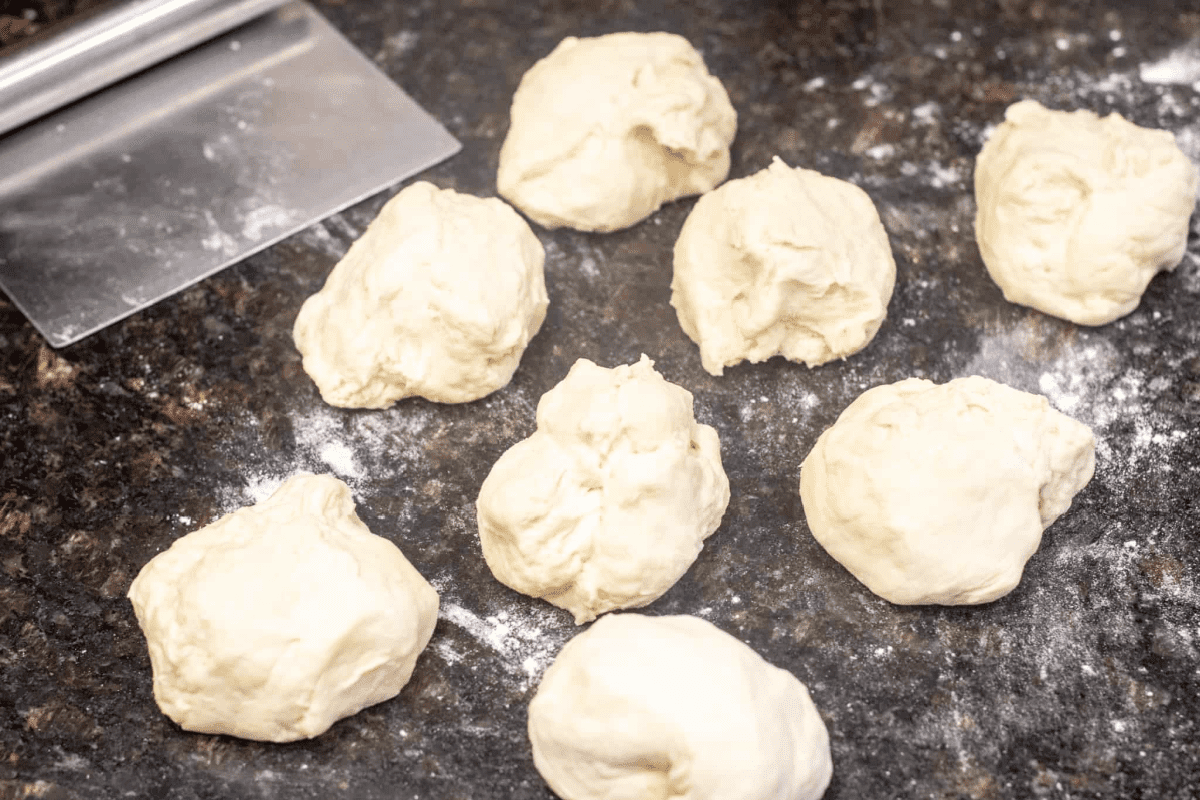
Step 3: Cut your homemade sot pretzel dough into 8 equal-sized pieces that are about 4 oz.
We love our dough cutter and kitchen scale for this but of course, a sharp knife and eyeballing it works fine, too!
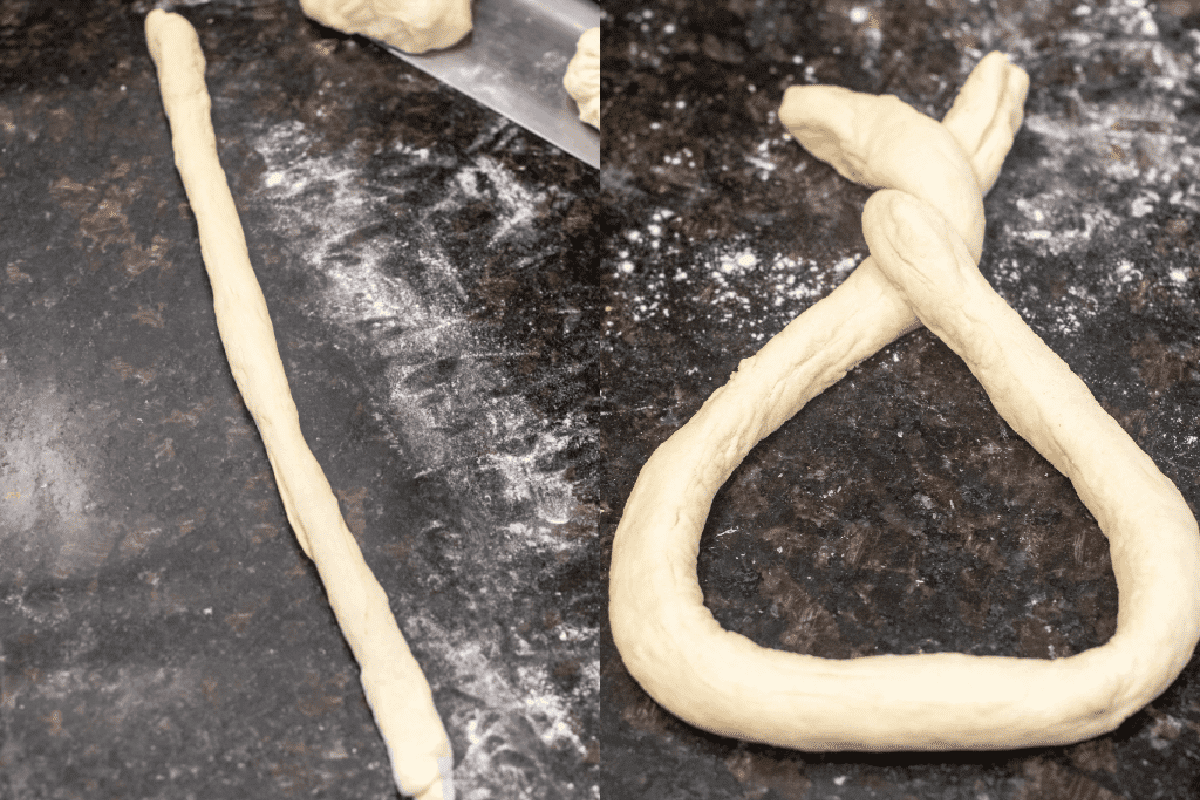
Step 4: Shape!
Shaping is one of the best parts and is actually super easy. Roll into a nice long rope, gather the ends up and twist, and then bring those ends down to connect it all.
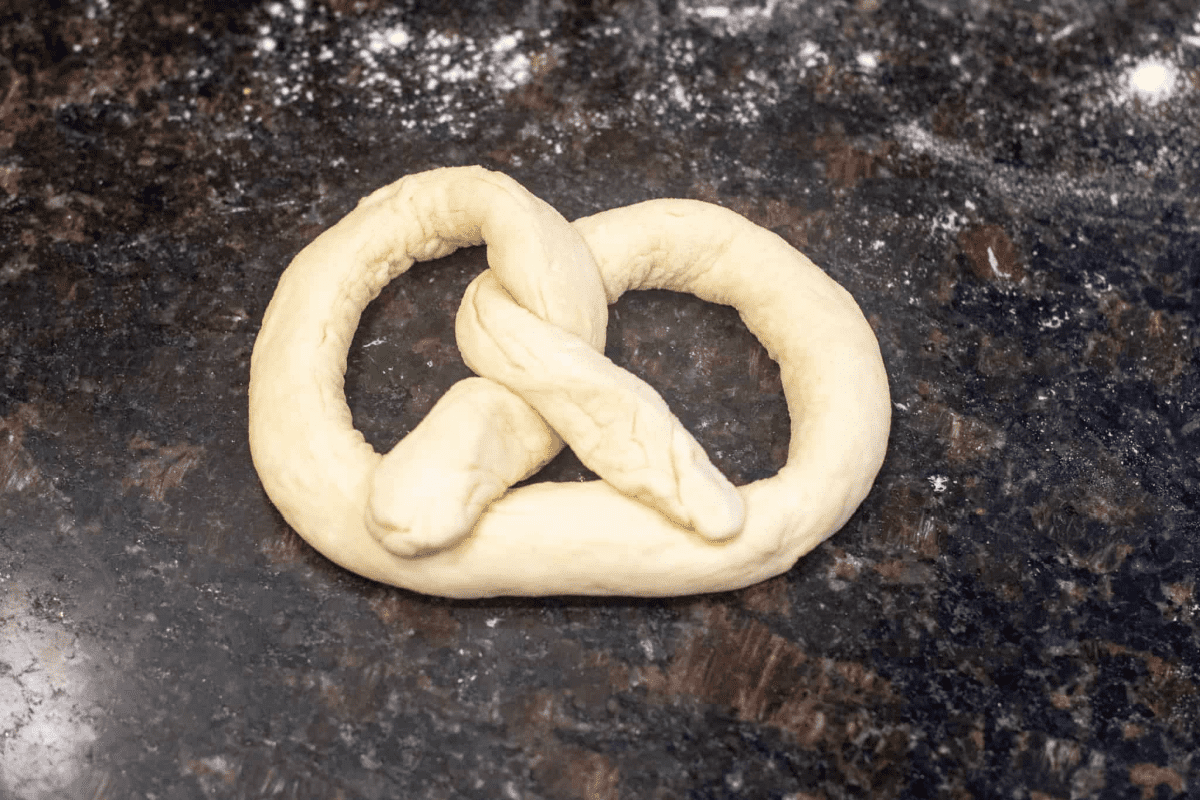
Voila!
TIP: Be sure to leave some extra space between all of the parts of the soft pretzel, because it will reduce when you give them a little batch.
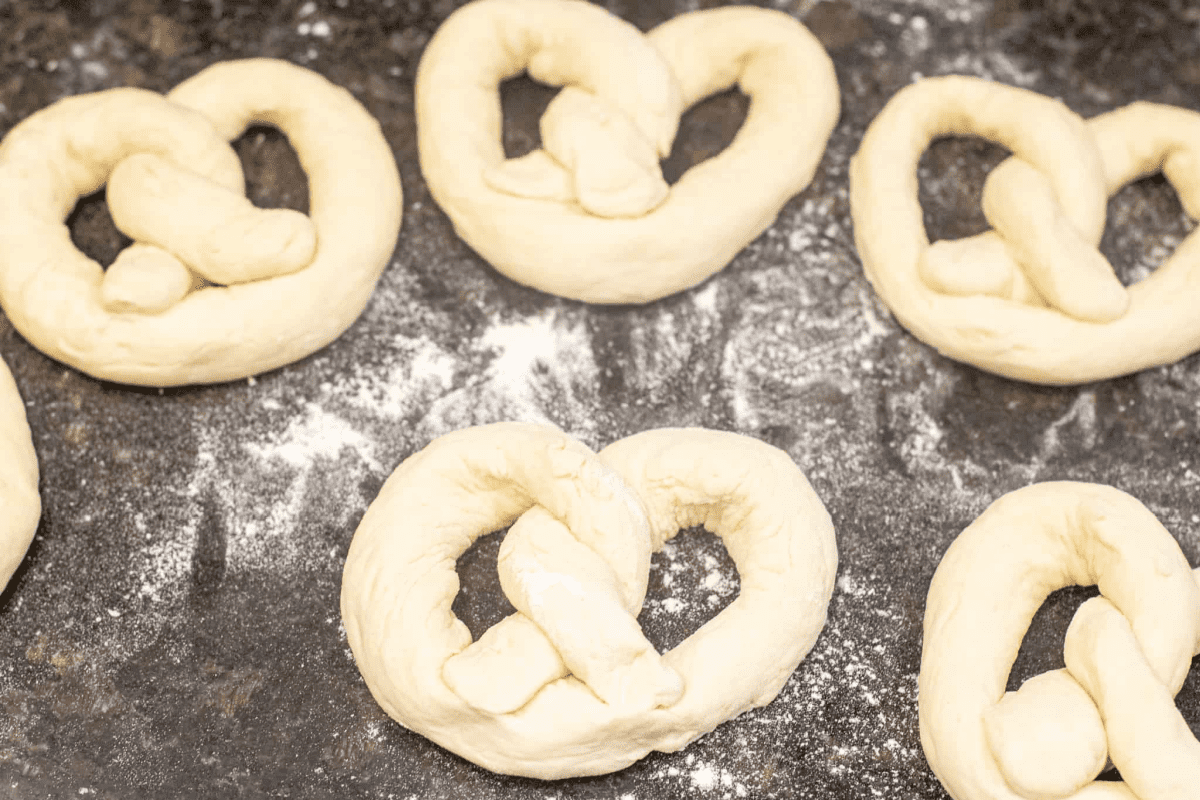
Step 5: Now they’re ready for the baking soda bath.
Why the Baking Soda Bath?
This step is crucial to creating these homemade soft pretzels’ signature chewy crust and that pretzel flavor that separates them from bread. Also, it prevents that final oven spring or rise that happens when bread is cooked.
We have made these with and without doing the baking soda bath and while the pretzels made without the bath are still good, they’re just not the same. It’s worth that extra effort, trust me! Plus, it’s pretty easy!
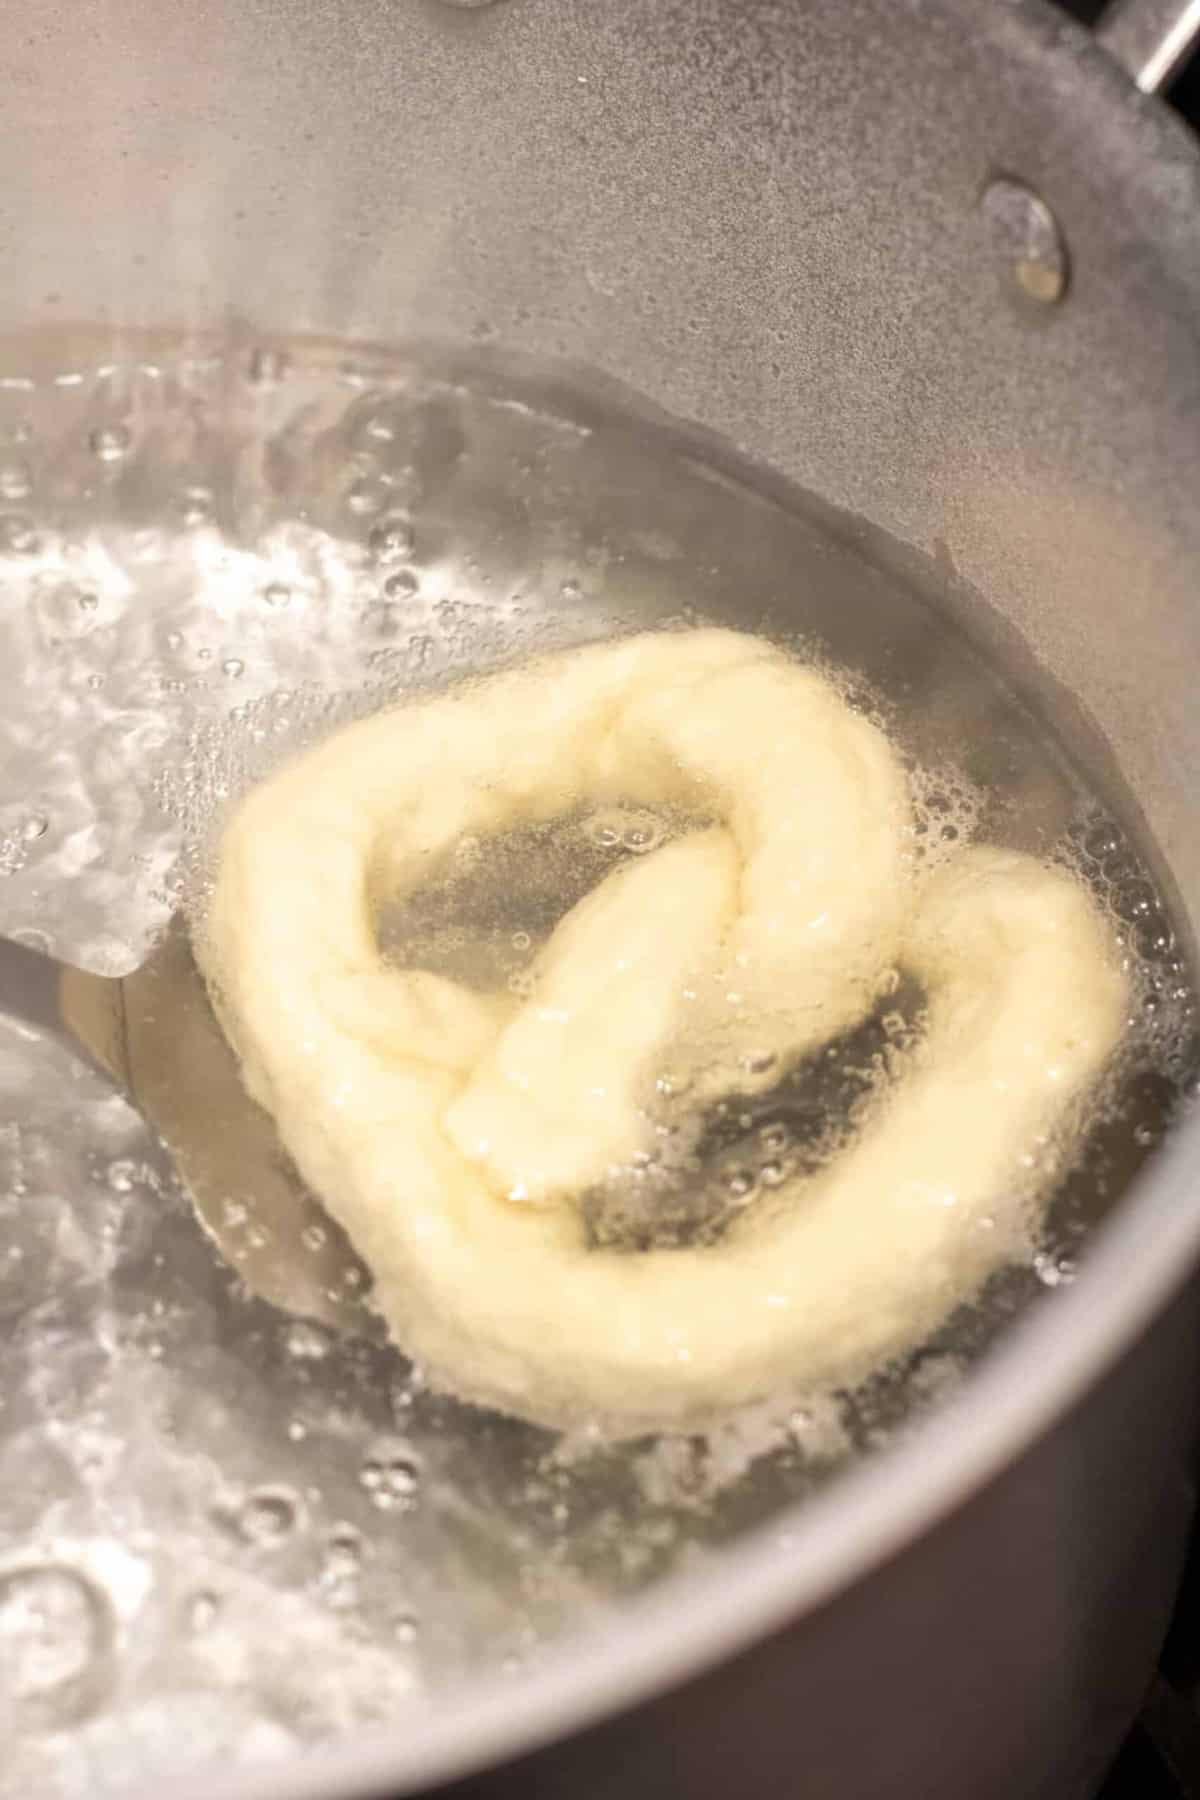
- Bring a large pot of water to a simmer.
- Add baking soda and stir to dissolve.
- Gently add pretzels 2 at a time. It’s best to lower them in the pot on a large flat slotted spatula.
- Boil for 30 seconds and then remove and add to a parchment or silicone mat-lined baking sheet.
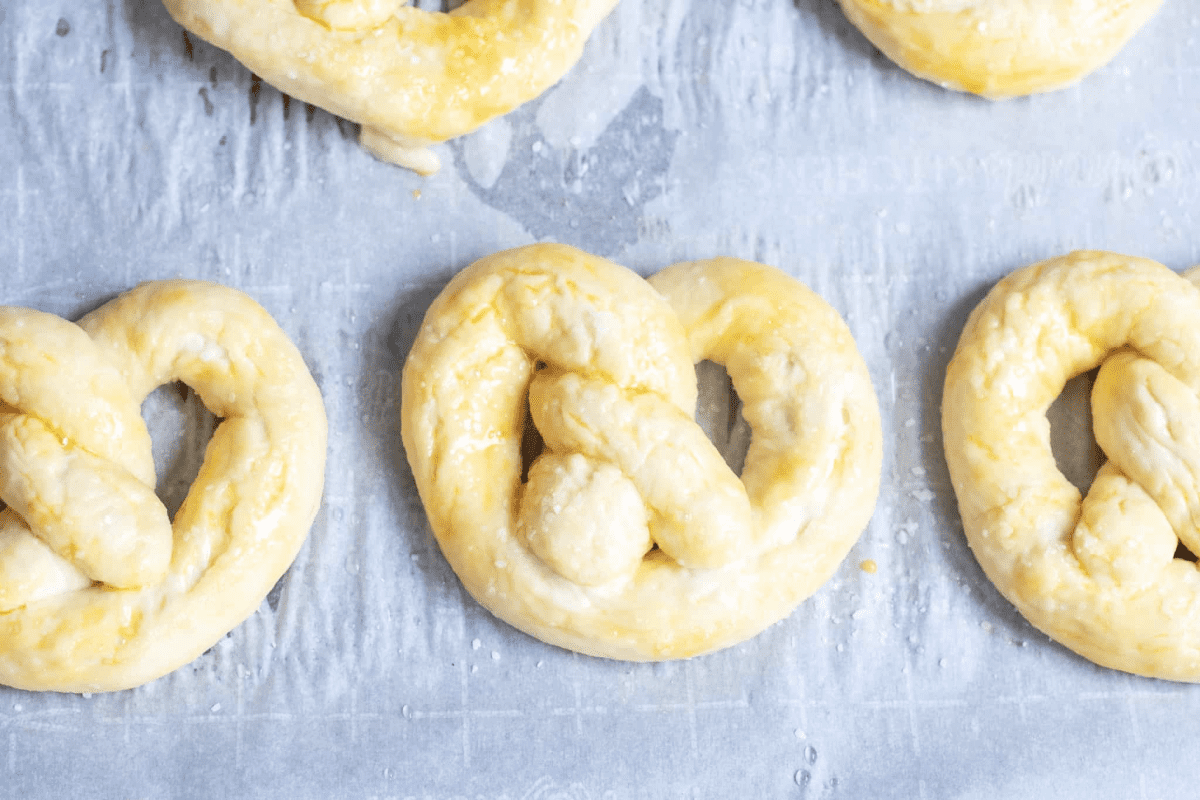
Step 6: Brush with some egg and sprinkle with some coarse ground salt and bake!
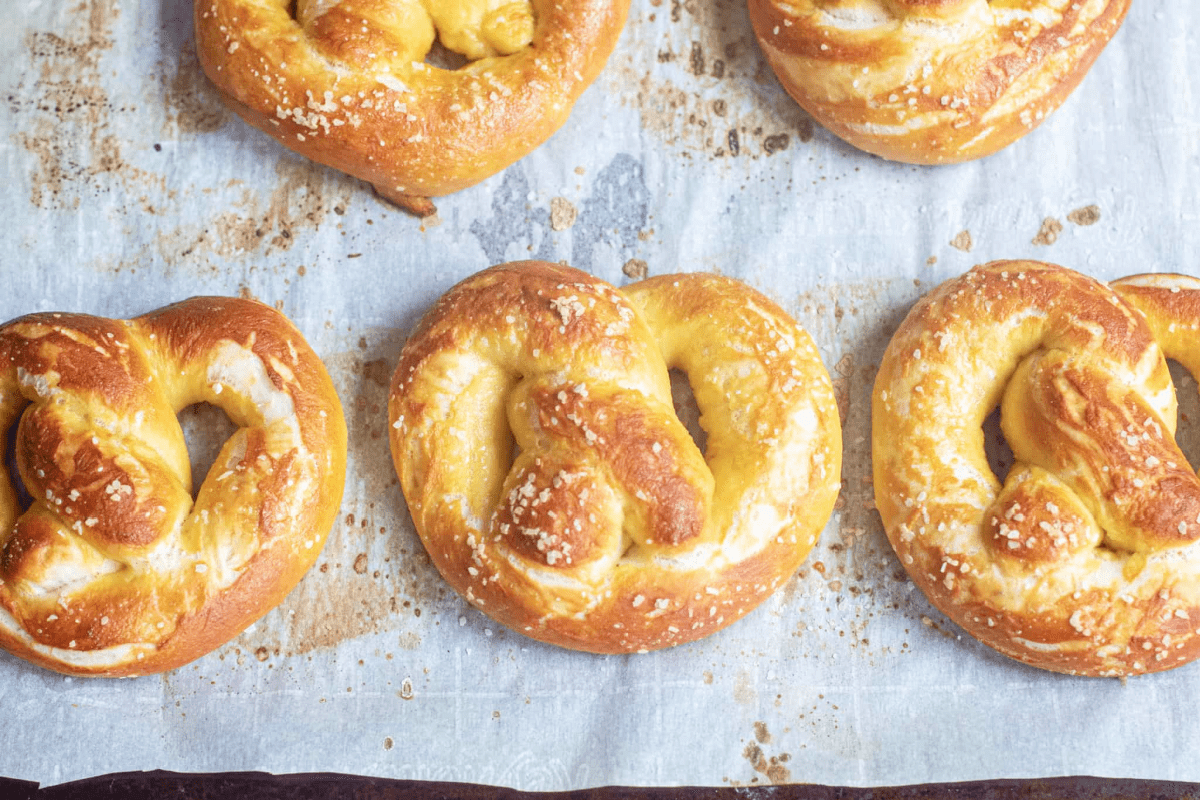
Soft, fluffy, chewy salty crust.
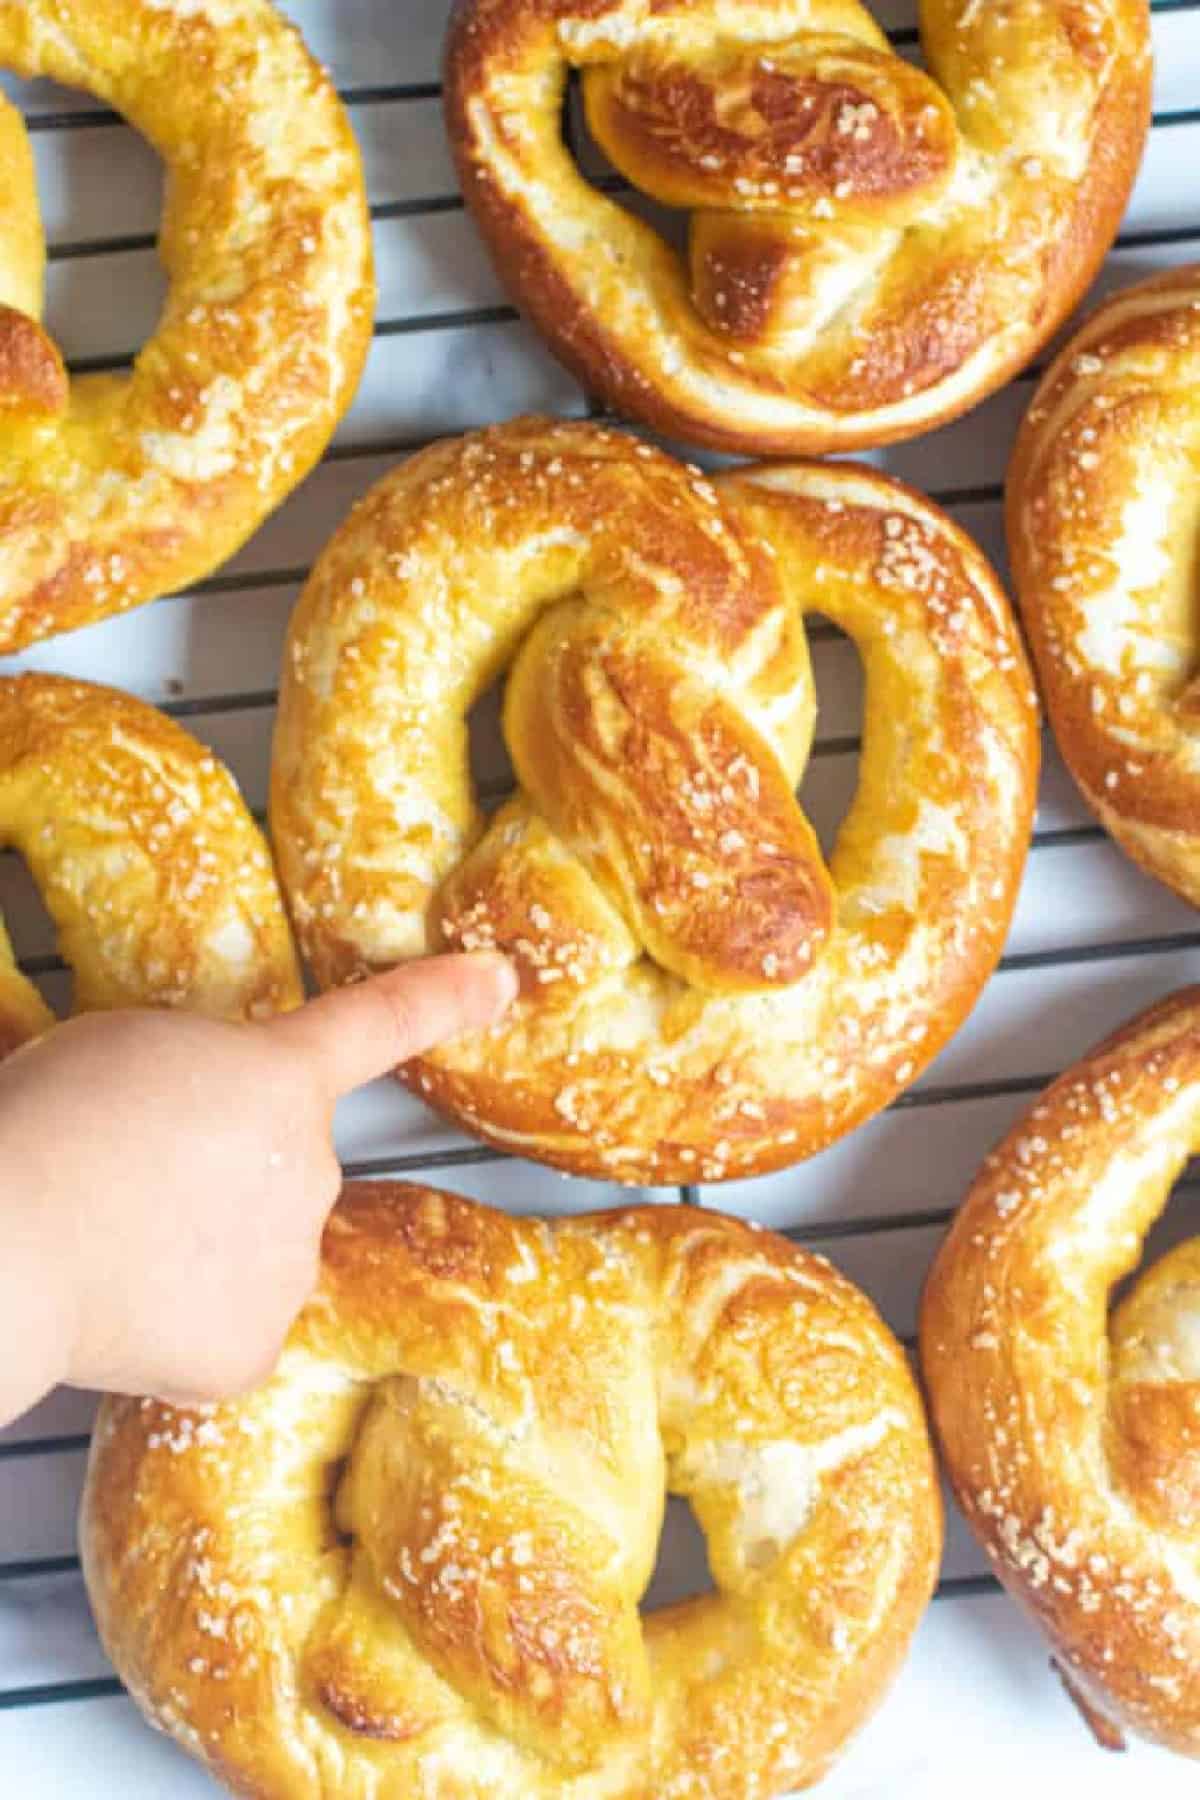
While my pretzel shaping isn’t the best, trust me, the flavor is sooooo good.
These Homemade Soft Pretzels are one of my girls’ favorite snacks and one that I am happy to share! We love them with some of our homemade Dijon Mustard, Hot Honey Mustard, or with some Homemade Ranch Dressing, made with our Ranch Dressing Mix and Homemade Mayonnaise or my girl the Cozy Cook’s Beer Cheese Dip!
Other Favorite Snacks From Scratch
- Crispy Ranch Chicken Tenders
- Homemade Potato Chips
- Everything Bagel Rye Crackers
- Homemade Onion Rings
- Parmesan Garlic Baked Chicken Wings
- Cheddar Sour Cream Potato Chips From Scratch
- Jalapeno Poppers From Scratch
- Baked Parmesan Steak Fries and Garlic Aioli Dipping Sauce
FAQs
Necessary? No, you’ll still have a tasty pretzel. But it won’t be *quite right. The baking soda bath really solidifies that pretzel flavor.
Yes! Once you’ve kneaded the dough and let it rest for at least 10 minutes, you can then refrigerate the dough for up to 3 days before you’re ready to use, or freeze it up to 3 months.
Definitely! Add some everything bagel seasonings, dried onion, or herbs! Go crazy and do you.
Enjoy! As always, if you make this recipe or any of my others, I love to hear what you think! Leave a comment below, email me, or you can find me on Facebook, Instagram, and Pinterest!
If you want to see more, be sure to sign up for my 5 Easy Ways to Start Cooking From Scratch!
Soft Pretzels From Scratch
Ingredients
- 4 cups all purpose flour
- 1 1/2 cups warm water 90 – 100 degrees F
- 2 1/4 teaspoons instant yeast
- 1 tablespoon white sugar
- 1 tablespoon butter melted
- 1 1/4 teaspoon granulated salt adjusted for butter
- 1 egg whisked
- coarse pretzel salt or coarse kosher salt
Baking Soda Bath
- 10 cups water
- 2/3 cup baking soda
Instructions
- In the bowl of a stand mixer with dough hook attachment. Add sugar and warm water, whisk to mix it all together and then sprinkle yeast on top. Let stand for 2-3 minutes until yeast is frothy.
- Add melted butter and salt and give a quick mix.
- Slowly add flour to bowl of stand mixer and mix until a dough starts to form. Slowly add the rest of the flour until the dough is no longer sticky and begins to pull away from the bowl and then when you give it a lil' poke it bounces back nicely.
- Add dough to a cleaned and lightly floured surface and knead for 3-5 minutes until the dough is soft and elastic.
- Gently cover with a linen towel. Meanwhile, prepare the baking soda bath by heating the water on high in a large pot with baking soda. Gently stir to combine baking soda and water. Bring to a boil as you shape the pretzels.
- Pre-heat oven to 450 degrees and line a large baking sheet (or 2 smaller) with parchment paper or silicone baking mats. If using parchment paper, gently grease or oil with a misto.
- Separate the dough into 8 equal pieces (about 4 oz) with a dough cutter or sharp knife.
- Roll each piece into a 20-24 inch long rope. Take each end of the rope, gather, twist, and then twist down to connect to rope to make a pretzel shape. Repeat for all dough pieces.
- With a flat slotted spatula gently lift pretzel doughs and add to baking soda bath, 2 at a time.
- Let boil for only 30 seconds (don't boil too long because it will affect the flavor) and then remove from pot with slotted spatula and add to baking sheets.
- Brush with egg wash and sprinkle with salt. Bake for 12-14 minutes until lightly browned. Remove from oven and cool on a cooling rack for 5 minutes before serving.
- Serve with your favorite condiment (or without) and enjoy!


I’m making them for a second time in 3 days great recipe and nice directions thank you
I love to hear it, Tina!! Thanks so much for sharing and taking the time to leave a review! ☺️
Love this easy pretzel 🥨 recipe!!
Love to hear it, Mel! Thank you!